[Companion App] for the mobile app name; replace them globally with the real names before publishing. All screen images are engineering renders from the device (generated from the actual firmware drawing code and fonts, not photos/screenshots); text and layout match the real device, but physical details such as the case and screen reflections are not shown.- First-time users should read Chapter 1 (Know Your Product) and Chapter 2 (Quick Start) first — you’ll be recording in 5 minutes.
- To dig into a feature, jump straight to its chapter; every screen page uses the same format: When / how to enter → Display → Buttons → Exit.
Contents
- ! Safety & Legal Notice
- 01 Know Your STINT GTM
- 02 Quick Start (5 min)
- 03 Power · Off · Charge · PC
- 04 The Watch Face
- 05 Main Menu
- 06 Racing (Core Feature)
- 07 GPS Auto Lap
- 08 Standing-Start Drag
- 09 View & Manage Records
- 10 Settings
- 11 App & Device Connection
- 12 FAQ & Tips
- 13 Appendix
Safety & Legal Notice
Read this chapter carefully before use. Using this product means you understand and agree to the following.
- Operating safety. Switching menus, confirming settings, checking data and similar actions should be done while the vehicle is stopped; do not operate the watch while moving, to avoid distraction. Start and end sessions before setting off and after coming to a stop.
- Nature of the data. The speed, lap times, acceleration and G-force recorded by this watch are for personal practice and reference only; derived from satellite positioning (GPS/GNSS) and built-in sensors, they are not officially certified timing or speed equipment, and must not be used as a basis for competition results, insurance claims, legal disputes or any other official purpose.
- Positioning accuracy. GPS/GNSS accuracy is affected by weather, terrain, buildings, tunnels and other conditions, so data may contain errors — especially in mountains, underground car parks and dense urban areas.
- Venues & legal compliance. When performing acceleration, lap-time or off-road tests, always obey local traffic laws and speed limits, and only on legal circuits, closed venues or private property. If speed or acceleration testing on public roads breaks traffic laws, the user bears full responsibility; the manufacturer accepts no legal liability.
- Off-road use. In Off-Road mode, ensure the safety of the vehicle, route and yourself, and wear appropriate protective gear. The watch’s attitude/tilt data is for reference only and is no guarantee of vehicle stability or safety.
- Charging & battery. Charge only with the original or specified charging clip/adapter; avoid charging in heat, humidity or near flammable materials; if unused for long periods, charge periodically to keep the battery healthy.
- General disclaimer. Damage or data anomalies caused by improper use, failing to follow this manual, unauthorized disassembly, or non-original accessories (such as unofficial RaceBox-compatible devices) are not covered by warranty.
Know Your STINT GTM
The STINT GTM is a GPS Racing Watch built for driving and track enthusiasts. It records your acceleration, lap times, mountain-road and off-road performance and saves each session’s track, speed and G-force (lateral / accel-brake) in full for later review on the watch, mobile app or computer. Day to day it is also an everyday watch with time, alarm, compass, barometer and heart rate.
The watch has a 240 × 240 full-color screen, four physical buttons and a backlight button that doubles as LAP during sessions.
| Button | General use |
|---|---|
| UP | Menu up, increase value, page |
| DOWN | Menu down, decrease value, page |
| OK | Enter, confirm, select |
| BACK | Back, cancel |
| Backlight | A short press turns the backlight on (it goes off after the AUTO OFF time); a long press keeps it on for the LONG PRESS time (default 3 min), and a short press during that time turns it off at once (see 10.2). On session screens it also acts as the LAP button (DAILY DRIVE and TOUGE don’t record laps); the backlight still toggles on or off when you press it |
Button basics: most actions are a short press (press and release). A few need a long press; how long depends on the function (e.g. backlight ~1 s, ending a session ~2 s, power off ~5 s), and this manual clearly notes it.
Sessions can use three positioning sources, freely switchable in Settings:
| Source | Characteristics | Best for |
|---|---|---|
| RaceBox Mini (external) | High-precision GPS over Bluetooth, the highest update rate, with a built-in G-force sensor (measured) | Users who want the most complete data (splits, G-force) |
| Built-in GPS | Built into the watch, no accessory, ready at power-on. Lower update rate; in MAX mode the watch derives G-force from GPS (see below) | When you want to travel light |
| Qstarz logger (external) | A Qstarz GPS logger over Bluetooth (BL-1000GT / 818GT), no pairing — select it and it connects (moderate update rate, no G-force shown on the watch) | Users who already own a Qstarz device and want to keep using it |
| Source | G-force | Notes |
|---|---|---|
| RaceBox Mini | Measured | Measured directly by the device’s built-in accelerometer, all three axes, highest accuracy. |
| Built-in GPS (MAX) | GPS-derived | The watch derives lateral and longitudinal G-force from changes in GPS speed and heading; it is shown live and stored in the record. Vertical G cannot be derived (fixed at 0). Low speeds are skipped automatically because accuracy is insufficient: below 2 km/h neither axis is counted, and between 2–10 km/h only the longitudinal axis (accel/brake) is. |
| Built-in GPS (ECO) | None | Power-saving mode logs only 1 sample per second — too sparse to derive reliably, so it is not offered. |
| Qstarz | Not on the watch | Qstarz devices do have a sensor, but their mounting orientation is unverified, so the watch does not use it; the mobile app derives G-force from the track itself. |
Quick Start (5 min)
Just got your watch? Follow these steps to make your first recording.
- Charge & power on Clip the supplied charging clip onto the watch body and charge it fully (while charging, the watch is in charging mode and cannot be operated). After you unplug the charger it powers on automatically, briefly showing the boot screen before the watch face.
- Set time & basics (face → OK →
SETUP→System Settings)
• Time: go to Time → Set Time and choose GPS SYNC, then go to an open outdoor area and wait for a fix — the time sets automatically. With no GPS signal you can also use MANUAL SET (see 10.2).
• Language: English / Traditional Chinese / Simplified Chinese.
• Units: metric or imperial for everyday display. (Racing speed units are set separately in Racing settings.) - Choose a GPS source (
SETUP→SET GPS)
Start simplest: choose INTERNAL GPS — no pairing needed. - Record your first session (face → OK →
RACING)
The watch searches for a fix → choose DAILY DRIVE → when the GPS dot turns green press OK to start → to finish hold BACK ~2 s; the screen showsSaving...and the session is saved. - Review it Back at the watch face, press DOWN for the Racing overview — top speed, distance and more. For per-session detail go to face OK →
RECORDS.
Done! The following chapters explain each screen one by one.
Power · Off · Charge · PC


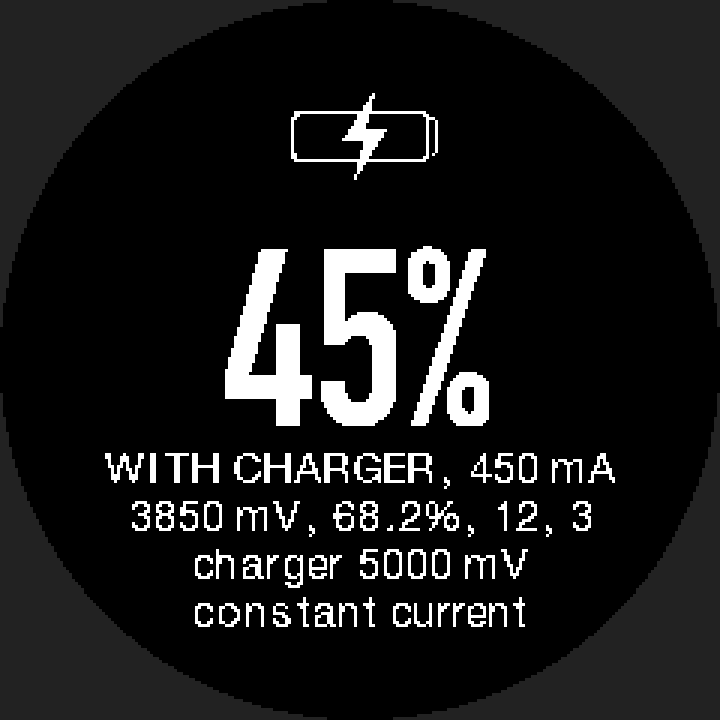
RACELOG folder to copy your session logs (see Chapter 11).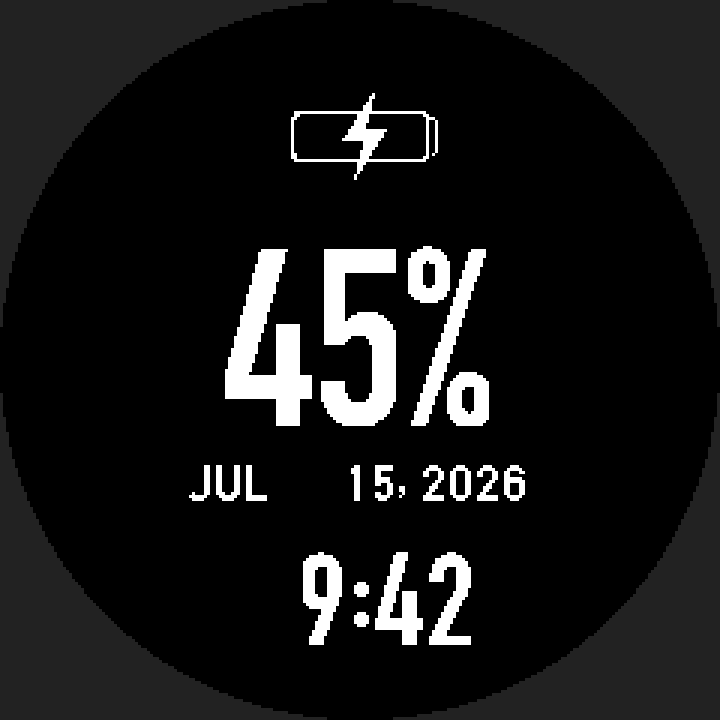
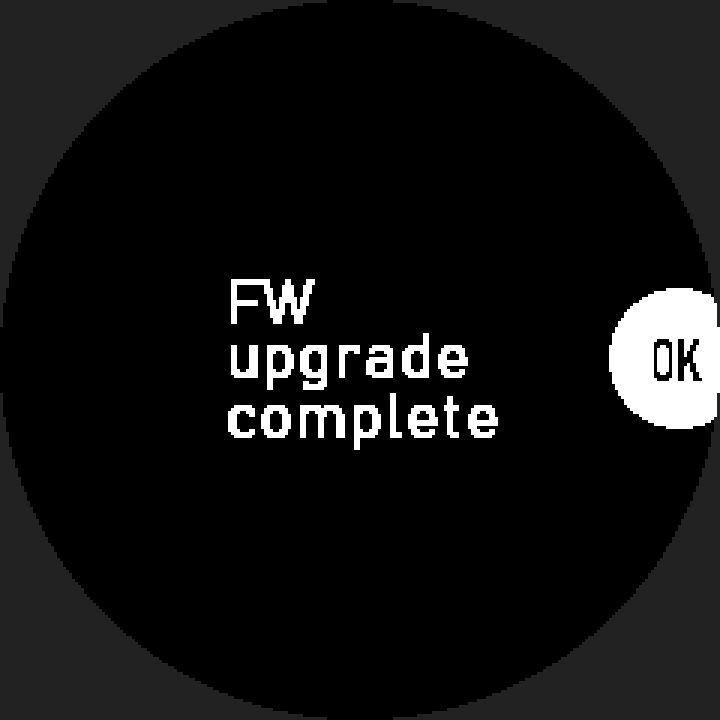
FW upgrading / Do NOT turn off watch appears (buttons locked — do not operate or cut power). The watch then reboots on its own and writes the new firmware, showing progress as a percentage; when done it shows FW upgrade complete (no boot screen this time).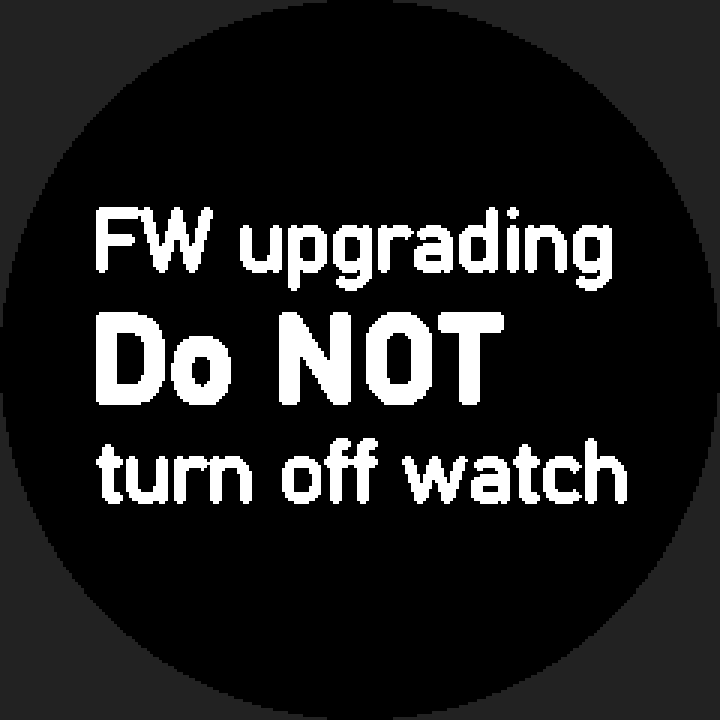
The Watch Face
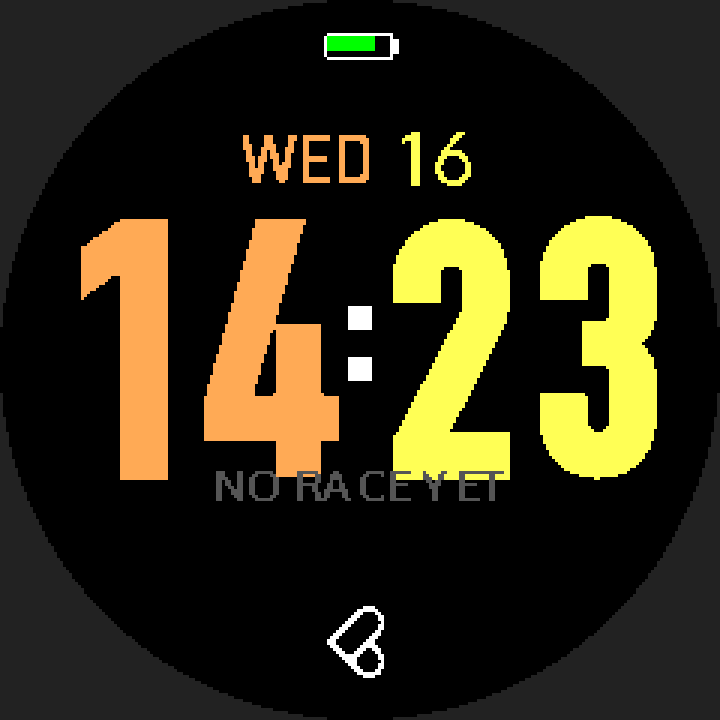
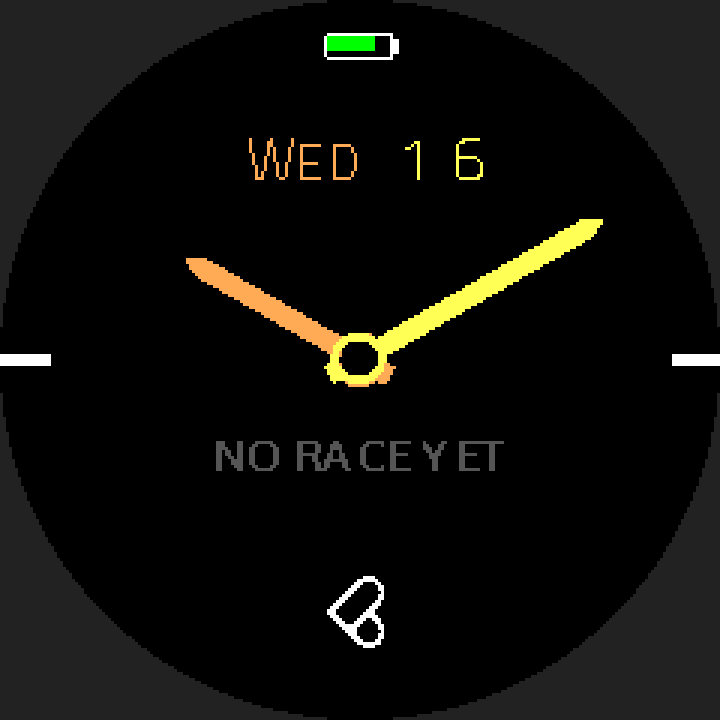
The watch has several switchable faces (see 10.2 System Settings to switch). Whichever you choose, the buttons work the same; which information appears depends on the face (see 4.4). This chapter covers the common operations and uses the classic faces as the example in 4.1.
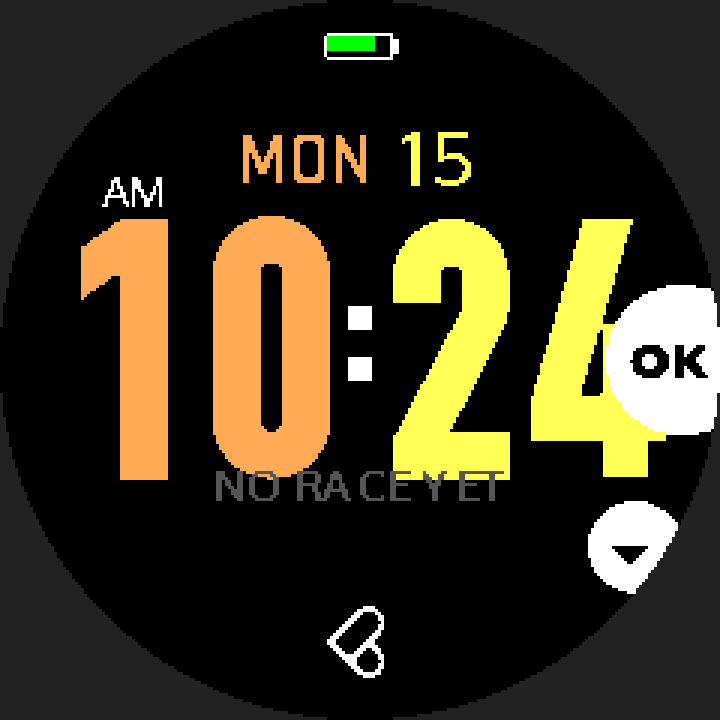
- Battery gauge (top)
- Weekday & date
- Time (in 12-hour mode Classic Digital shows AM/PM; switchable to 24-hour in Settings)
- Racing signature line: a snapshot of your sessions — with no records it shows
NO RACE YET; with records it showsSPD(top speed) andSESS(sessions). It always covers only the newest 10 records in RECORDS (TILT records among them are not counted as sessions), so the session count is 10 at most; speed followsSETUP → RACING → SPEED UNITand no unit is shown on screen. - App connection icon: while the mobile app is connected, a white Bluetooth symbol appears to the right of the battery gauge (see 11.4).
| Button | Short press | Long press |
|---|---|---|
| OK | Enter the main menu | — |
| UP | Enter FreeTilt (TILT); keep pressing up to cycle info pages (see 4.3) | — |
| DOWN | Enter the Racing overview | — |
| BACK | Refresh Bluetooth connection | Power off (hold for about 5 s; it does not power off while the charger is connected) |
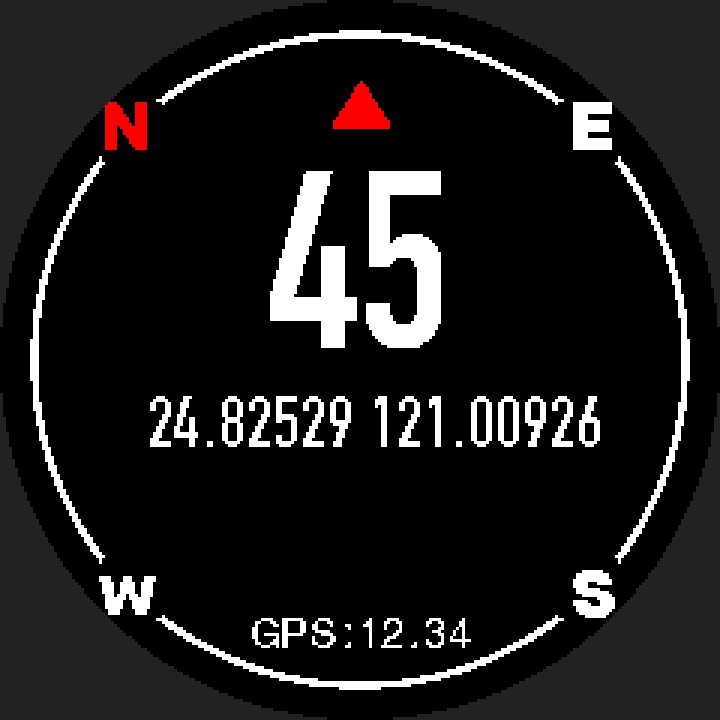
Face → TILT (FreeTilt) → Compass → (HR monitor*) → Barometer → HR info → back to face
- On each page: UP forward, DOWN back, BACK to the face. Two exceptions: BACK on the compass returns to TILT first (press BACK again for the face); with the HR monitor enabled, DOWN on the barometer goes straight back to the compass.
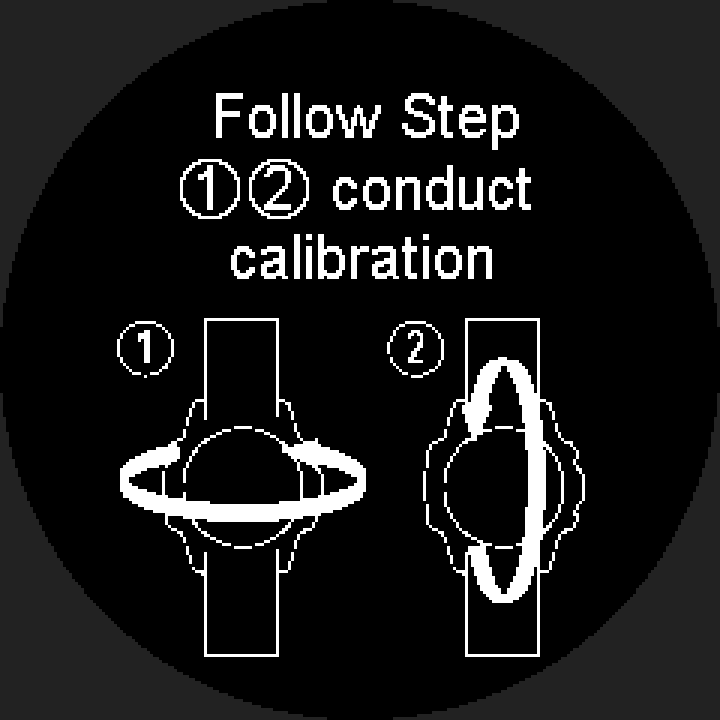
- Compass: when calibration is needed it opens the calibration screen automatically; just rotate the watch as prompted.
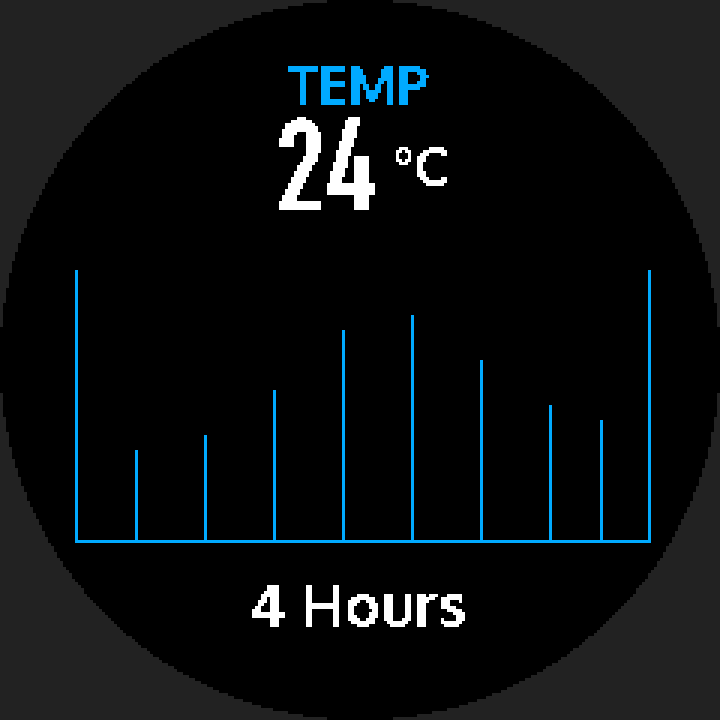
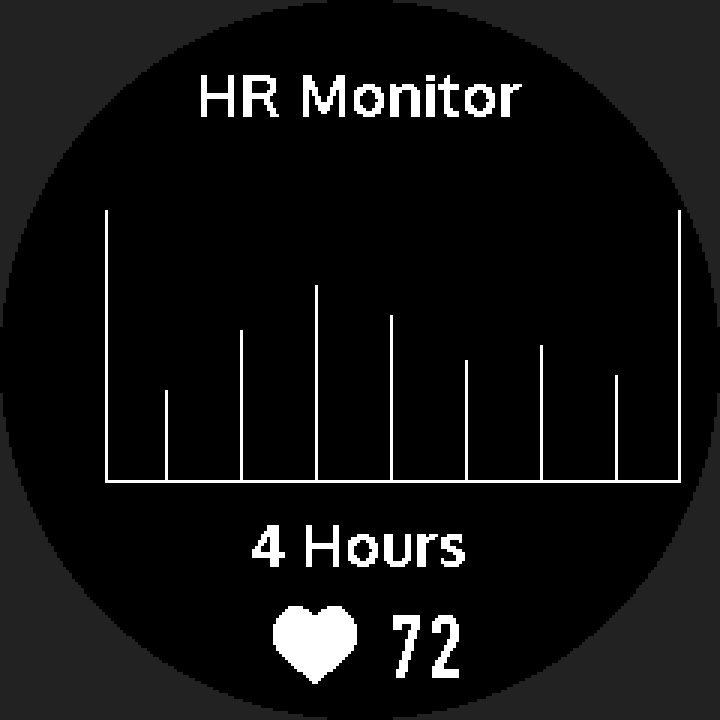
Heart-rate monitor (*): appears only after System Settings → Heart Rate → HR Monitoring is enabled; shows a 4-hour heart-rate bar chart and live heart rate, returning to the face after ~60 s of inactivity.
The watch ships with 8 watch faces in three groups: 2 Classic (the previous look), 4 Achievement (your cumulative results shown right on the face, see 4.6) and 2 Minimal (time and battery only). In the settings preview, achievement faces are labelled with the name shown in brackets (see “How to switch” below).
| Face | Group | What it shows |
|---|---|---|
| Classic Digital | Classic | Large time (12/24-hour), weekday and date, battery gauge, and the Racing signature line (see 4.1). |
| Classic Analog | Classic | Traditional dial with hour and minute hands, plus weekday, date, battery gauge and the Racing signature line (see 4.1). |
| Triple Stack (OVERVIEW) Default | Achievement | Time, date and battery stay primary; below them lifetime distance, drives and today’s top speed sit side by side — the one to pick when you want everything at a glance. The default face on a new watch and after a factory reset (a watch upgraded from firmware without achievement faces keeps its classic face). |
| Odometer (ODOMETER) | Achievement | Shows lifetime distance in an automotive odometer style, with drives and today’s top speed in small type below. |
| Racing Analog (RACE DIAL) | Achievement | Analog dial with a band at the bottom showing lifetime distance, drives and today’s top speed (hour and minute hands in white and yellow). |
| Milestone (MILESTONE) | Achievement | Shows your current distance, the next milestone target and a progress bar (see 4.6). |
| Pure Analog | Minimal | Dial markers, hands and battery only — no date, weekday or achievement data. |
| Pure Digital | Minimal | Large HH:MM and battery only; 12/24-hour follows your setting. |
How to switch: main menu → SETUP → System Settings → Watch face (see 10.2). Inside, UP/DOWN steps through the previews (the preview is the real appearance; before you have any achievement data, an achievement face’s preview shows its name in the centre, e.g. OVERVIEW, instead of READY TO RACE), OK saves and applies, BACK discards. The list does not wrap — pressing UP on the first face or DOWN on the last will not jump to the other end.
FreeTilt is a GPS-free quick tilt tool: clamp the watch to a roll cage or dashboard at any angle, zero it once, and from then on you can see how far the vehicle is tilted relative to level — useful for levelling when parked and for judging slopes. Unlike ordinary inclinometers, you do not have to align the mount (Mount & Go).
- Entering: press UP from the watch face; FreeTilt is the first stop in the carousel (see 4.3).
- First use: the screen shows
PARK LEVEL / PRESS OK TO ZERO— park on level ground and press OK to zero (it showsHOLD STILLwhile collecting, so stay still; if it cannot stay still for about 3 seconds in a row within about 10 seconds — for example because the vehicle rocks or the engine vibrates — it showsNOT LEVEL / RETRY; press any button to clear it, then press OK to try again). - After zeroing: the artificial horizon shows roll (R) and pitch (P) live, with the age of the reference below (e.g.
ZERO 5m). The reference is kept, so you only need to re-zero when you change mounts or the way it is fixed — when not recording, hold BACK for 1 second (the hintBACK 1S: ZEROis shown at the bottom). Let go once the second has passed: holding for about 5 seconds powers the watch off. - Recording: press OK to start (a red dot appears, 25 Hz sampling); press OK again to stop and save (it shows
SAVEDand the sample count). The recording appears in RECORDS marked TILT. It stops and saves automatically below about 3.5 V or after 2 hours. After you press OK it may showSTARTINGfor a few seconds; buttons are ignored during that time and for about 1 second after recording starts, so a double press can’t stop it straight away. With records full or not enough space it showsSTORAGE FULL / DELETE OLD LOGSand won’t start (delete a few old records, see 9.3). If the battery is already below about 3.5 V, pressing OK showsLOW BATTERY / CHARGE TO REC— charge it first. When recording stops because of low battery,LOW BATTappears underSAVED. - Other messages:
SAVE FAILED= that recording was not saved; the watch stays on this page so you can see it — check free space and battery, then record again (see Chapter 12).STORAGE ERROR= a read/write error (not a full memory, so deleting records won’t fix it).NO IMU= no attitude data for about 3 seconds; the horizon returns once the data comes back.STORAGE FULL,STORAGE ERROR,LOW BATTERYandNOT LEVELclear with any button (that press does not trigger the button’s normal action);SAVEDandSAVE FAILEDdisappear after about 2 seconds. - Leaving: UP goes to the compass, DOWN/BACK returns to the face; leaving while recording saves first.
- Afterwards: recordings can sync to the mobile app, which can overlay the attitude onto your driving video (see 11.14).
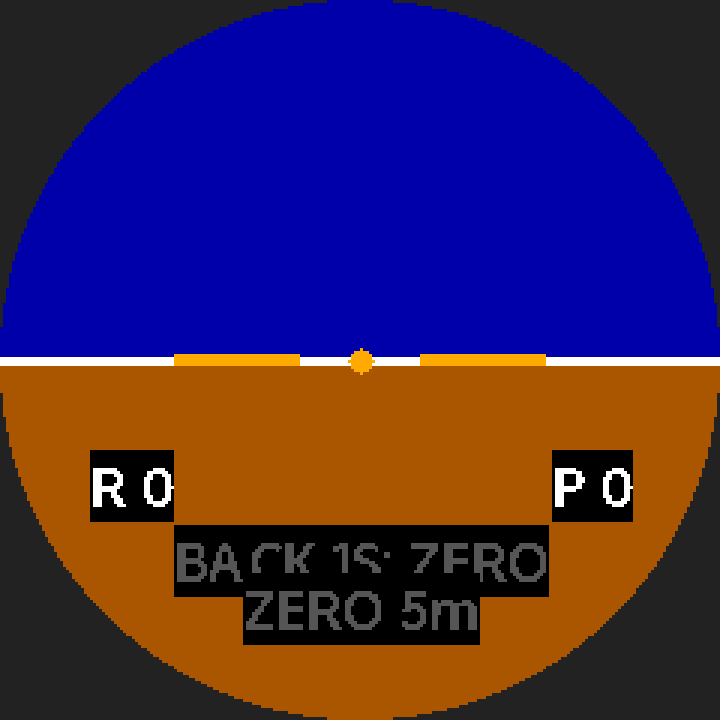
ZERO 5m) and then the BACK 1S: ZERO hint. New screenshot to come.Achievement faces (see 4.4) show two lifetime figures — lifetime distance and drives — plus today’s top speed. The lifetime figures are not limited to the last 10 sessions — deleting one record or all records in RECORDS keeps the totals (for the clearing options in SETUP, see 10.6).
| Item | Meaning |
|---|---|
| Lifetime distance (TOTAL KM / MI) | The sum of the distance of every session record, accumulated from when you started using this feature. |
| Drives (DRIVES) | How many times you have pressed OK: START and completed a drive. One drive counts once — even if a very long recording is split automatically into several records (see 6.5), it still counts as 1. |
| Today’s top speed (TODAY MAX) | The highest speed reached today, based on the watch’s local date; it resets automatically at midnight. |
- Distance units follow
SETUP → RACING → SPEED UNIT(km/h shows KM, mph shows MI) and do not follow the metric/imperial system setting. - Large numbers are abbreviated: below 10,000 the full number is shown; from 10,000 it uses
Kand from 1,000,000 it usesM, with one decimal place (truncated, and a trailing .0 is dropped: 12,000 shows12K, 12,345 shows12.3K). The Odometer face’s digit boxes show all 6 digits up to 999,999. - With no records yet, achievement faces show
READY TO RACEand0 KM | 0 DRIVESrather than a meaningless 0 as the headline figure. - When it counts: a drive must have at least one segment saved successfully to be added. If you pressed start but it failed or lost power before the first segment was saved, it does not count.
The Milestone face shows how far you are from your next target. The steps are:
100 → 250 → 500 → 1,000 → 2,500 → 5,000 → 10,000 → every 5,000 after that
After you cross a milestone, the next time you return to that face (for example from the main menu or the info pages) it shows a MILESTONE! congratulation once, then switches to the progress toward the next target. Switching between KM and MI does not trigger a false congratulation.
Main Menu
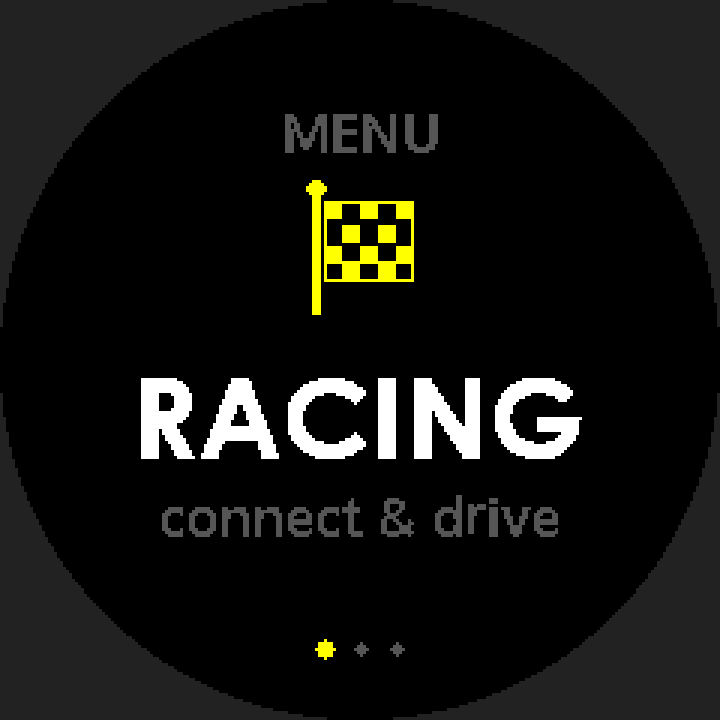
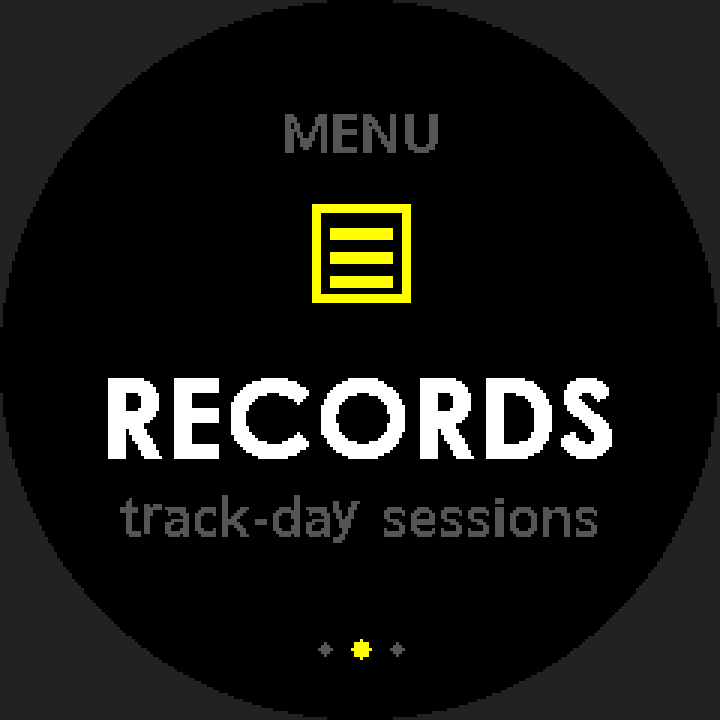
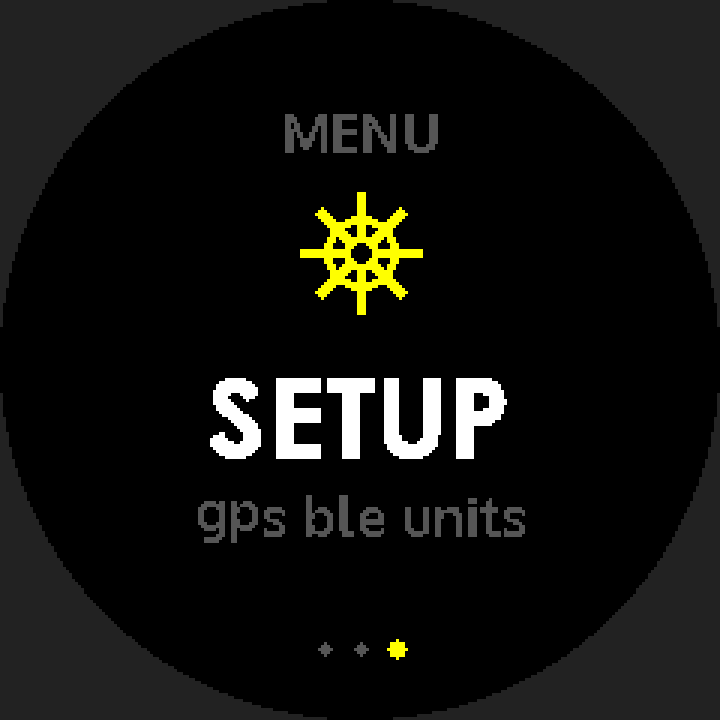
Press OK at the watch face to open the main menu. It has 3 items and shows one at a time; UP/DOWN cycle, OK enters, BACK returns to the face (the dots at the bottom show which item you are on).
| Item | Description | Go to |
|---|---|---|
| RACING | Start a session (connect and go) | Chapter 6 |
| RECORDS | Browse per-session detail | Chapter 9 |
| SETUP | GPS, Bluetooth, units and more | Chapter 10 |
Racing (Core Feature)
This is the heart of the watch. A complete Racing flow is:
Menu RACING → connect / find sats → pick mode → (DRAG: pick method / LAP TIMER: pick lap mode) → standby → start recording (Live)
This section clears up the logic and terms most often misunderstood. Two minutes here saves a lot of trouble.
- DAILY DRIVE: records continuously from start to manual save, with no splits or laps — just distance, average speed and top speed.
- DRAG: measures acceleration, in three methods (below) that you choose.
- LAP TIMER: circuit lap times — counted by button press with BUTTON (above), or automatically from a start/finish line with GPS AUTO (see Chapter 7).
- TOUGE: free mountain-road runs, no laps — records total distance, average and top speed, peak G-force and elevation gain; for continuous driving rather than lap comparison.
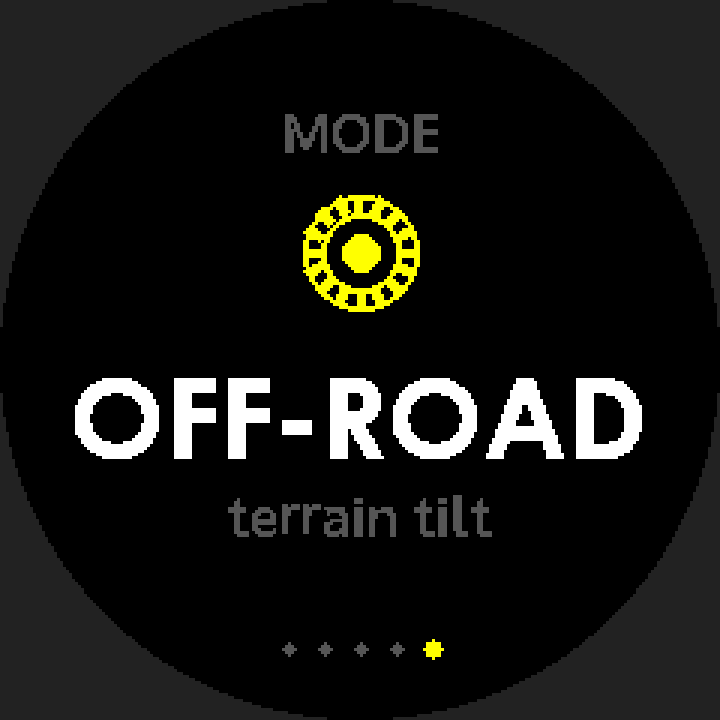
- OFF-ROAD: measures vehicle attitude (roll and pitch), not speed or acceleration. Needs MOUNT=VEHICLE Tilt first needs MOUNT set to VEHICLE with the watch fixed to the vehicle. The Live artificial horizon always uses the watch’s own IMU, so it works with all three sources, but it needs a moment standing still to capture its reference (see 6.6). Tilt on the detail page afterward also needs a source that records true three-axis acceleration: built-in GPS records the watch’s IMU and a RaceBox its own IMU, but Qstarz records no acceleration, so Qstarz sessions have no tilt in the detail. When the conditions aren’t met, the detail’s attitude page shows
NO TILT / NEEDS VEHICLE MOUNT(see 6.6).
- STANDING: launch from a complete stop, measuring split acceleration times (e.g. 0–100 km/h).
- QUARTER MILE: elapsed time and trap speed over a fixed 1/4-mile distance.
- ROLLING: starts while already moving; press OK for a 3-2-1 countdown, timing begins at “GO.” Lifting off ends the run automatically (detected when speed drops from its peak for about half a second) — no manual stop needed.
In the detail page, green (best) marks the shortest of all completed laps in that session; orange (slowest) marks the longest — not the first or last lap. The GPS AUTO warm-up and an unfinished final part-lap at save time are left out, and laps flagged for problems such as lost GPS are never picked as best.
Actual density = min(your set sample rate, the source’s real update rate). Built-in GPS and Qstarz have a far lower ceiling than an external RaceBox, so raising the sample rate does not truly refine the data — this isn’t a failed setting or a fault.
Switching source in SET GPS (between RACEBOX / INTERNAL GPS / QSTARZ) saves immediately, but takes effect only the next time you enter Racing; the current session keeps the source locked in at its start, and changing it in the app mid-session has no effect.
When a session fills up (depending on the actual sample rate: about 45 minutes at 25 Hz, 1.9 hours at 10 Hz, 3.75 hours at 5 Hz), the watch saves automatically and carries on in a new session: Saving... shows briefly with one long beep, and the timer and distance reset while the lap count carries on. Nothing else tells you a new session has begun; if a recording seems shorter than expected, this is why. MAX REC (see 6.4, Step 5) counts the whole run: even though the on-screen timer resets after a split, the automatic end still goes by the total time. Because MAX REC is at most 4 hours, at an actual sample rate of 2 Hz or less (including DAILY DRIVE, fixed at 1 Hz) a session never fills before it ends, so it is never split.
Most screens follow RACING → SPEED UNIT (km/h ↔ mph), but these stay fixed in km/h and do not convert: speed on the LAP TIMER detail page, and the QUARTER MILE split thresholds (0–60 / 0–100 / 0–160 km/h; the 0-100 KM/H on the DRAG dial layout too). STANDING, by contrast, switches to mph thresholds with the unit (see 6.6).
- RaceBox Mini: no pairing — switch it on nearby, set the source to RACEBOX, and it connects automatically when you enter Racing (next section); most complete data.
- Built-in GPS: no pairing, ready to use.
- Qstarz logger: no pairing — switch the Qstarz device (BL-1000GT / 818GT) on nearby, set the source to QSTARZ, and it connects automatically when you enter Racing.
The RaceBox Mini does not need pairing — when the watch enters Racing it searches for a nearby RaceBox and connects to whatever it finds.
- Switch on the RaceBox Mini and put it in the vehicle (make sure it is charged).
- Set the watch’s GPS source to RACEBOX (see 10.1).
- Enter Racing; the watch shows
Connect to GPS Devices...and connects automatically, then goes straight to the mode list.
| Mode | Purpose |
|---|---|
| DAILY DRIVE | Everyday driving log, lightweight throughout |
| DRAG | Straight-line acceleration (0–100, 100–200, 1/4 mile, etc., by method; pick a method after selecting) |
| LAP TIMER | Circuit lap times, recording each lap (pick lap mode BUTTON / GPS AUTO after selecting) |
| TOUGE | Free mountain-road runs |
| OFF-ROAD | Off-road, records body tilt (shown in detail afterward) |
From the main menu choose RACING; the watch prepares according to your GPS source:
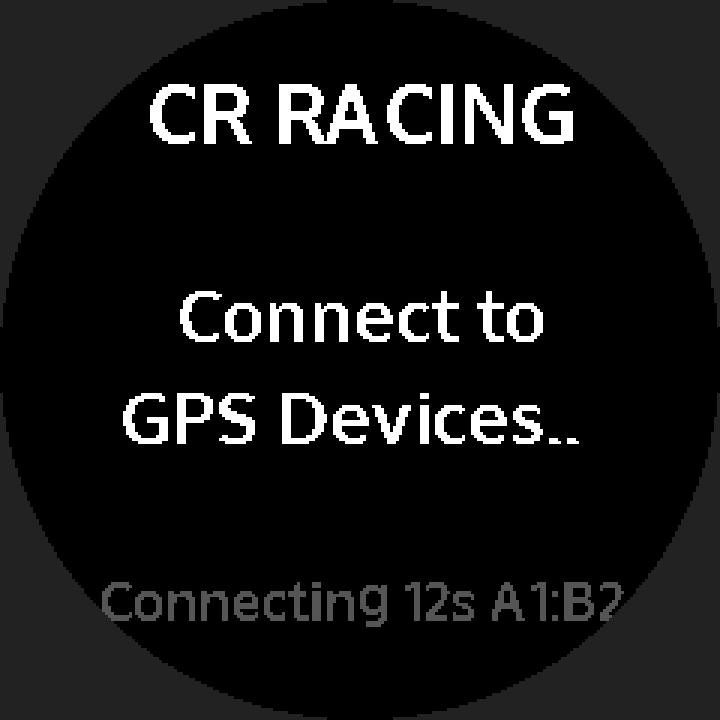
- RaceBox / Qstarz: shows
Connect to GPS Devices...and the current connection stage with elapsed seconds (e.g.Scanning 12s); once connected it opens the mode list automatically. - Built-in GPS: shows
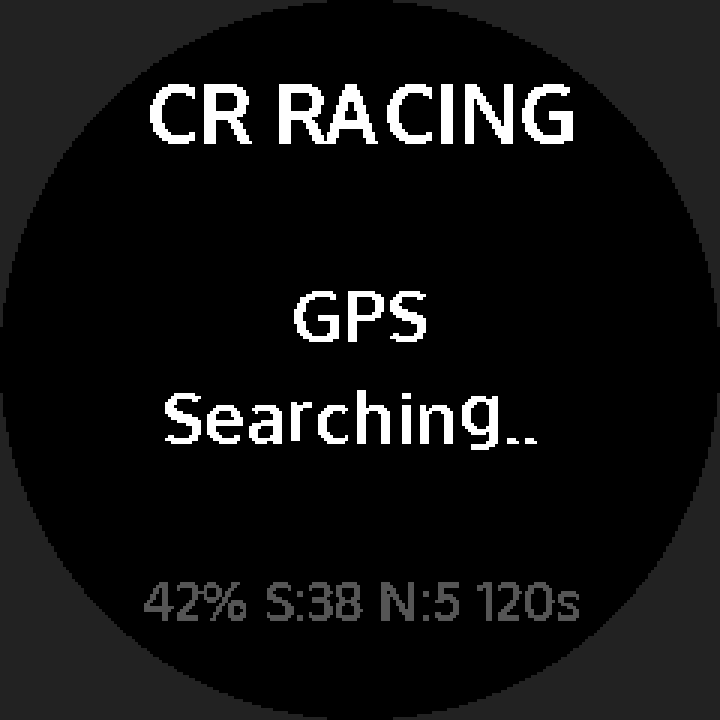
GPS Searching...and fix progress (percent, signal, satellite count); once a fix is obtained it opens the mode list automatically. - Pressing BACK here returns to the main menu (and drops the connection).
- If no signal is found: after about 5 minutes (external sources — RaceBox / Qstarz) or 20 minutes (built-in GPS) it reports not found and returns to the watch face.
In the mode list use UP/DOWN to choose and OK to select. If you pick DRAG, next choose a method (see 6.6); if you pick LAP TIMER, next choose the lap mode, BUTTON (manual) or GPS AUTO (automatic, see Chapter 7). BACK drops the connection and returns to the main menu. If the mode list or the DRAG method screen sits for 5 minutes with no button pressed, the watch returns to the face.
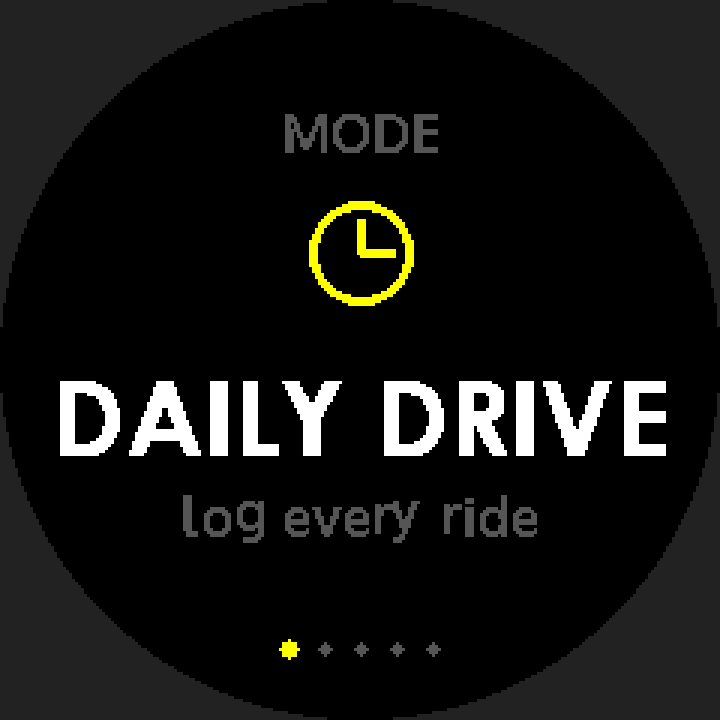
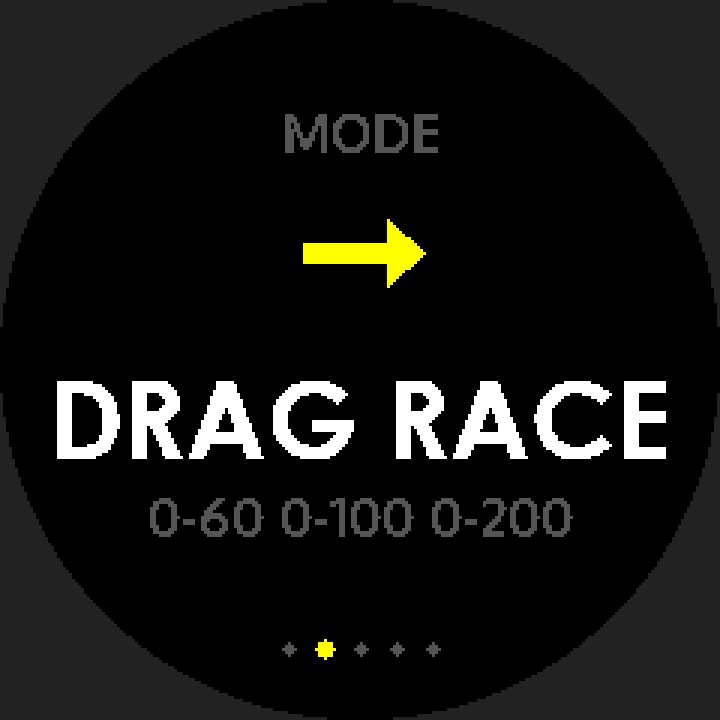
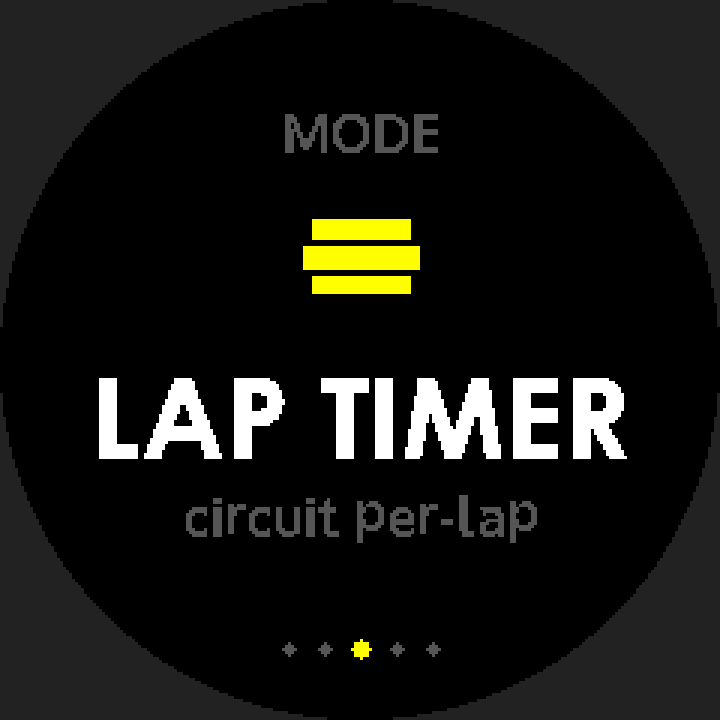
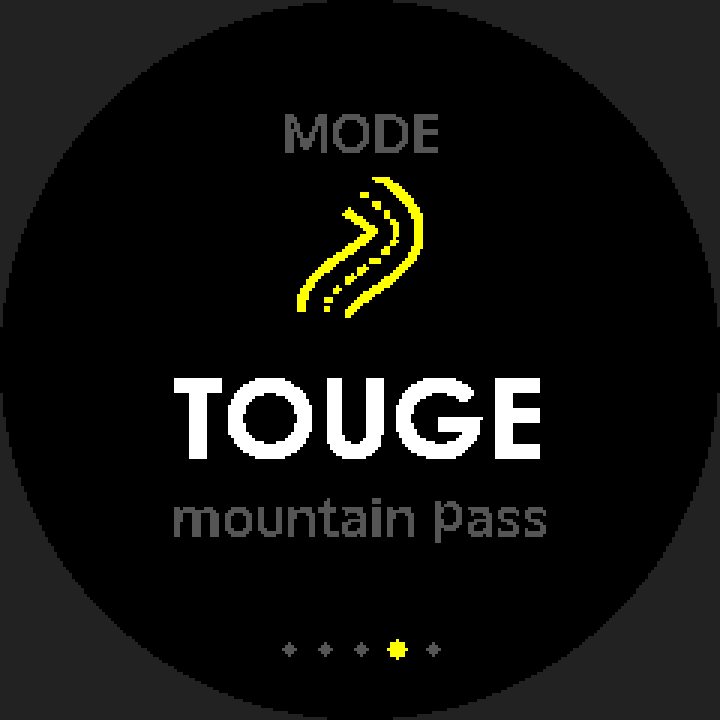
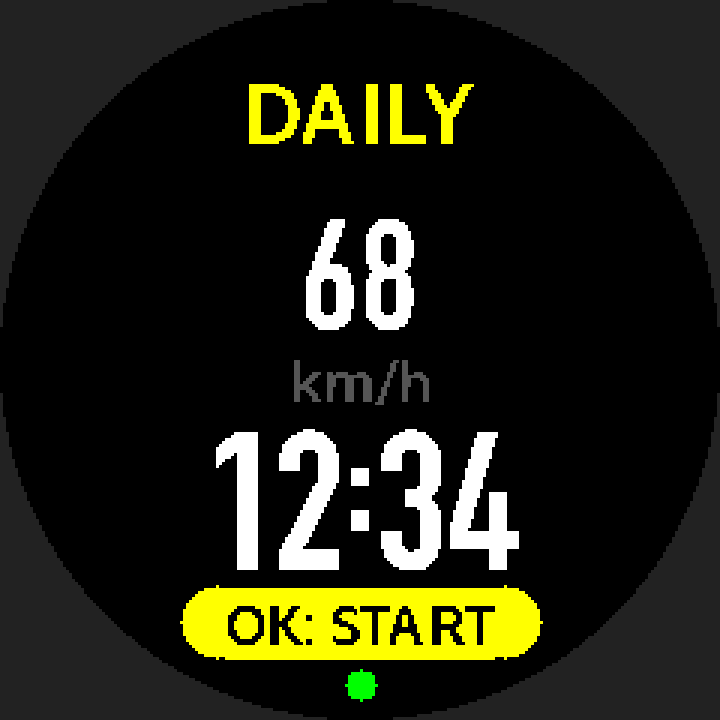
The standby screen shows the mode name (abbreviated, e.g. DAILY; LAP TIMER appears as CIRCUIT; DRAG also shows the method), a speed preview, the mount (WRIST / VEHICLE), the current time and a GPS status dot (green = fix / yellow = external device connected but no fix yet / gray = source not ready).
- OK: when the GPS source is ready (dot green or yellow), start recording and enter the Live dashboard; with a gray dot, OK does nothing. With an external device you can also start on a yellow dot, but there is no fix yet — better to wait for green.
- BACK: go back a step to change mode (stays connected).
- RaceBox battery (RaceBox source only, at the left of the speed-unit line): shows the remaining charge as e.g.
RB 51%, colored by level (red below 10%, orange below 20%, yellow below 50%, green otherwise). When the RaceBox is plugged in it switches toRB CHG— the moment charging starts the RaceBox’s reported level jumps around (51%→43%→51% in testing), so the watch deliberately shows the charging state rather than that phantom drop. - Pressed OK and nothing started? Below about 3.5 V the watch shows red
LOW BATTERY/CHARGE TO REC— charge it first. With 300 records stored or not enough space it showsSTORAGE FULL/DELETE OLD LOGS(delete a few old records, see 9.3); a read/write error showsSTORAGE ERROR. Any button clears the message, and that press does not start recording. - If the standby screen sits for 20 minutes with no recording started and no button pressed, the watch returns to the face (and an external GPS is disconnected); if the GPS source has dropped out (gray dot), it returns after about 5 minutes without a button press.

WRIST / VEHICLE on the speed-unit line (plus the battery at the left with a RaceBox). New screenshot to come.VEHICLE in yellow (WRIST in gray when set to WRIST), and pressing OK first brings up a mount confirmation page (below) — check that the watch is fixed to the vehicle (face up is best) and press OK again to actually start. With WRIST (the default) it starts straight away.SECURE WATCH / TO VEHICLE prompts, the confirmation page carries a live status line telling you how the tilt reference is coming along:•
GPS NOT READY (red) — the GPS source isn’t ready yet.•
HOLD STILL... (orange) — it is collecting stationary samples; keep the vehicle still.•
READY (green) — the reference is captured; you can go.Only built-in GPS with MOUNT=VEHICLE has to wait for this; RaceBox, Qstarz and wrist mode report ready immediately. Pressing OK once it reads
READY gives the most accurate tilt; if the vehicle moves again after that, the status drops back to HOLD STILL... and collection restarts. You can still press OK early once GPS is ready — the tilt reference for that session then has to be captured after the start instead (see 6.6).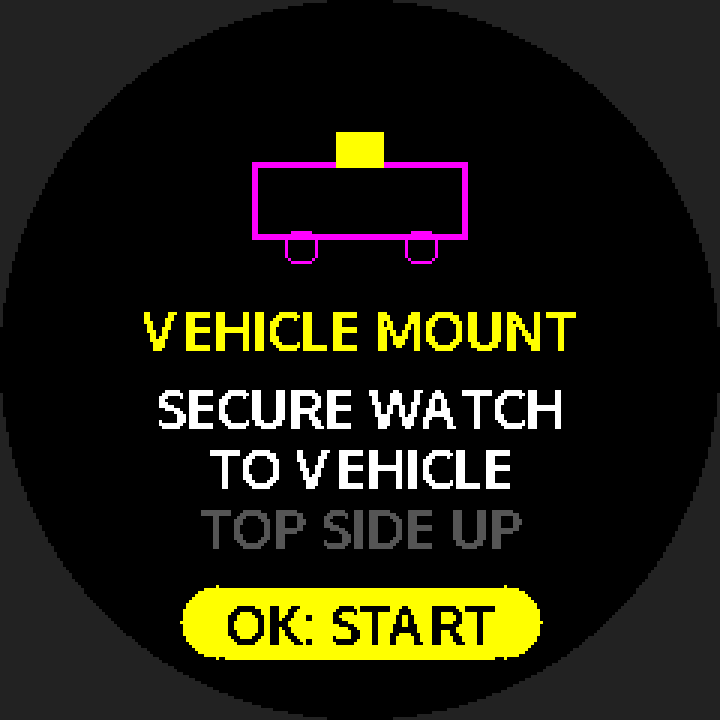
Go! The Live dashboard shows your performance in real time (next section).
Hold BACK ~2 s; the screen shows Saving... → saved → back to standby, ready to record another session.
The watch can also end and save a session by itself: it shows Saving..., then green SAVED with a yellow reason line, and after about 3 seconds (or any button) returns to standby.
| Yellow reason | When it happens |
|---|---|
TIME LIMIT | Recording time reached the MAX REC setting (default 1 hour; 30 min / 2 h / 4 h available, see 10.3) |
NO MOVEMENT | With a fix, the watch stayed within about 30 m for 20 minutes in a row |
LOW BATT | Battery below about 3.5 V (it has to persist for about 10–15 s) |
SETUP → RACING first.When a session file fills up, the watch splits it automatically (see 6.0): Saving... shows briefly (about 2–6 s) and recording carries on. If 300 records are already stored or space runs out at that point, no new part is started — the part just saved is kept, and the watch returns to standby showing STORAGE FULL.
The real-time screen while recording, showing the most relevant info per mode. Common elements:
- Large speed (center): shows
--without a fix. - GPS status dot (bottom-left): green/yellow/gray shows fix state.
- Red record dot (bottom-right): recording in progress.
- Live G-force (some modes): the figure at the left of the TOUGE and ROLLING screens is lateral (cornering) G — orange = to the right, cyan = to the left, gray within 0.1 G; it does not indicate acceleration or braking (on the LAP large-speed layout it is white, positive = right). RaceBox is measured; built-in GPS (MAX) is derived; ECO mode shows no value; a Qstarz source supplies no G-force, so the TOUGE screen always reads
0.0and other screens show none (see 1.2). The RaceBox battery is shown on the standby screen (see 6.4, Step 3). - If the connection drops, the screen shows
Connection lostin red; the RaceBox retries automatically in the background.
| Button | Action |
|---|---|
| OK / LAP button | Mark a lap (LAP TIMER with BUTTON, QUARTER MILE, OFF-ROAD; in QUARTER MILE it also resets the screen to STAGED); in ROLLING, OK starts the countdown; no effect in DAILY DRIVE and TOUGE |
| OK (STANDING) | Arm; press again while armed = disarm; on the result screen = dismiss the result (see Chapter 8) |
| OK / LAP button (GPS AUTO) | OK has no effect; LAP sets the start/finish line while none is set, then adds a lap manually (see Chapter 7) |
| BACK short press | During a ROLLING sprint = abort the run; in STANDING, while armed = disarm, mid-sprint = keep the run as INCOMPLETE (see 8.3), on the result screen = dismiss the result; otherwise no effect |
| BACK hold 2 s | Save and end the session, return to standby |
| UP / DOWN | In OFF-ROAD with MOUNT=VEHICLE, switch between the artificial horizon and the layout chosen in SCREEN LAYOUT; otherwise no effect |
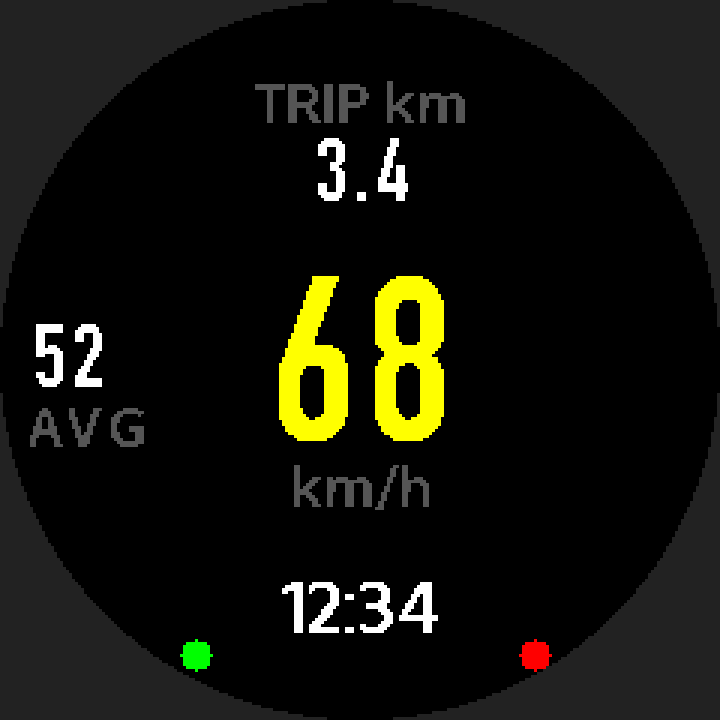
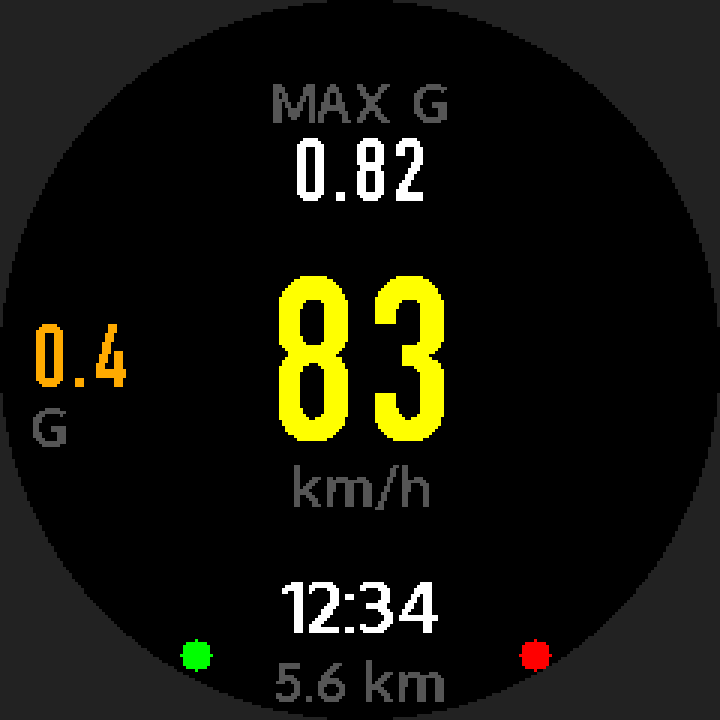
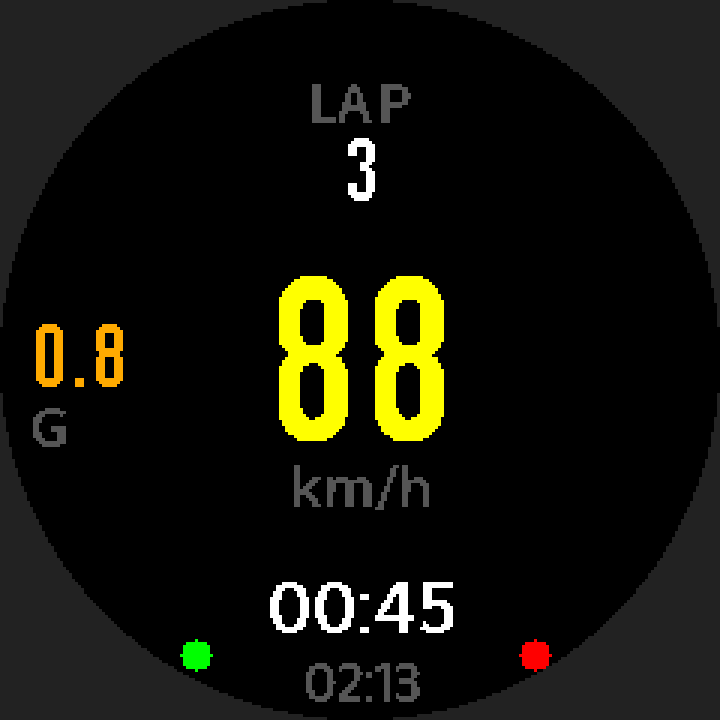
Saving... shows briefly with one long beep. This is normal protection (see 6.0).Every mode’s Live screen offers three layouts (A/B/C) — the data in the record is the same, only the presentation changes. Set it per mode in SETUP → RACING → page 3, SCREEN LAYOUT (see 10.3); it applies from the next session. Exceptions: in DRAG only QUARTER MILE uses A/B/C (STANDING has its own screen, ROLLING uses the generic screen), and LAP TIMER with GPS AUTO always uses the generic screen.
| Mode | A (default) | B | C |
|---|---|---|---|
| DAILY | Dashboard | Trip stats (2×2 cells) | Route breadcrumbs |
| DRAG | Dashboard | Christmas tree | Analog dial (0–100 time) |
| LAP | Large speed | Lap list | Circuit trace |
| TOUGE | Dashboard | G-G friction circle | Elevation profile |
| OFF-ROAD | Attitude display (pitch/roll; readings with a RaceBox source only) | Large compass | Tool grid (several values side by side) |
Pressing OK in the SCREEN LAYOUT list opens a live preview that draws the layout with sample data, so you can confirm before applying.
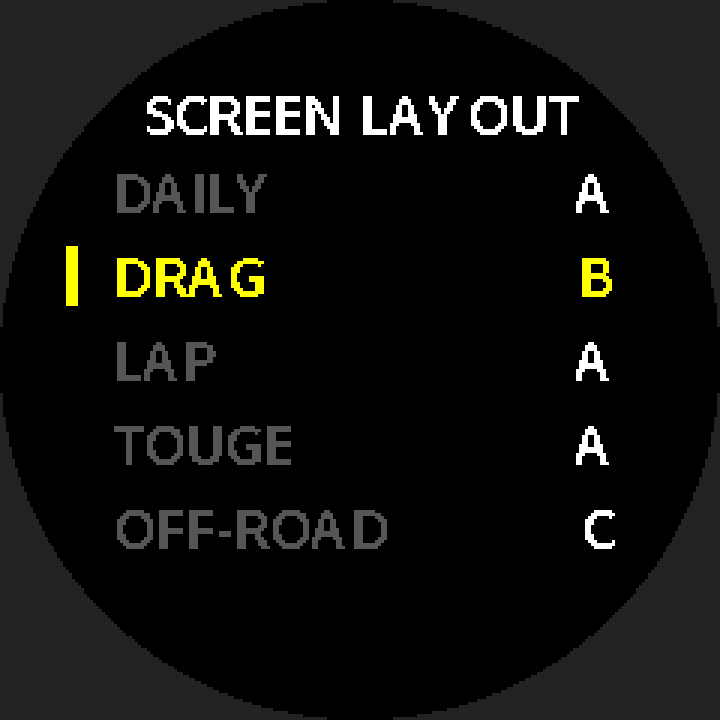
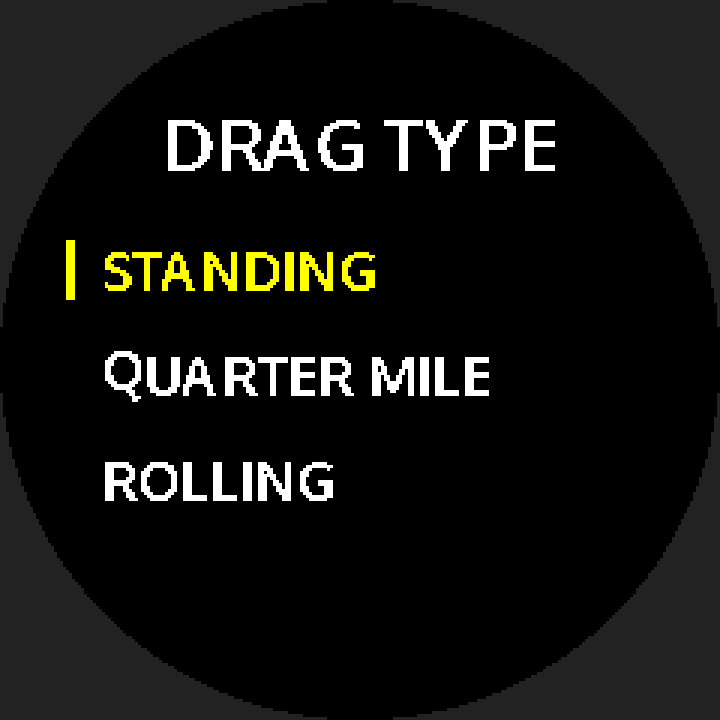
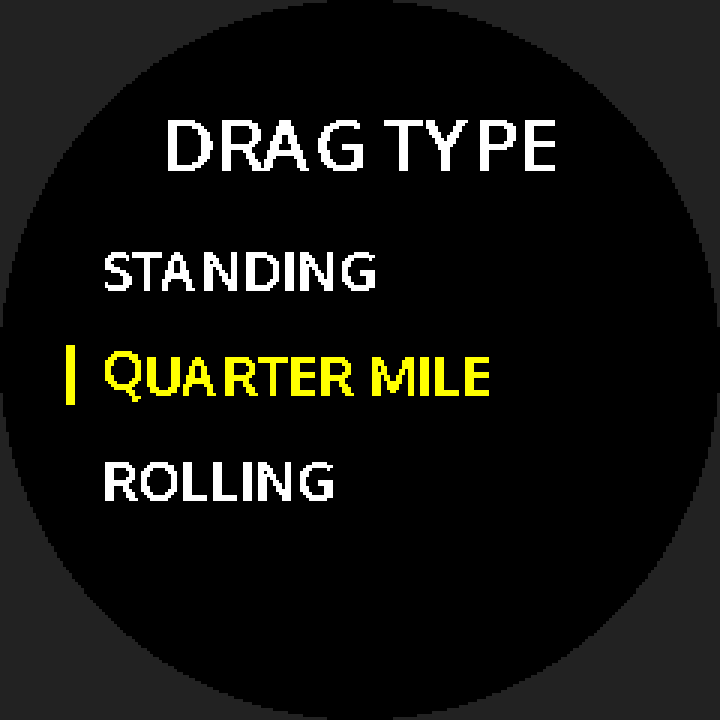
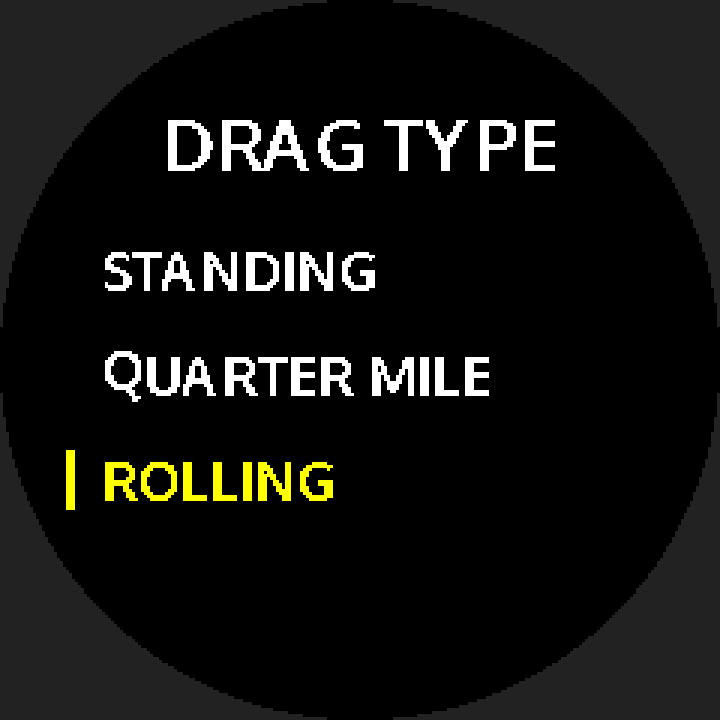
After choosing DRAG, pick a method (your last choice is remembered):
| Method | Measures |
|---|---|
| STANDING | Split acceleration from a standstill (0–100, 100–200, and 200 to the run’s top speed, km/h; with the speed unit set to mph: 0–60, 60–120, and 120 to top speed); full steps in Chapter 8, Standing-Start Drag |
| QUARTER MILE | 1/4 mile: 0–60, 0–100, 0–160 (always km/h), plus 1/4-mile time and trap speed |
| ROLLING | Rolling acceleration: press OK for a 3-2-1 countdown → GO → lift off to finish automatically |
- LAP TIMER (circuit): with BUTTON, mark each lap on the Live screen with OK/LAP button; the detail page lists best lap, per-lap times and gaps. To count laps automatically, choose GPS AUTO when entering LAP TIMER (see Chapter 7, GPS Auto Lap).
- TOUGE (mountain): free-run recording; detail gives distance, average and top speed, elevation profile and total climb.
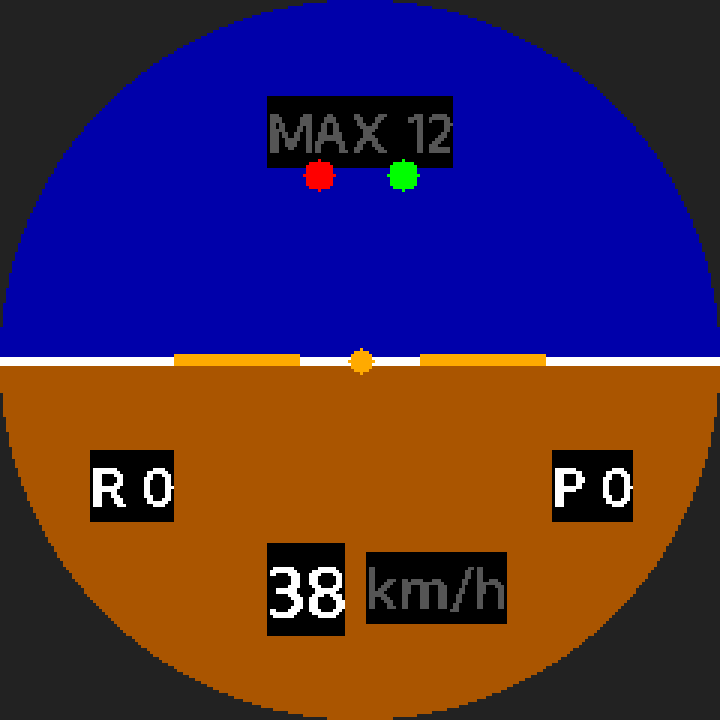
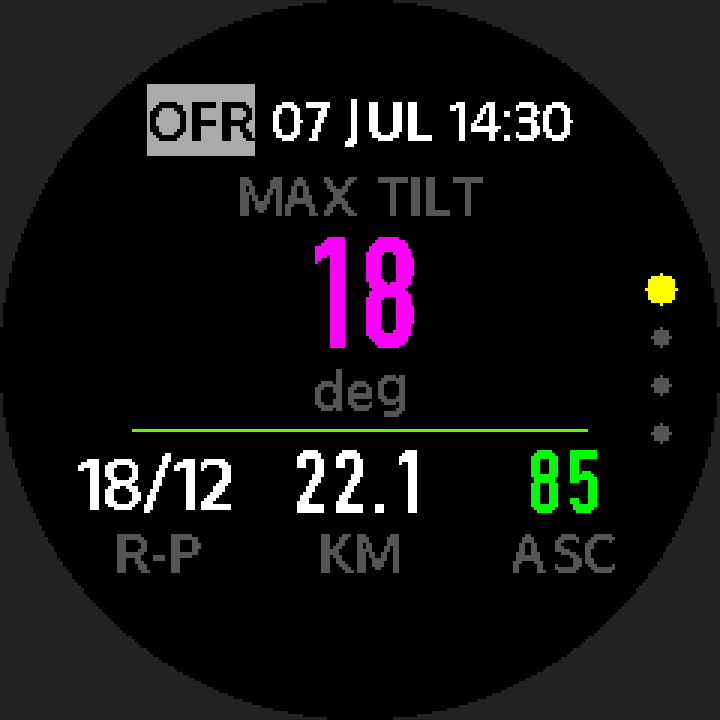
- OFF-ROAD: records vehicle attitude. With MOUNT set to VEHICLE, Live first shows the artificial-horizon layout (press UP/DOWN to switch to the layout chosen in SCREEN LAYOUT) — sky/ground fill and a white horizon line follow roll and pitch live, along with R/P readouts, the session’s maximum tilt (MAX), speed and the recording/GPS status dots. The reference (0°) is taken from the attitude at the start of the session and is calibrated automatically, with nothing for you to do: just stay still for a moment while the screen shows
LEVELING;STOP TO LEVELmeans you are still moving and no reference has been taken yet. On the detail page, P1 shows the session’s maximum tilt as one large total-tilt figure, and P2 is a total-tilt gauge — an outer reference circle with a single needle rotated out from the starting reference; the angle between the two lines is the maximum tilt. The gauge’s left and right do not indicate direction: the left/right and fore/aft split is not implemented yet, so the R-P field reads--. The horizon always uses the watch’s own IMU, so it works with all three sources; tilt on the detail page needs MOUNT=VEHICLE plus a source that records true three-axis acceleration (built-in GPS records the watch’s IMU, a RaceBox its own, and Qstarz none — see 6.0); without both, the detail showsNO TILT / NEEDS VEHICLE MOUNT. - DAILY DRIVE: lightweight recording throughout; Live shows distance, average speed and total time.
Complete your first DRAG run
- Set units:
SETUP → RACING → SPEED UNIT, pick KM/H or MPH. - Choose source: confirm the GPS source (
SETUP → SET GPS); RaceBox is recommended for complete data. - Start: face OK → RACING, go outdoors and wait for a fix.
- Pick mode: choose DRAG → OK, then a method (STANDING for the first time).
- Standby: wait for the GPS dot to turn green, press OK to start.
- Accelerate: on a safe, legal straight, go full throttle; the watch captures each split automatically.
- Finish: hold BACK 2 s to save.
- View results: face OK → RECORDS, pick the session, page through for best times and the acceleration curve.
Racing mode records your speed and route, so the watch must first “find satellites” and get a fix. On entry the screen shows search progress — percent complete, signal strength, satellites found and elapsed seconds. The moment a fix is obtained, the watch automatically goes to mode selection.
The watch remembers its last fix, so the more recently you used it, the faster next time. Just remember two numbers: 5 minutes and 4 hours:
| Since last use | Typical wait | Why |
|---|---|---|
| Within 5 min | Almost none | GPS still active, satellites tracked continuously |
| 5 min – 4 hr | A few seconds | GPS asleep but remembers satellite positions; re-fixes quickly on wake |
| Over 4 hr, or just powered on | Longer, possibly tens of seconds | Stored satellite data has expired and must be re-downloaded |
Watch stuck searching? First check whether you’re indoors or obstructed — moving to open sky usually fixes it.
(With an external device, the second line shows RaceBox or Qstarz instead of GPS.)
So you don’t wait repeatedly between sessions, GPS keeps running for 5 minutes after you leave racing mode. Re-enter within that window and the next session starts with almost no wait. After 5 minutes idle, GPS shuts off to save power.
- Back-to-back sessions: leave for under 5 minutes and re-entry needs almost no wait.
- Done for the day: just leave it — GPS turns itself off and won’t quietly drain the battery.
With an external device (RaceBox / Qstarz) you wait for a Bluetooth connection rather than a satellite search: the watch looks for a nearby RaceBox and, once connected, goes to mode selection. If none is found within 5 minutes it reports no device and returns to the face. (No pairing is needed — just switch the RaceBox on nearby.) The GPS source is switched in SETUP → SET GPS, where you can also set built-in GPS precision.
- Before you set off, enter racing mode once outdoors for a first fix — the rest of the day will be fast.
- For back-to-back sessions, try to stay away no more than 5 minutes — with the built-in GPS, the watch keeps the GPS running for 5 minutes after you leave Racing, so re-entering within that window needs almost no wait; after that it shuts down and the next entry needs a new fix.
- Never getting a fix: move to open sky; no fix indoors is normal.
Key events during a session are announced with a tone and vibration, so you don’t have to watch the screen:
| Event | Alert |
|---|---|
| GPS source ready (connected / fix obtained) | Two short beeps + short buzz |
| ROLLING arm / countdown / GO / finish | Two short beeps + short buzz (each stage) |
| Lap marked (OK / LAP button) | Two short beeps + short buzz |
| Saved successfully | One long beep + short buzz |
| Save failed | Two long beeps + long buzz |
| Long recording split automatically | One long beep (soft notice) |
Automatic end (TIME LIMIT / NO MOVEMENT) | One long beep + short buzz |
Automatic end (LOW BATT) | Two long beeps + long buzz |
| 200-lap limit reached | One long beep + long buzz; marking a lap after that: two long beeps + short buzz |
| STANDING: OK pressed to arm (accepted or refused) | One short beep + short buzz |
| STANDING result ready | Two short beeps + short buzz |
| GPS AUTO: lap counted automatically | Two short beeps + short buzz |
GPS AUTO: CHECK LAP shown (see Chapter 7) | One long beep + two buzzes |
| GPS source lost / restored in Racing (with built-in GPS: fix lost / regained; also on standby and the mode list) | Lost: two long beeps + long buzz; restored: two short beeps + short buzz |
| Mobile app connected / disconnected | Connected: one long beep + short buzz; disconnected: two long beeps (on any screen) |
Tone and vibration can be switched separately: ALERT TONE / ALERT VIB under SETUP → RACING (both on by default, see 10.3). The two switches govern the events in the table above, including the app connection alerts, except the four STANDING and GPS AUTO rows, which still beep and buzz with the switches off.
GPS Auto Lap
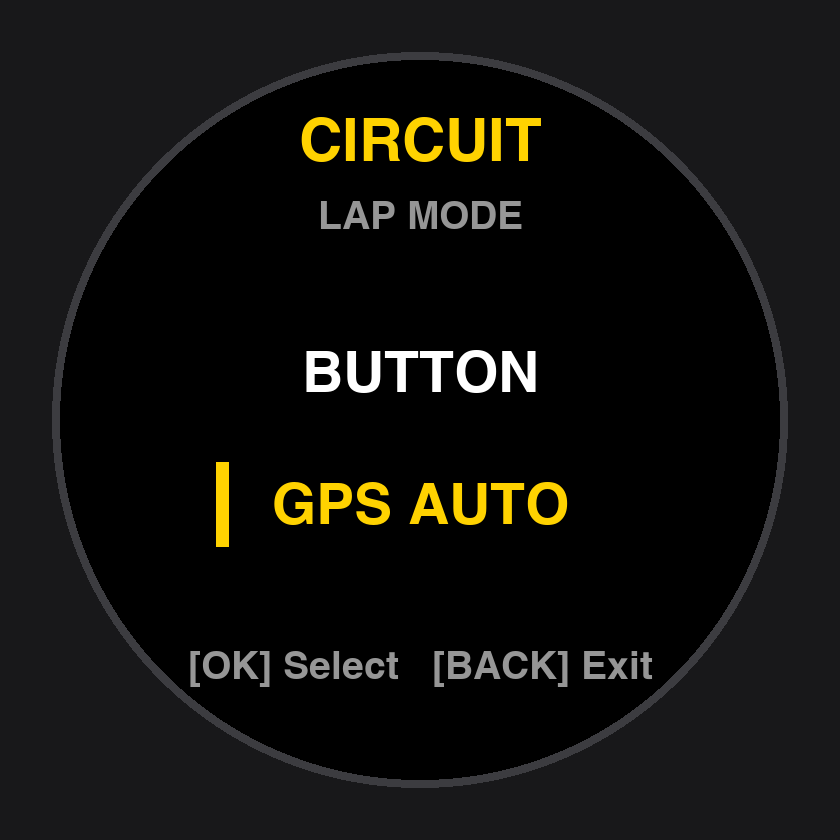
In circuit mode (CIRCUIT) the watch can count laps for you. Set the start/finish line once at the start, and every time you cross it the watch logs the lap number and lap time automatically — no more looking down to press a button.
To enter: Menu → CIRCUIT → choose GPS AUTO.
To keep traditional button lapping, choose BUTTON — it works exactly as before.
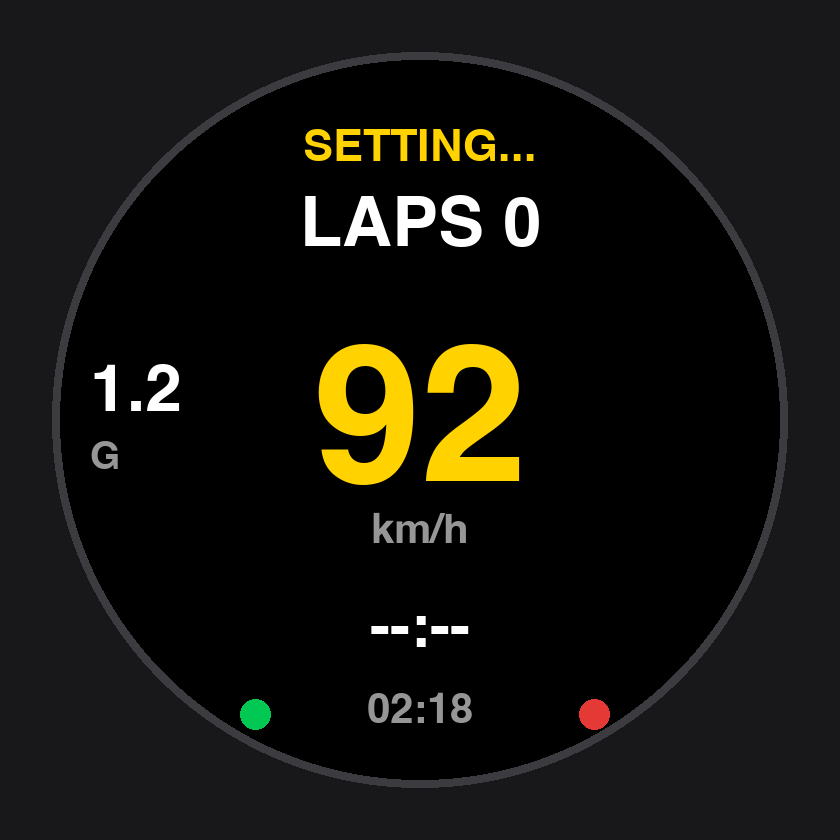
After recording starts the screen shows SET START LINE. There are two ways to set the line:
Method 1 · On the move (recommended)
Method 2 · At a standstill
As you ride/drive across the spot, press the LAP button once. The screen briefly shows SETTING... and it’s done.
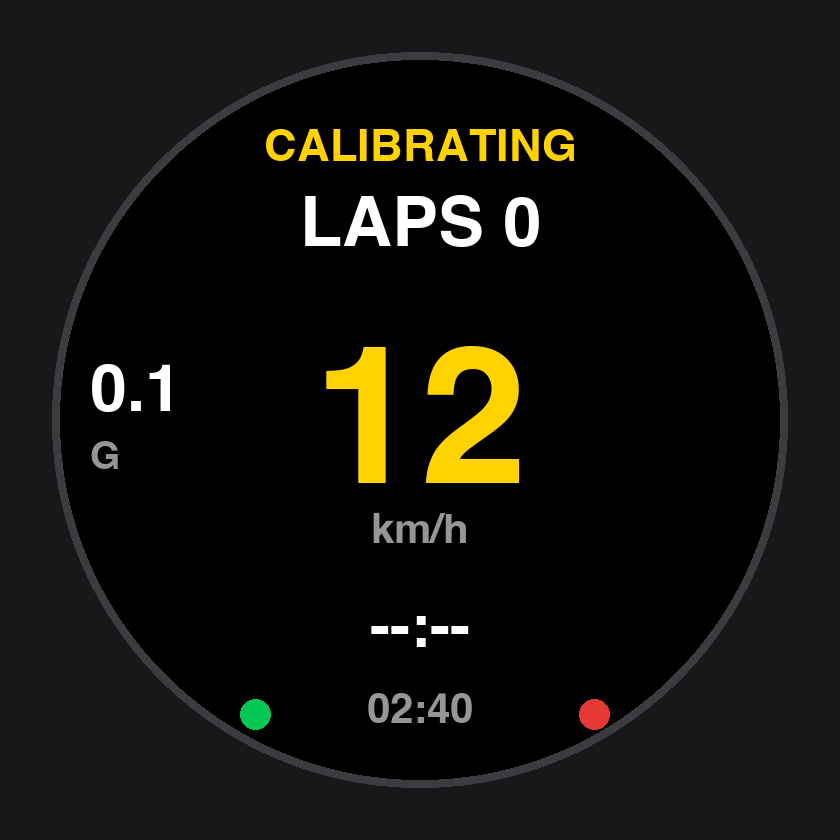
Stop on the start/finish spot and press the LAP button once; the screen shows CALIBRATING. Calibration completes once you set off. Note: lap 1 is timed from the moment you press LAP, so time spent waiting on the line is included in lap 1 — press it when you are ready to go.
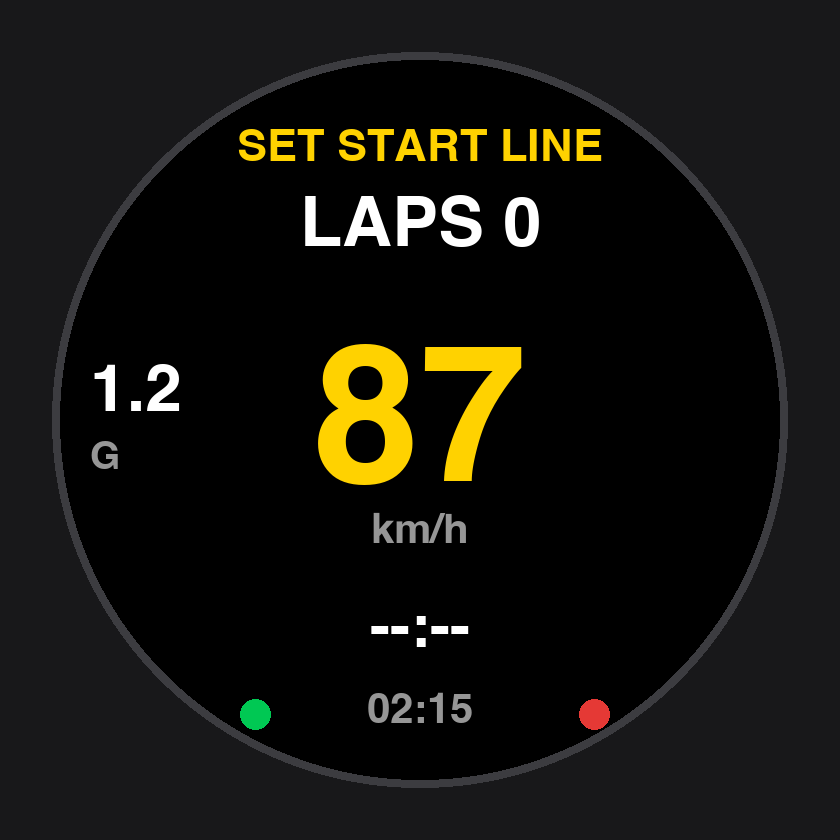
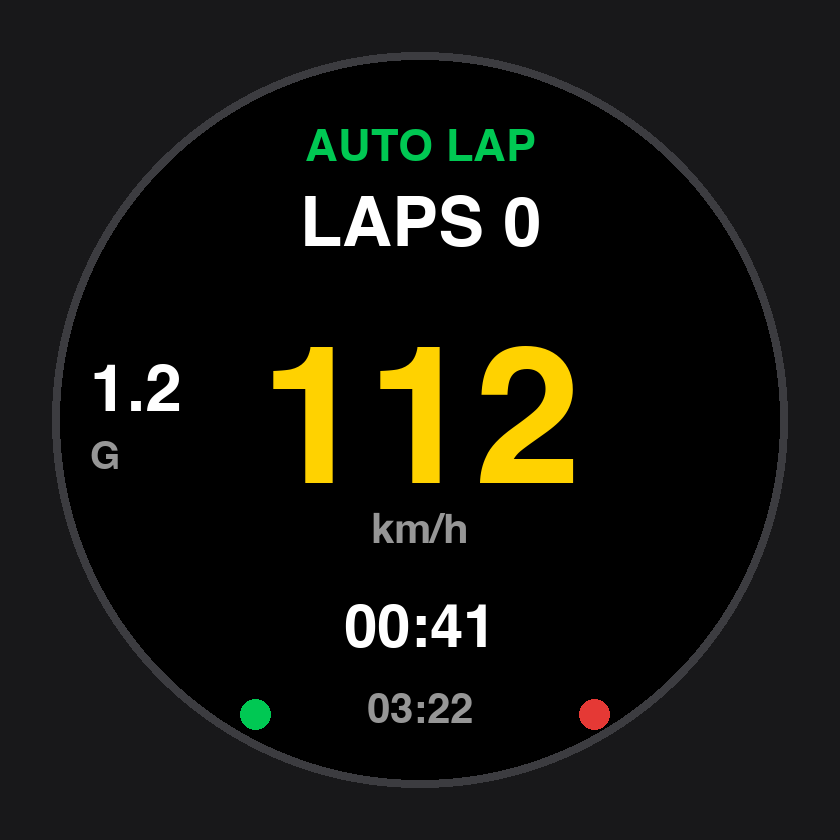
AUTO LAP and the large figure changes from WARM UP to the lap you are currently on (1 for the first lap), meaning auto lap is armed.SETTING... or CALIBRATING, don’t press LAP again: doing so resets the start/finish line to where you are at that moment, with no separate notice. Wait until AUTO LAP appears.LAP MARKED and CHECK LAP are yellow), the large figure shows WARM UP or the current lap number (not LAPS 0), crossing notices such as LAP N appear at the bottom of the screen, and the estimate symbol is ~. New screenshots to come.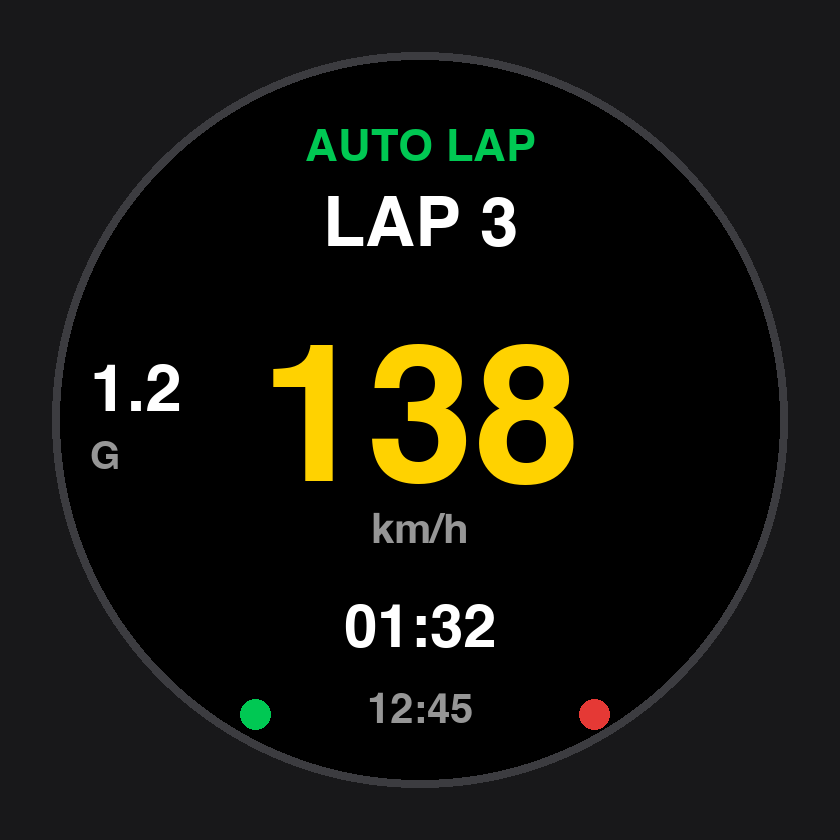
- Each time you cross the line from the correct direction, a lap completes automatically: the watch beeps and vibrates and shows the lap number and lap time.
- The line is directional: crossing it the wrong way or passing on a parallel road won’t trigger a false lap.
- Crossings below about 5 km/h (near walking pace) don’t trigger a lap, avoiding false counts from GPS drift while stopped. There is no alert for such a crossing, and the laps either side merge into one long lap — press LAP as you cross if you need it counted.
- For a short time after a lap, it won’t count again — fine even on small karting circuits.
If a lap isn’t detected automatically (e.g. a brief GPS dip), press the LAP button as you cross to mark it manually; the screen shows LAP MARKED.
- If the watch detects that same crossing within about 2 seconds of your press (about 3 seconds with built-in GPS · ECO), it uses the GPS crossing time instead — no double count. After that window, the lap is recorded at the moment you pressed.
- Don’t press LAP after the watch has already counted the lap: about 2 seconds later (about 3 s in ECO) an extra, very short lap is added, and that lap becomes the best lap.
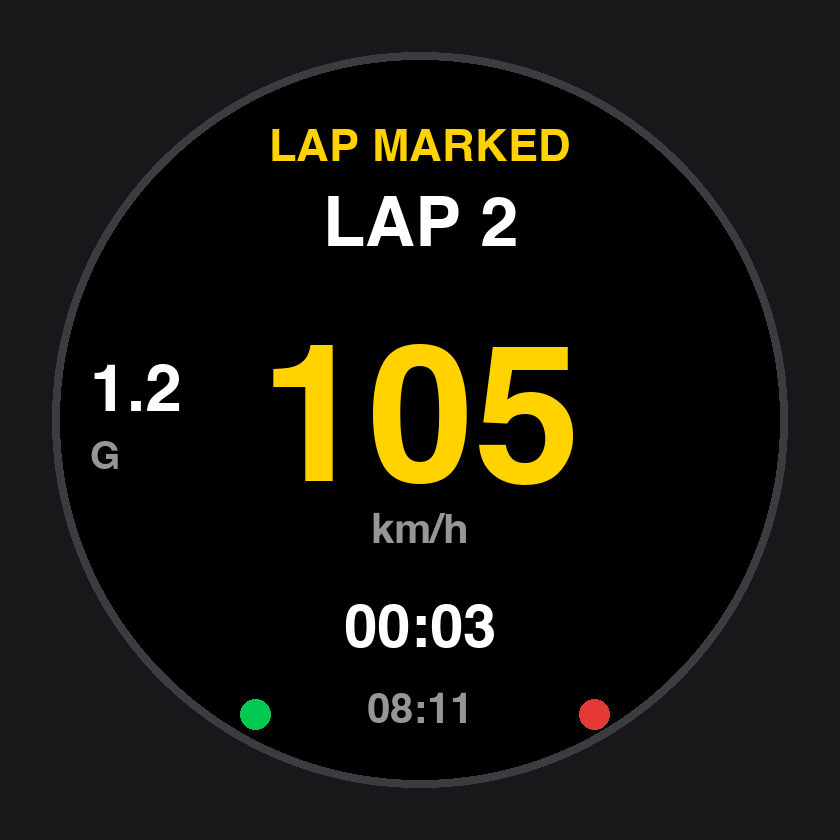
| Button | Function |
|---|---|
| LAP short press | Before the line is set: set start/finish. After: manual lap |
| OK | No effect (prevents mis-press; use BUTTON mode for manual lapping) |
| BACK hold 2 s | Stop and save the session |
| Display | Meaning |
|---|---|
SET START LINE | Start/finish not set; press LAP to set |
SETTING... | LAP pressed; building the line from the next GPS sample |
CALIBRATING | Not enough direction data yet (e.g. set at a standstill); completes after about 10–20 m of driving |
AUTO LAP | Auto lap running |
WARM UP (large figure) | Line not set yet; after setup it shows the lap you are currently on |
LAP N + lap time | Lap complete |
~ LAP N + lap time | Lap complete, but the time is estimated |
EST LAP N/NO BEST | Lap complete, but high uncertainty; excluded from best lap |
LAP MARKED | Manual lap logged; recorded as a lap after about 2 s (about 3 s in ECO) |
CHECK LAP | Confirming a crossing with a large GPS gap, or a possible missed pass was detected |
Connection lost | External GPS (RaceBox / Qstarz) disconnected; replaces the top status and lap number. Recording continues and it recovers on reconnection |
LAP N, ~ LAP N and EST LAP N are notices shown for about 3 seconds after a crossing, at the bottom of the screen (temporarily in place of the total time). CHECK LAP appears at the top while confirming, and also at the bottom when a possible missed pass is flagged. The rest are status words at the top.
GPS signal quality affects crossing-time precision. The watch honestly reports the confidence of each lap:
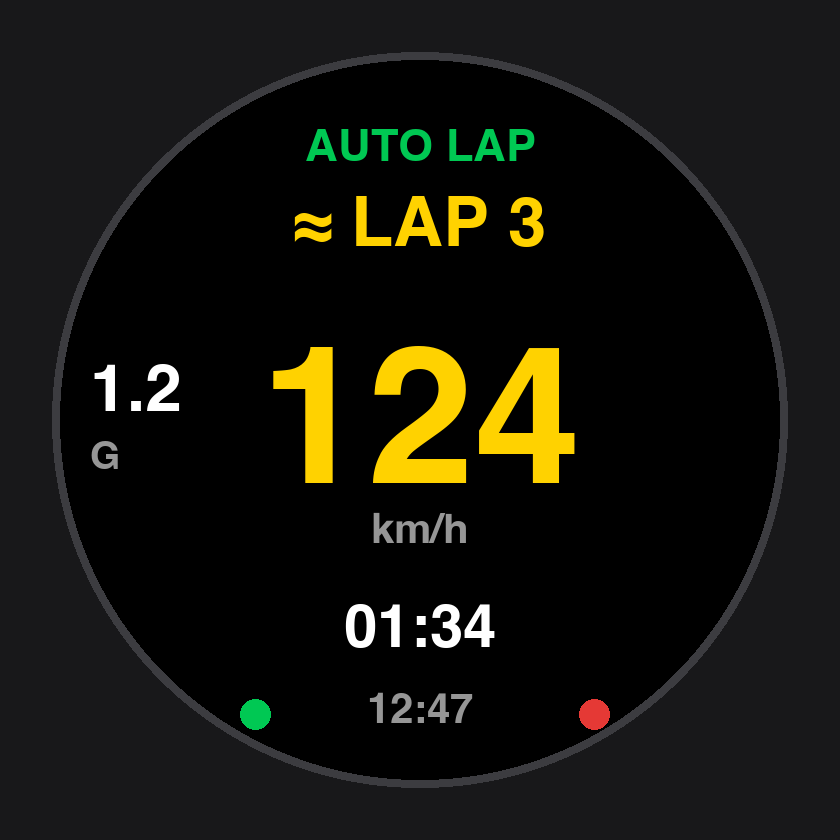
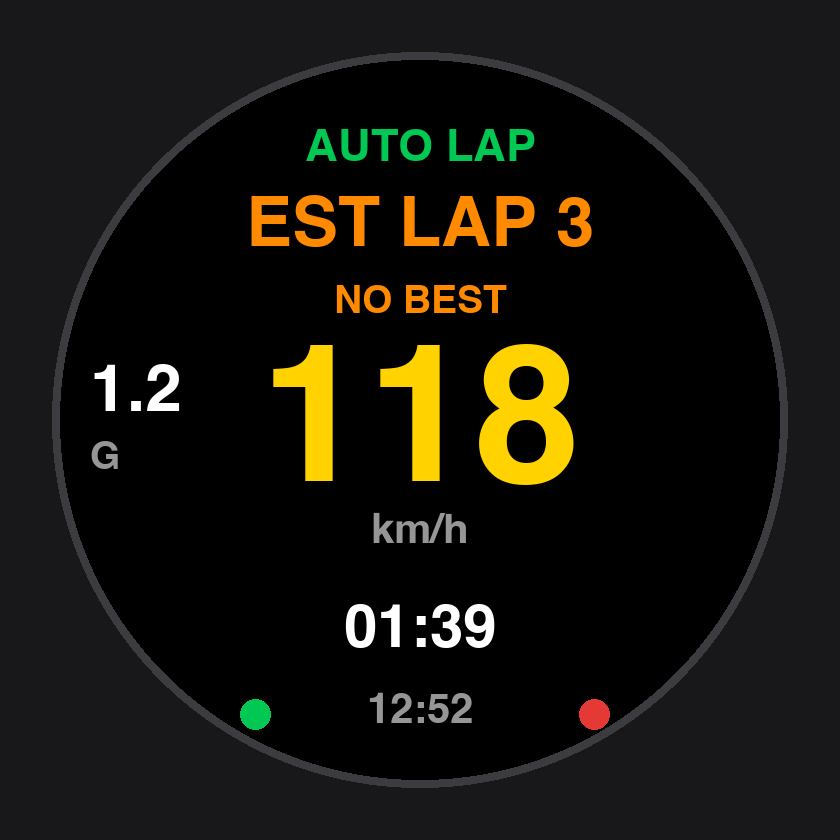
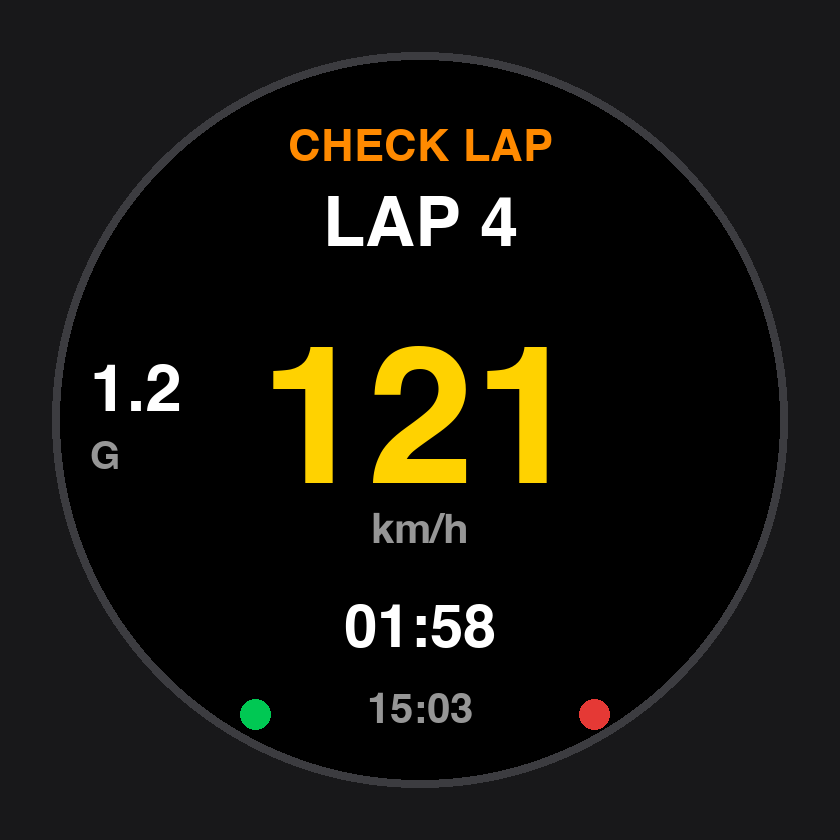
- Normal lap: good GPS quality, precise lap time.
~Estimated lap: the GPS points either side of the crossing are far apart (about 50–100 m, e.g. crossing fast in ECO), the crossing speed is below about 15 km/h, or speed and distance don’t agree; the time is a small estimate but can still count for best. The best lap is still shown simply asBEST.NO BESThigh-uncertainty lap: the GPS points either side of the crossing are more than about 100 m apart, so the watch confirms it with the next sample before counting; the lap and time are kept but excluded from the best-lap ranking.CHECK LAP: the watch is confirming a crossing with a large GPS gap; if it can’t be confirmed it is treated as a possible missed pass — no lap is added, and the laps either side merge into one long lap.
After holding BACK to stop, the watch returns to standby and briefly shows SAVED and the session’s counted lap total (N LAPS). The record file contains:
| Segment | Description |
|---|---|
Warm-up (before the line is set; the screen shows WARM UP) | Track before the start/finish line is set: kept in the record file but not an official lap, and not listed in the RECORDS lap list |
LAP 1...N | Completed official laps |
PARTIAL (listed as L-- / PART) | The unfinished segment from the last crossing to stopping: saved as a separate record, not a formal lap, and never chosen as the best or worst lap. Not saved once 200 counted laps are reached |
In the RECORDS detail summary, LAPS counts official laps only and the best lap is chosen from them; KM and TIME cover the whole session, including warm-up and cool-down.
Each session records at most 200 counted laps (GPS auto lap keeps one warm-up record besides that, so a file holds at most 201). Once you reach the limit:
- The Live screen shows
LAP FULLpermanently and gives one longer alert (tone/vibration, see 6.8). - Pressing the LAP button again (OK/LAP button in
BUTTONmode) only produces a short error beep and is not recorded as lap 201; GPS auto lap also stops buzzing on later crossings. - Recording does not stop — distance, time, track and all statistics keep accumulating, and nothing is overwritten, deleted, or split automatically because of the lap count.
| GPS source | Sample rate | Best for |
|---|---|---|
| RaceBox (external) | 25Hz | Track days demanding top precision |
| Qstarz (external) | 10Hz | When using a Qstarz external GPS |
| Built-in GPS · MAX | 5Hz | General circuits and karting |
| Built-in GPS · ECO | 1Hz | Long rides, power saving first |
~). For precise laps use RaceBox or MAX mode.- Once synced to the STINT app, the session detail shows the best lap, lap count, average lap time, top speed and lateral G, plus a track map of the whole session (can be expanded to full screen).
- The lap list shows each lap’s time, top speed, max lateral G and gap to the best lap; the warm-up appears as its own row.
- The watch’s
~,EST,NO BESTandCHECK LAPmarkers currently appear only on the watch, not in the app.
- ✓An open straight section.
- ✓A spot with steady speed and no sharp steering.
- ✕In a tight or hairpin corner.
- ✕Near the pit entrance.
- ✕A section running close and parallel to another road.
| Q: Started without setting the line? | No problem — the track before setup is kept as WARM-UP. Press LAP as you cross the spot you want, anytime, to begin official lapping. |
| Q: What if GPS drops mid-run? | Recording continues. Auto lap re-arms when the signal returns; any laps missed meanwhile can be marked with LAP as you cross the line. |
| Q: Does the lap in progress at stop count? | No. Only fully crossed laps count; the unfinished segment is saved separately as PARTIAL (listed as L-- / PART in RECORDS) and is not a lap. |
| Q: Can I switch back to button lapping mid-session? | The lap mode is set at the start of each session; changing it mid-session takes effect from the next one. |
Standing-Start Drag
Standing-start drag measures the time from a standstill to a target speed. The watch detects your launch automatically to start timing and records the run automatically after the sprint — press OK once before each run to arm, and after that no more button presses are needed, so you can focus on driving. The session itself is saved when you hold BACK to end it.
Each run records three split results, each one the time for that segment alone (not a running total from 0):
| Speed unit | Split 1 | Split 2 | Split 3 |
|---|---|---|---|
| km/h | 0-100 | 100-200 | 200-MAX |
| mph | 0-60 | 60-120 | 120-MAX |
0-100 is launch to 100 km/h; 100-200 is 100 to 200; 200-MAX is from passing 200 to the moment the run’s top speed first appears — it climbs as you set new highs and freezes when you lift. 200-MAX is for reference and not used to pick the best run. Splits you don’t reach show --, without affecting the splits you did achieve.
- Enter RACING and wait for GPS to be ready (external RaceBox, Qstarz or built-in GPS).
- Choose the DRAG → STANDING method to reach the standby screen.
- You can only arm (ARM) once the GPS signal is stable; if it’s weak the watch refuses — move to open sky.
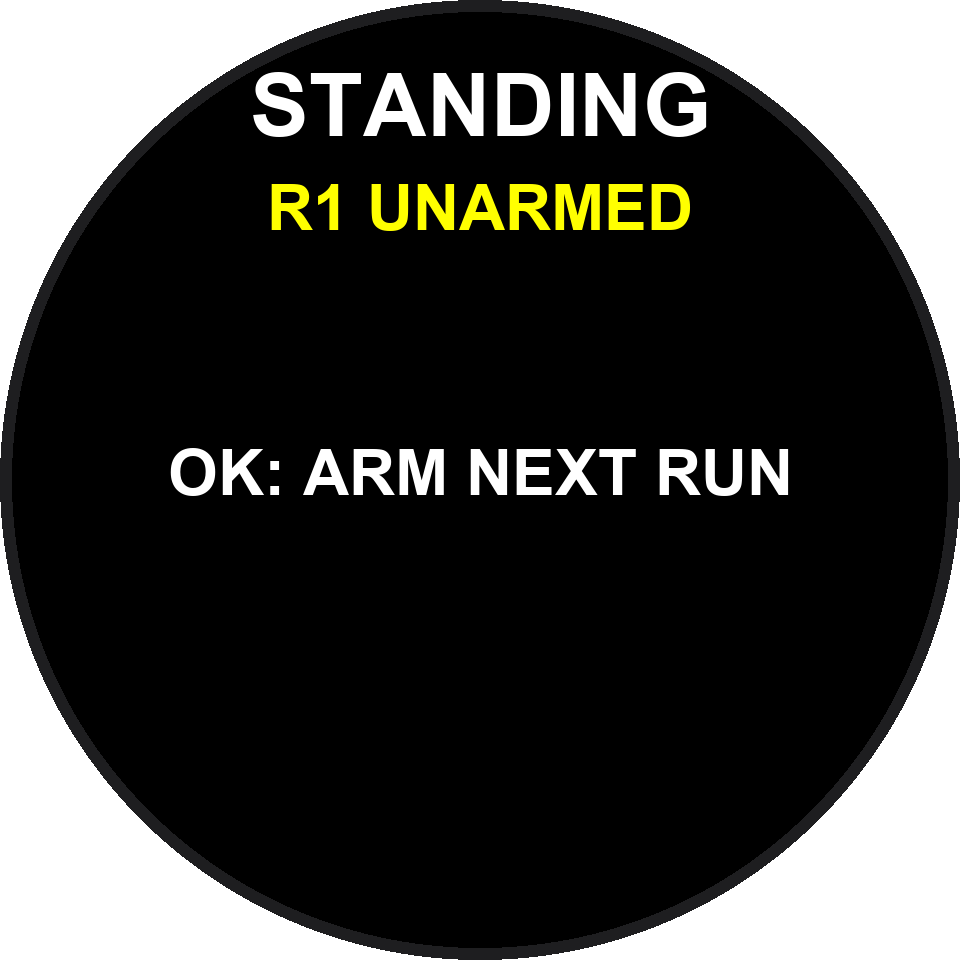
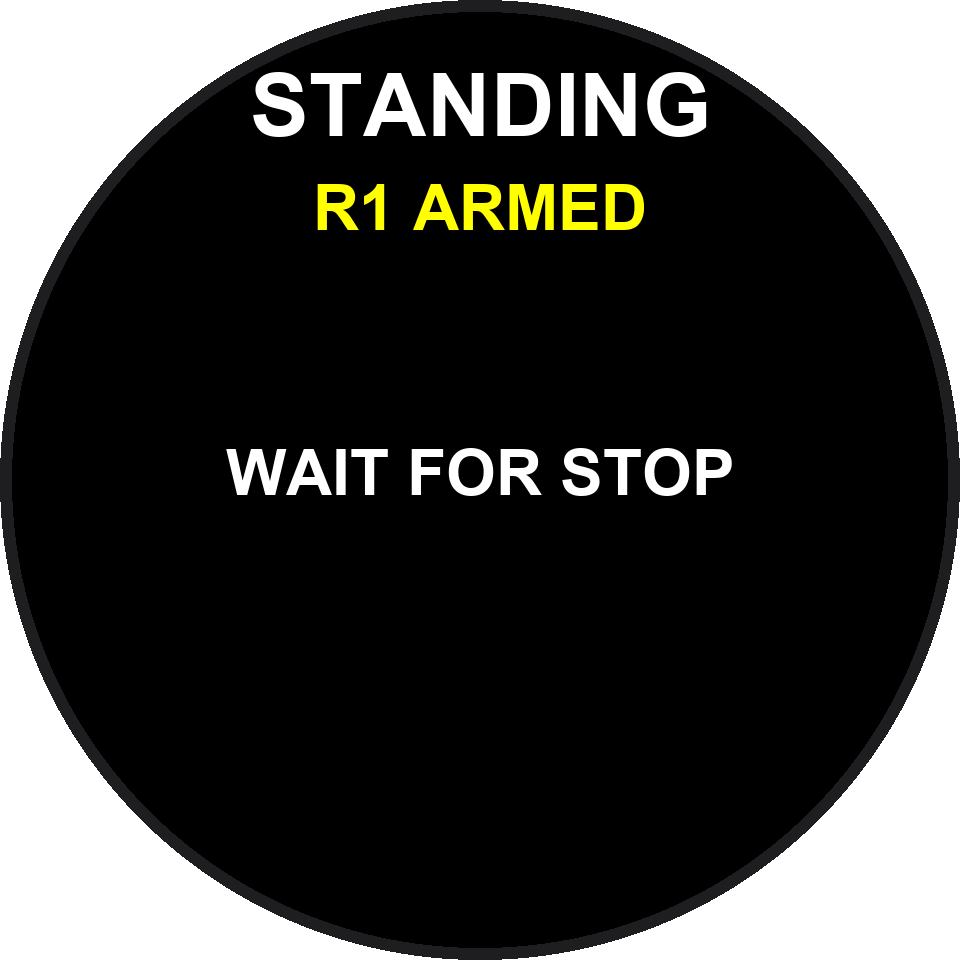
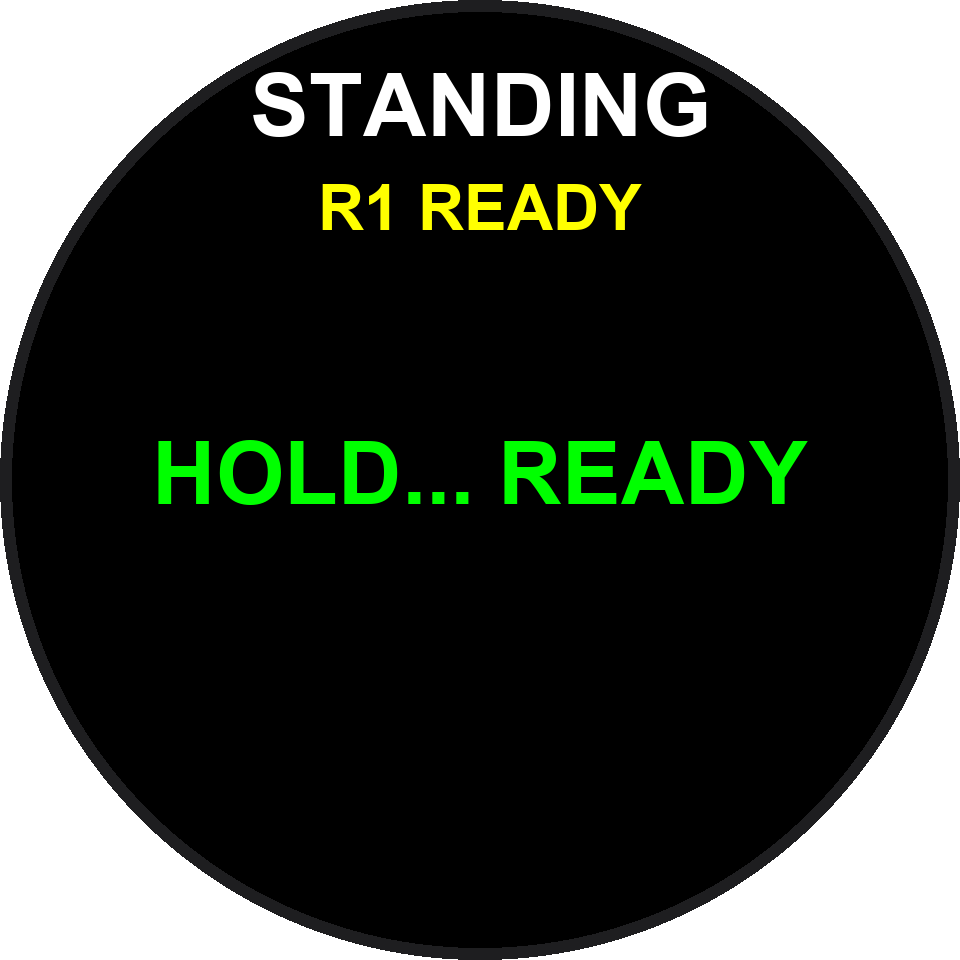
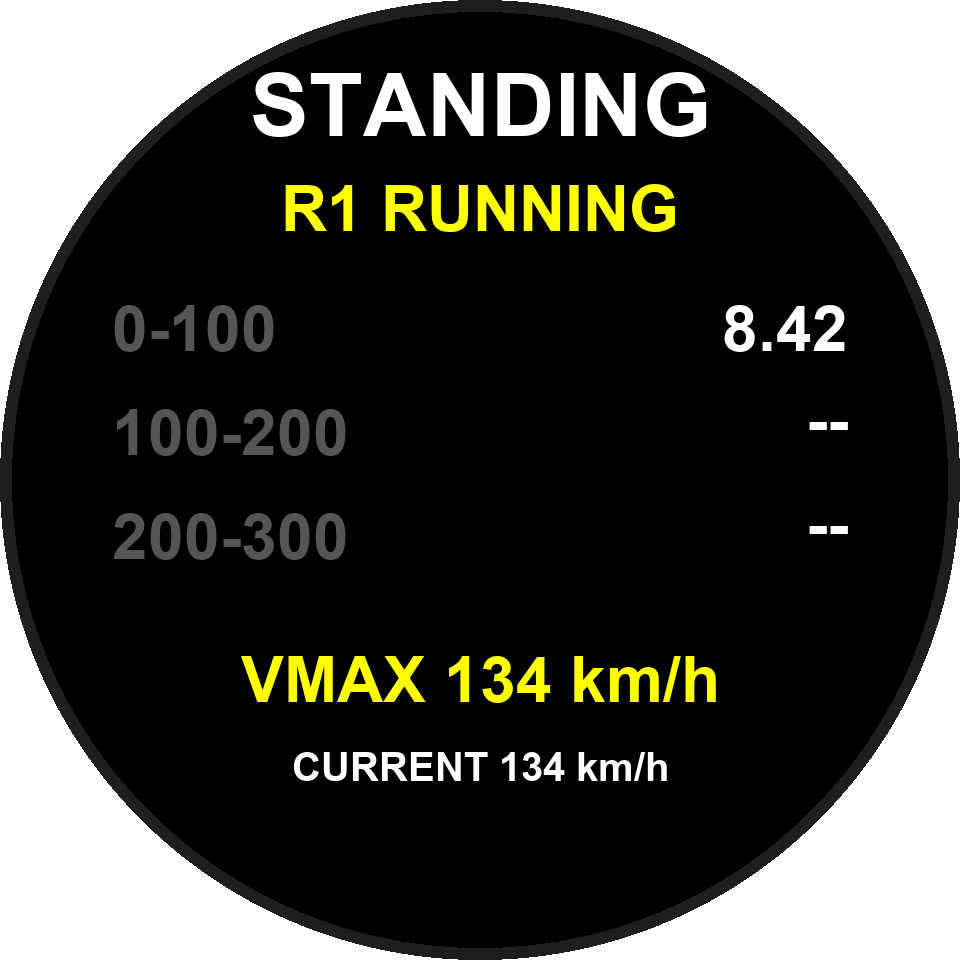
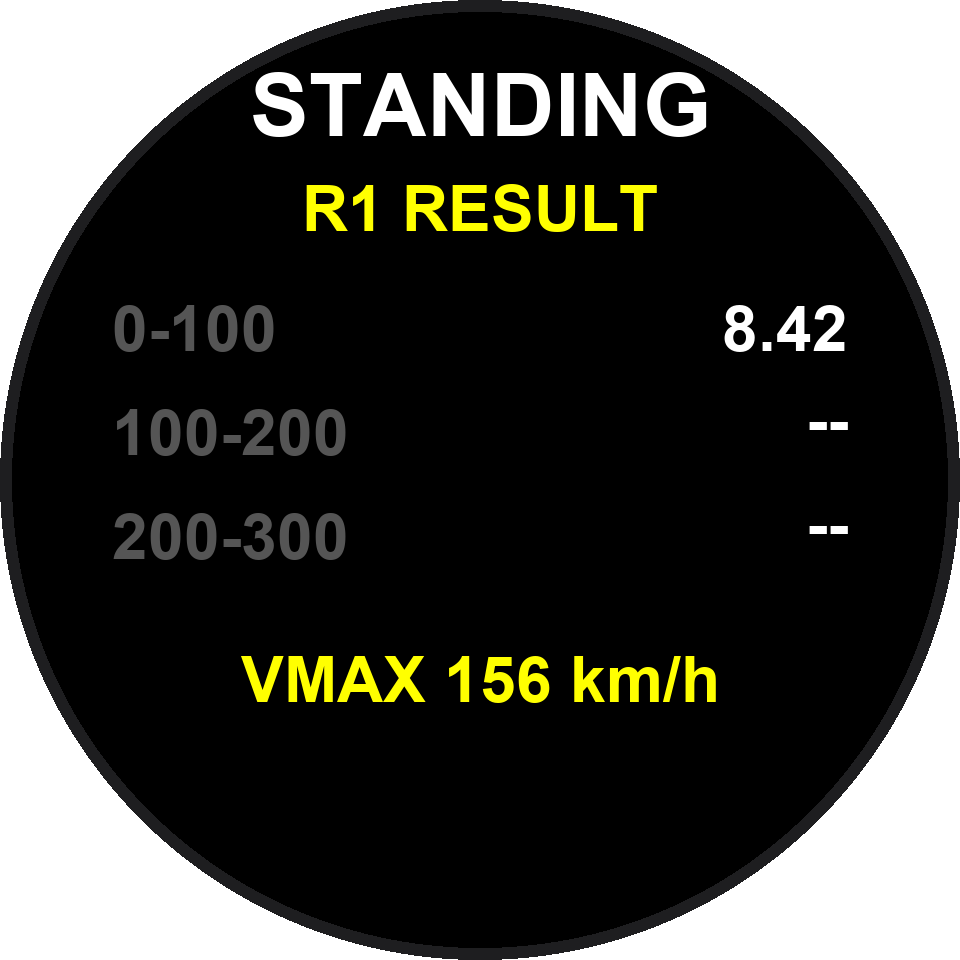
200-300; the current screen shows 200-MAX (see 8.1). New screenshots to come.- ① Arm (ARM): stop the car and press OK to arm. This tells the watch “the next launch is a timed run.”
- ② Confirm stop (READY): stay fully still for about 1 second; once confirmed it becomes ready. If the car moves before confirmation, it restarts.
- ③ Launch: the instant you hit the throttle and the car moves, timing starts automatically — no accuracy lost to glancing at the watch.
- ④ Sprinting: the screen shows the three splits, the run’s top speed (
VMAX) and current speed (CURRENT) live; each split locks in the moment its speed is reached. - ⑤ Finish: lift off, drop below about 10 km/h and hold for 2 seconds; the run ends and is recorded automatically. The RESULT screen closes after about 3 seconds, or press OK or BACK.
INCOMPLETE — the screen shows R# RESULT with yellow INCOMPLETE, then returns to standby after about 3 seconds (or OK / BACK). It uses up a run number; splits already reached are shown, but it can’t be the best run.Standing mode supports multiple runs per session: after each run, return to standby and press OK to arm the next. Runs are numbered R1, R2, R3…, up to 200 runs per session; once full the prompt changes to RUN LIMIT and no further run can be armed (everything else in the session still saves normally). On standby the prompt in the middle of the screen reads OK: ARM NEXT RUN (another run can be armed), STOP TO ARM (still moving), GPS NOT READY (no fix yet), GPS SEARCHING... (searching for GPS) or RUN LIMIT (200 runs reached).
Standing mode shows which stage it is in directly on screen:
| On screen | Meaning |
|---|---|
UNARMED | On standby, not armed. Acceleration now is not recorded. |
ARMED | Armed, waiting for the vehicle to come to a complete stop. |
READY | Stationary confirmed; timing starts the moment you launch. |
RUNNING | Run in progress; split times lock in as you reach them. |
DECEL | Deceleration detected, waiting to finish (below about 10 km/h for 2 seconds). |
RESULT | The result screen for that run; it closes after about 3 seconds, or press OK or BACK. |
GPS NOT READY means there is no fix yet; STOP TO ARM means the vehicle is still moving — come to a stop and press again.Only an armed, official launch produces a result. Driving back to the start, or any acceleration while not armed, is never recorded as a run — no need to worry about return trips cluttering your log.
Accuracy depends entirely on GPS, so the watch has three layers of protection:
Poor quality ignored
When fix quality drops (e.g. under an overpass), that data isn’t counted toward the result and won’t falsely trigger a launch or finish.
Brief dropouts tolerated
Brief GPS instability during a sprint (within 2 seconds) is skipped automatically, without affecting the result.
Too long → aborted
If a dropout lasts 2 seconds without a break, the run aborts and is marked GPS LOST; it’s kept for reference but excluded from best results.
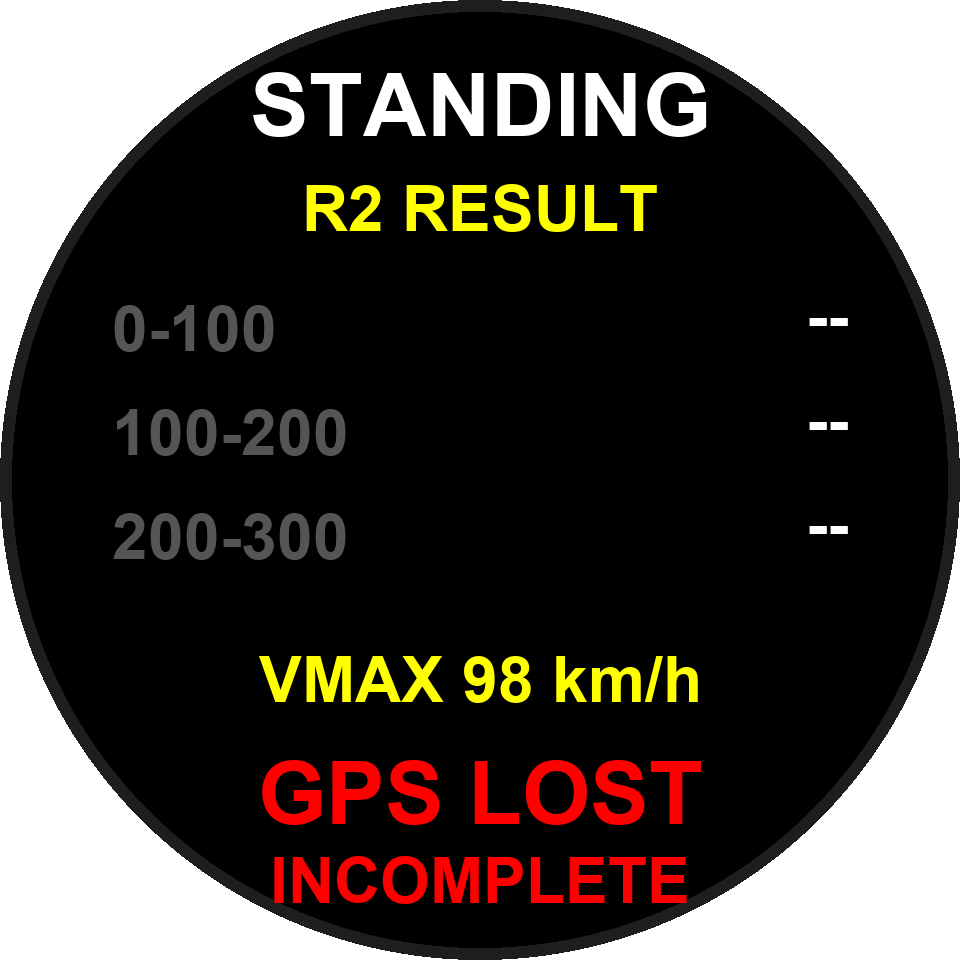
If GPS fails after arming but before launch, arming clears automatically — just re-arm from the standby screen.
GPS LOST and INCOMPLETE on the live screen, and GPS LOST on its RECORDS run page. Splits and top speed reached before the dropout are kept; splits not reached show --. The run is excluded from best.200-300; the current screen shows 200-MAX (see 8.1). New screenshots to come.CURRENT -- km/h instead, so a run isn’t mistaken for a stop and ended early; in standby it shows GPS NOT READY and won’t arm for the moment. External RaceBox / Qstarz sources are not affected.Main menu RECORDS (see Chapter 9) → select the session to view:
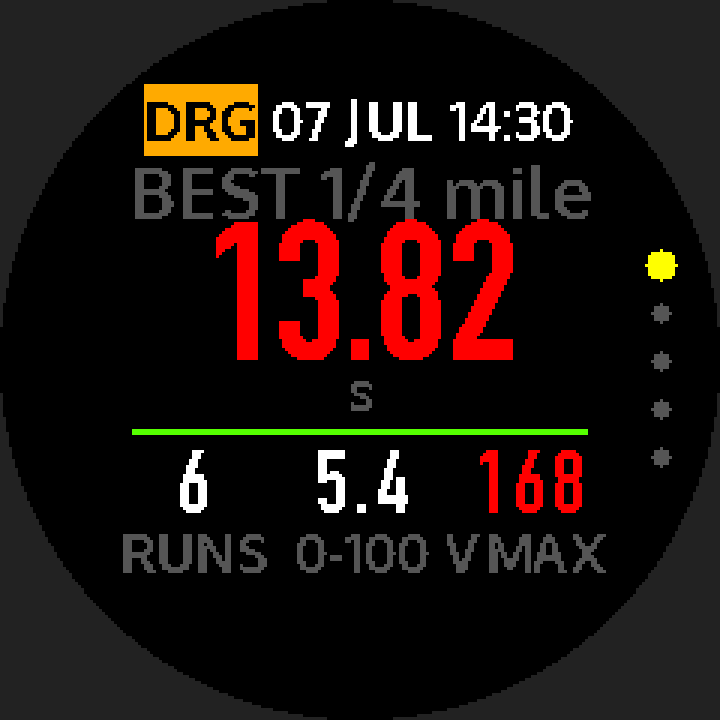
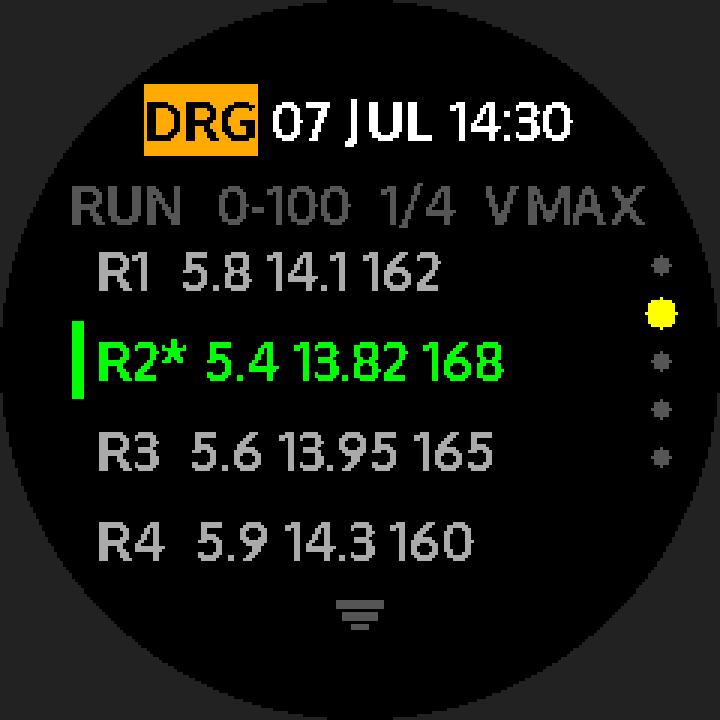
BEST 0-100 (BEST 0-60 in mph): the large figure is the best 0-100 time, with RUNS / BEST / VMAX below. A run ended by a short BACK mid-sprint, or cut short by holding BACK, is marked INCOMPLETE — and will not be chosen as the best run even if it reached a high speed.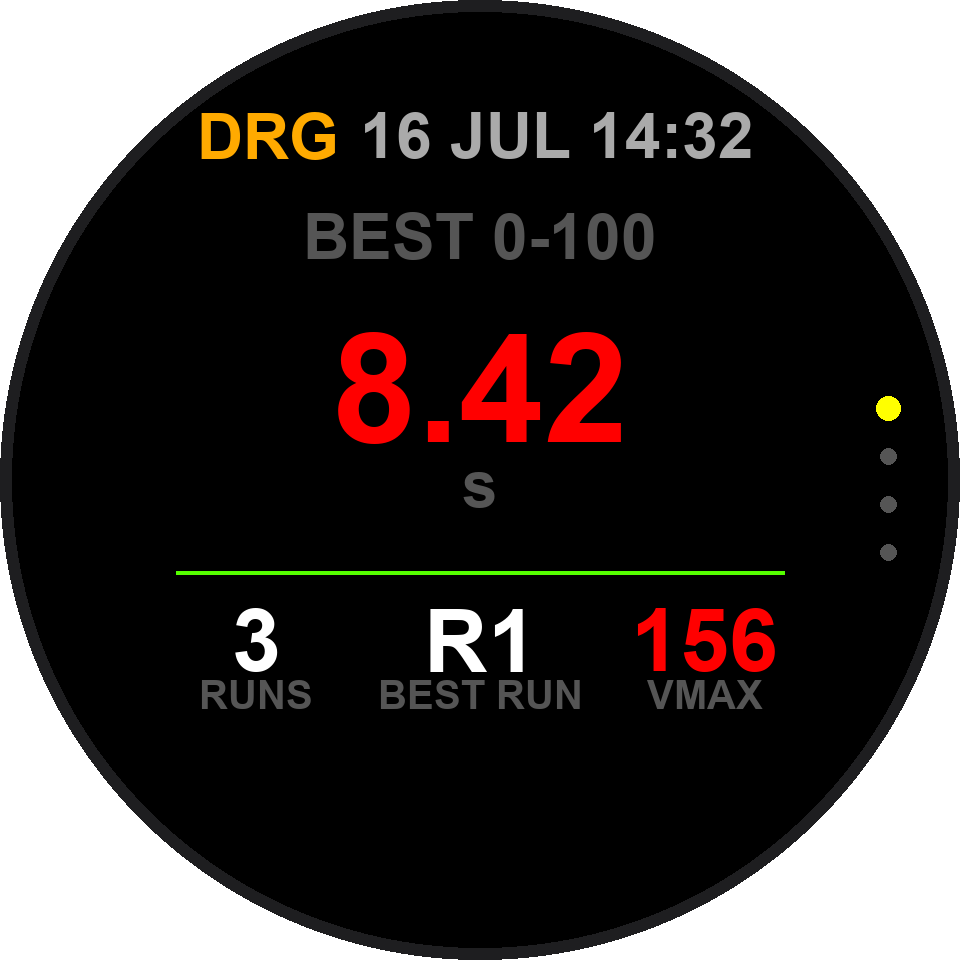
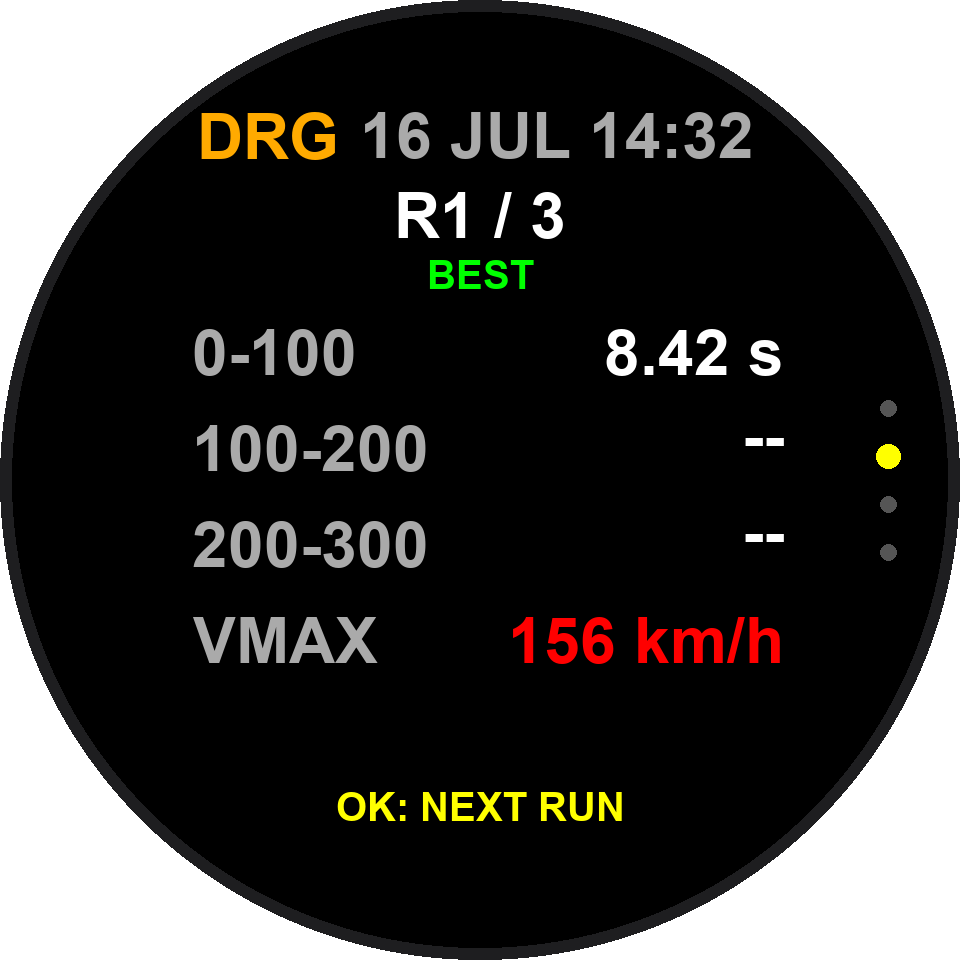
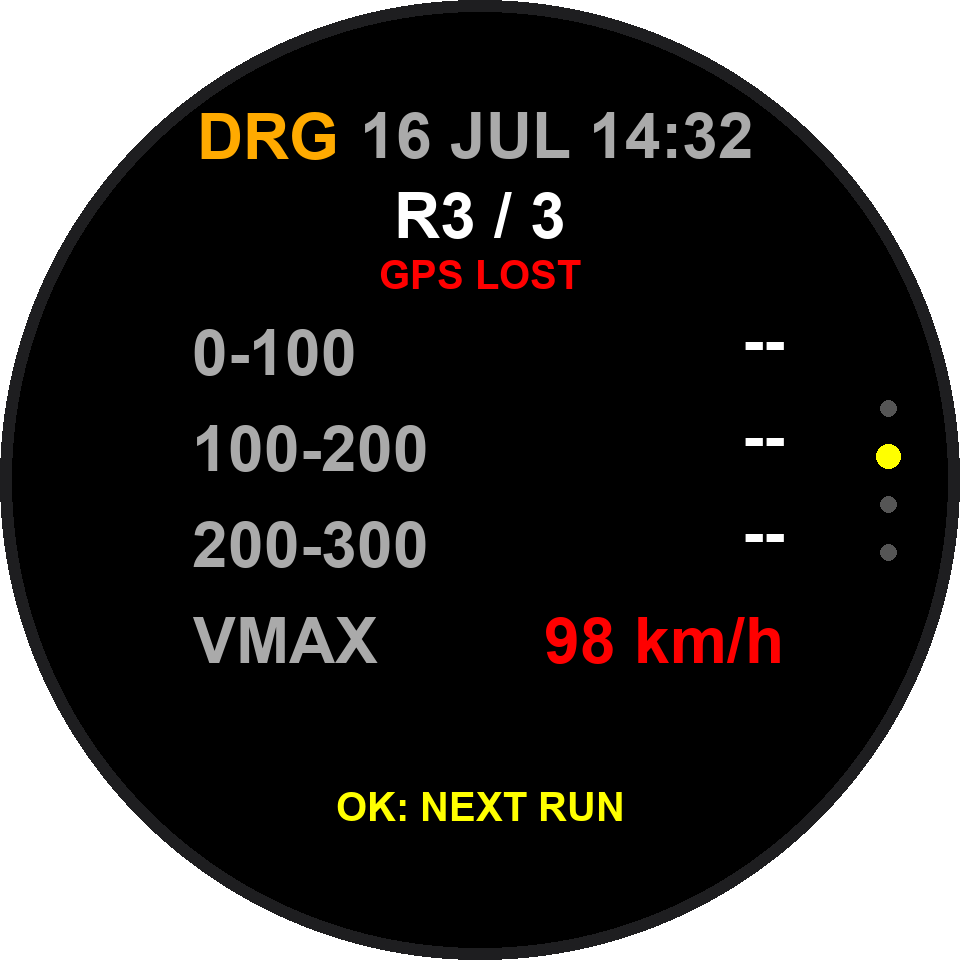
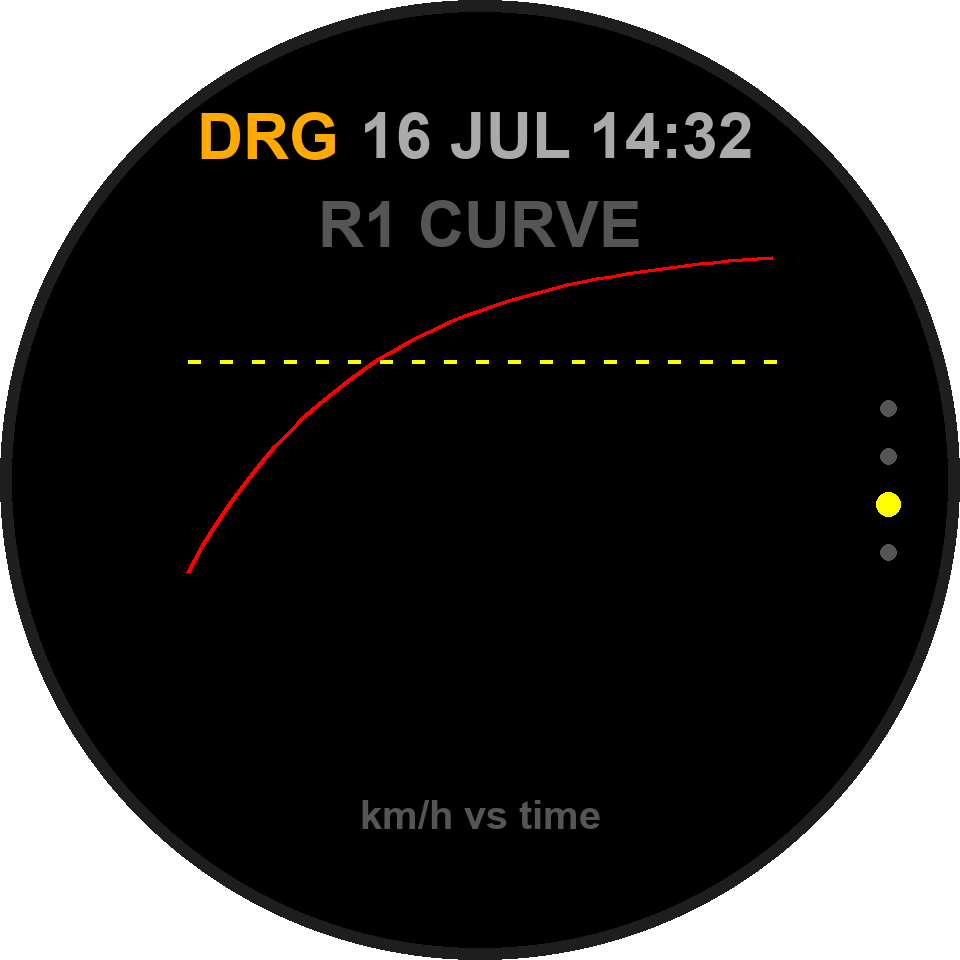
- Switch runs: press OK to move between R1/R2/R3… and view each run’s splits.
- BEST marker: the session’s best run (compared by first-split time). Incomplete and
GPS LOSTruns are excluded. - Accel curve: the current run’s speed–time curve, drawing only that run, excluding the return trip.
- Meaning of
--: on0-100/100-200it means that speed wasn’t reached (e.g. the venue was too short for 200 km/h) or GPS dropped out before that speed; on200-MAXit means the run never passed 200, or its top speed came exactly at the moment it passed 200 (lifting just after 200 usually still gives a short time). - Older records: DRAG records made on earlier firmware now also list
0-100 100-200 200-MAX(segment times) instead of the running totals0-200/0-300.
200-300 (the per-run page shows cumulative 0-200 / 0-300) and the middle cell of the summary page reads BEST RUN. The current screens show 0-100 / 100-200 / 200-MAX, and the middle cell reads BEST. New screenshots to come.- The launch threshold is about 3 km/h: after READY, the first GPS sample at or above about 3 km/h is the timing start (driver reaction time is not included, and no rollout is subtracted).
- Splits are computed by interpolating the GPS track, independent of screen refresh rate.
- An external RaceBox (25 Hz) gives higher sample density and finer curves than built-in GPS.
- Speed units (km/h / mph) switch in Settings (Chapter 10); each record remembers the unit used at capture.
View & Manage Records
There are two places to view records: DOWN at the face (quick overview) and RECORDS in the main menu (per-session detail).
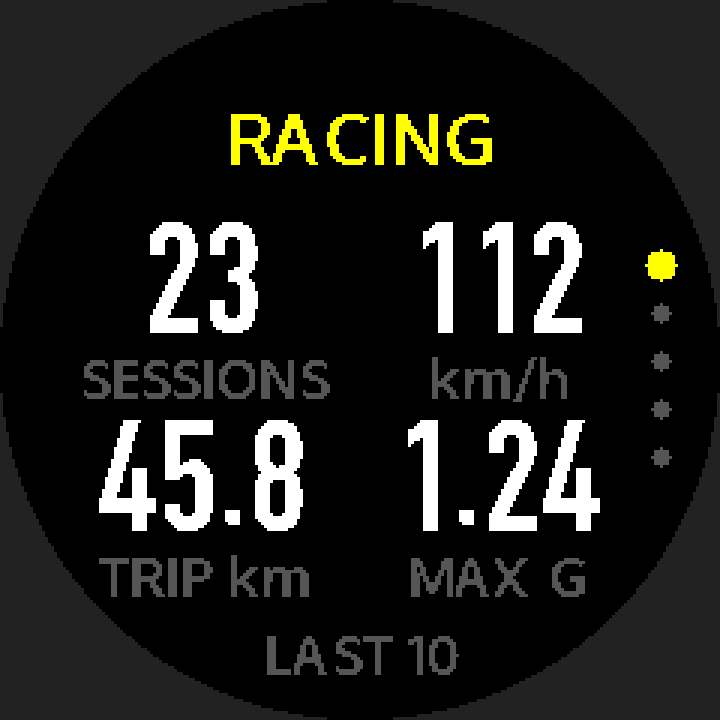
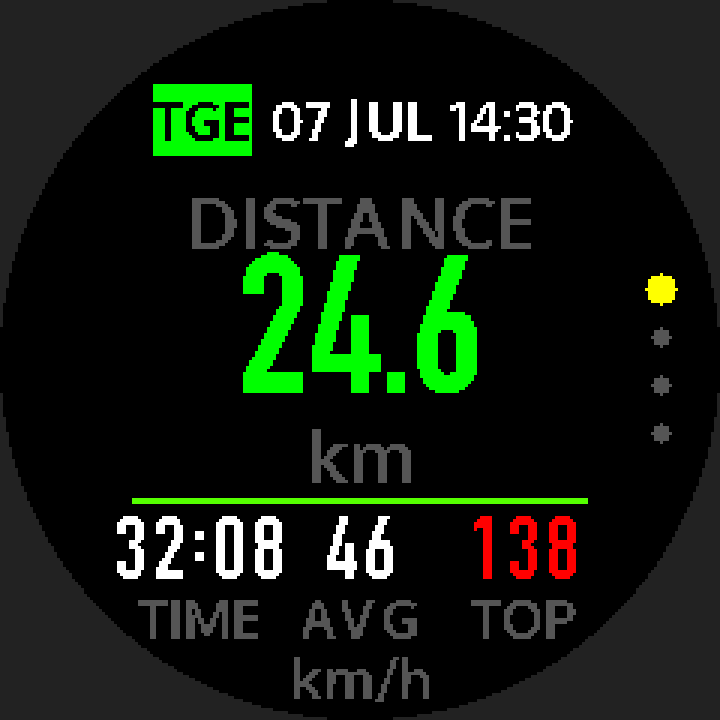
- Display: the first page is an overall summary (sessions, top speed, longest single trip
TRIP, max G); then one stats page per mode that has records. - Scope: the last 10 records — this page always summarizes only the newest 10 records, regardless of how many records RECORDS actually holds (see 9.3). Tilt records also take up places among these 10, but they are not counted as sessions or in any of the stats. With none it shows
NO RACE YET. - Buttons: UP/DOWN page; pressing UP on the first page or DOWN on the last slides back to the face; BACK returns to the face.
RECORDS.DELETE ALL.NO SESSIONS / START A MODE TO LOG.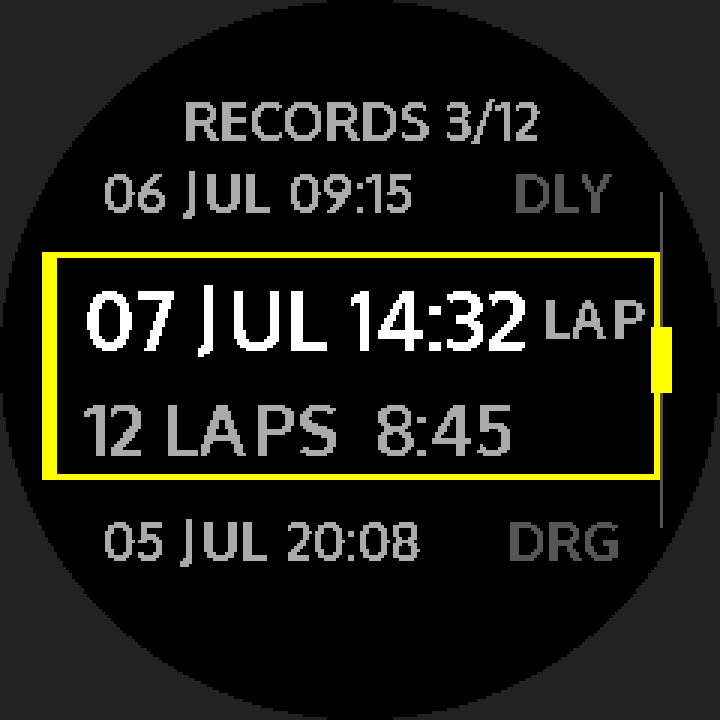
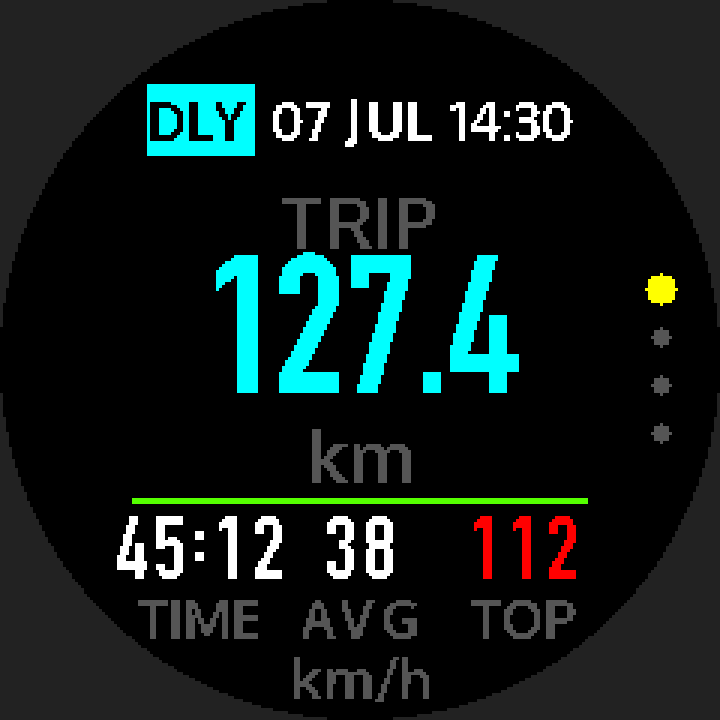
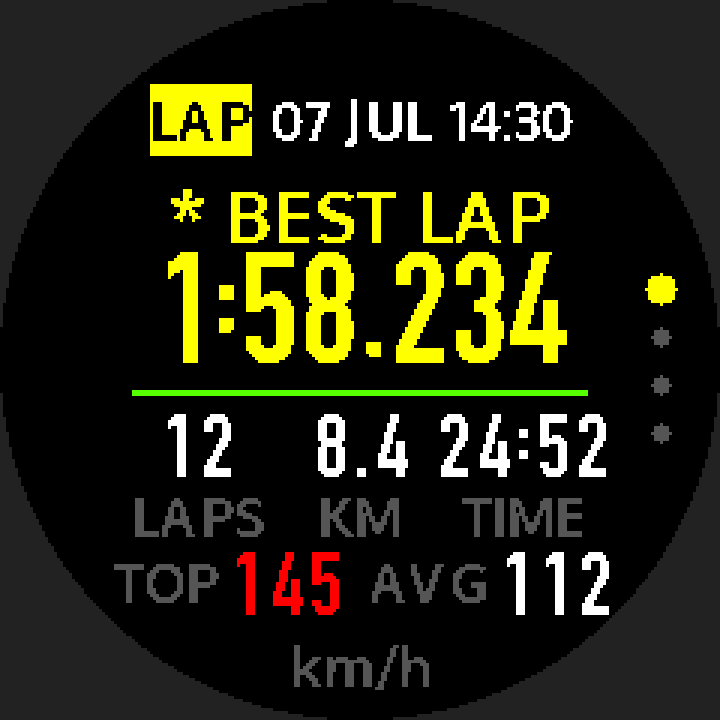
On entry it loads that session (large files show READING LOG briefly). Use DOWN next/UP previous to page, BACK to the list. Page count and content vary by mode; in every mode (tilt records included) the second-to-last page is INFO (session info, see below) and the last page is Delete (see 9.3):
| Mode | Main content |
|---|---|
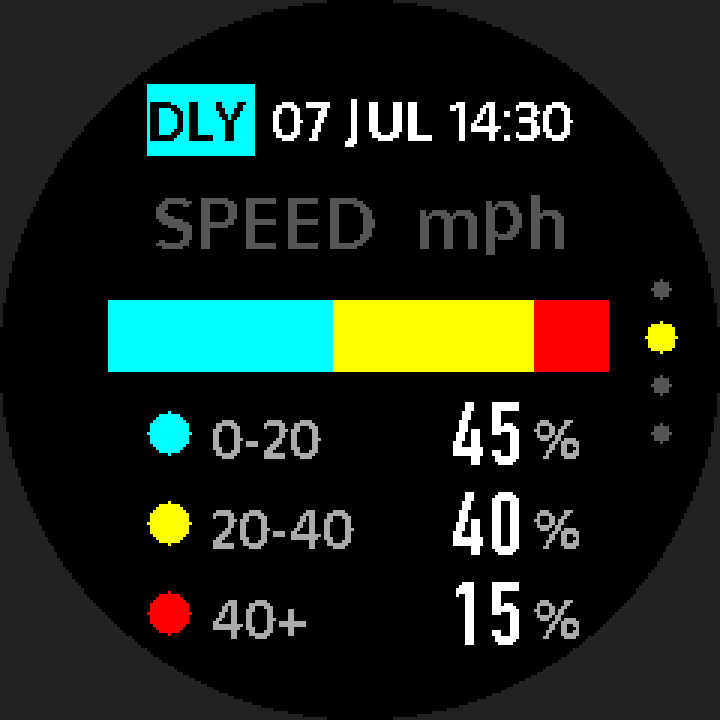
| DAILY | Distance & time / avg / top speed → speed-band distribution → route map |
| DRAG | Best result → run list (best run marked with a green star) → best-run splits → acceleration curve; STANDING records show Summary → runs (OK switches runs) → accel curve (see 8.6) |
| LAP TIMER | Best lap → per-lap times & gaps → route map with max G |
| TOUGE | Distance / time / avg / top speed → route map → elevation profile & total climb |
| OFF-ROAD | Max tilt → attitude page (total-tilt gauge) → route map |
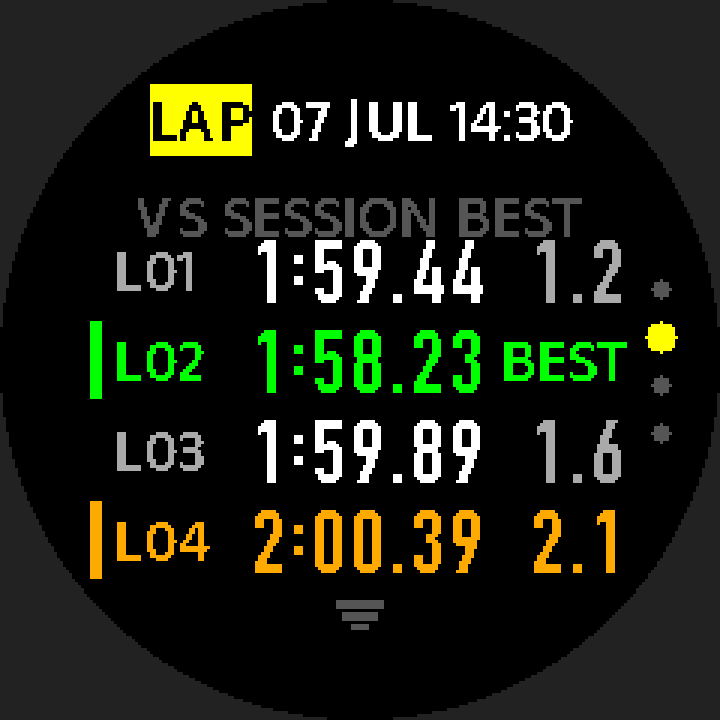
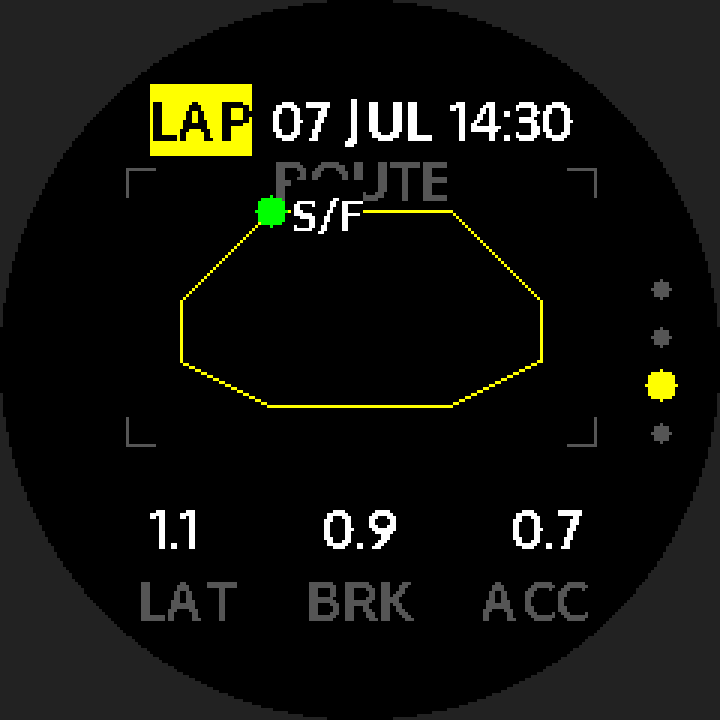
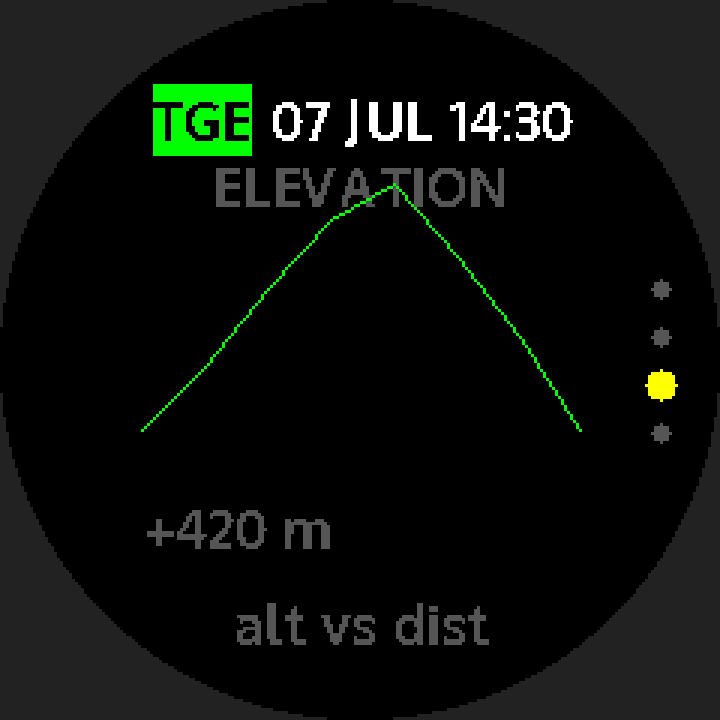
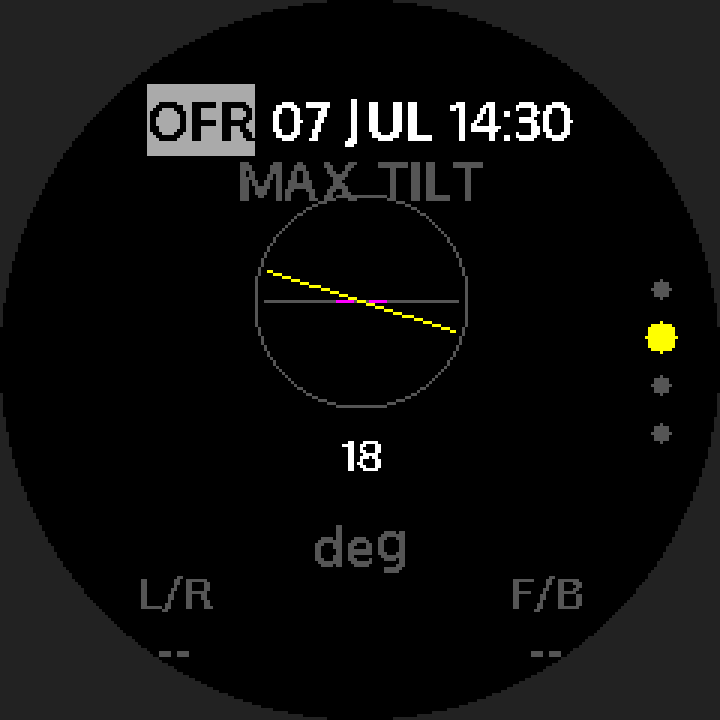
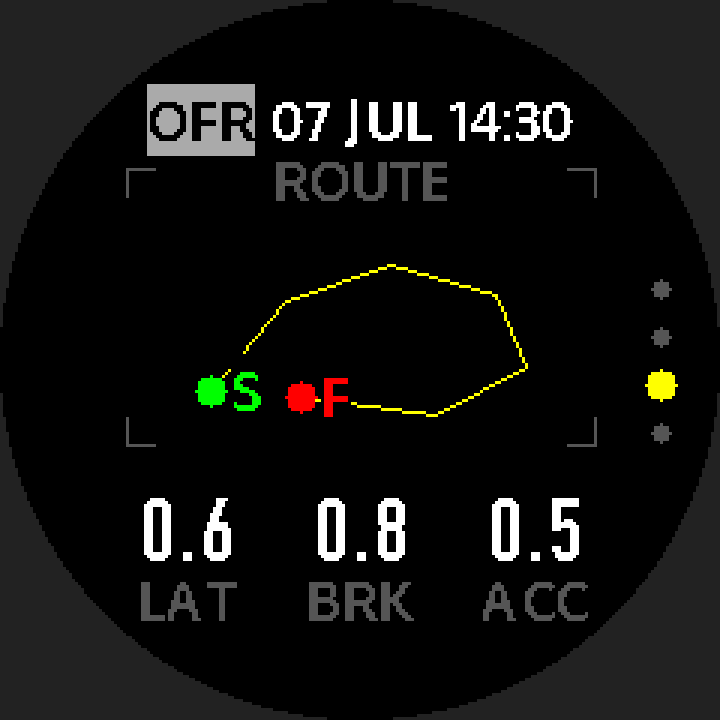
NO TILT / NEEDS VEHICLE MOUNT, no attitude reference was taken for that session — check that MOUNT is set to VEHICLE (see 10.3), that the watch really is fixed to the vehicle, and that the vehicle was briefly stationary around the start. Note that the source matters too: Qstarz sessions carry no tilt data at all (see 6.3).The INFO page gathers the recording conditions of the session, so you can check afterwards which GPS was used, at what rate, and how it ended. Rows that don’t apply are hidden; OK does nothing on this page.
| Row | On screen | Meaning |
|---|---|---|
SRC | RACEBOX / QSTARZ / INTERNAL | The GPS source used. The built-in GPS shows INTERNAL for both MAX and ECO — tell them apart by RATE |
RATE | e.g. 25HZ, 10HZ, 5HZ, 1HZ | Sample rate, derived from the mode setting at the start and the source’s limit — not a measured value |
DRAG | QUARTER / STANDING / ROLLING | DRAG records only: the method used |
BATT | e.g. 87>62% | RaceBox records only: RaceBox battery at the start and at the end |
END | see below | How the session ended |
FIX | e.g. Q0-Q3 | Lowest and highest fix quality seen in the session (0 = no fix, 2 = 2D, 3 = 3D) |
PTS | a number | Track points (samples for tilt records) |
FW | e.g. GTM003 | The firmware version when the session was recorded, not the watch’s current version |
END shows | Meaning |
|---|---|
MANUAL | You ended and saved it |
AUTO | The watch ended it: TIME LIMIT (MAX REC reached), NO MOVEMENT (a long stop), or the first part when a full file is split automatically (see 6.4) |
LOW BATT (red) | The battery ran low and the watch stopped and saved automatically (see 6.4, 13.1) |
LINK LOST (red) | The GPS source dropped out at some point during recording, even if it came back |
SDK_V4.5.1 under FW — back then that field held the SDK version, not the firmware version. If no sample rate was stored, RATE shows -. A screenshot of the INFO page will be added later.- Delete one: in a session’s detail, page to the last page
DELETE LOG?→ OK → confirm again → deleted and back to the list. - Delete all: the last row of the record list
DELETE ALL→ OK → confirm. SETUP → Deletedoes not delete Racing records: it resets the achievement data (lifetime distance / drives / today’s top speed) to zero and keeps your watch face choice. To delete Racing records, useDELETE ALLabove (see 10.6).

DELETE ALL) does not affect the lifetime distance and drives on achievement faces — they are stored separately. Conversely, SETUP → Delete and both resets zero the achievements but do not delete records (see 4.6 / 10.6).Save track-day results to a computer
- Connect the watch to a computer with USB; it appears as a flash drive.
- Open the drive, go to the
RACELOGfolder and copy the.BINfiles you want to keep. - Put the files in the
input/folder of the desktop parser tool. - Double-click
parse.bat. - Each session produces: a Google Earth track (
.kml), a spreadsheet with a speed chart (.xlsx) and an interactive map (.html).
Settings
Main menu → SETUP, containing:
| Item | Description |
|---|---|
| SET GPS | GPS source & precision (10.1) |
| System Settings | Backlight, sound, time, language, units, etc. (10.2) |
| RACING | Speed unit & per-mode sample rates (10.3) |
| Delete | Resets achievement data to zero (watch face choice kept); does not delete Racing records (see 9.3, 10.6) |
| Reset | Restore factory settings (10.6) |
| About | Version & device info (10.6) |
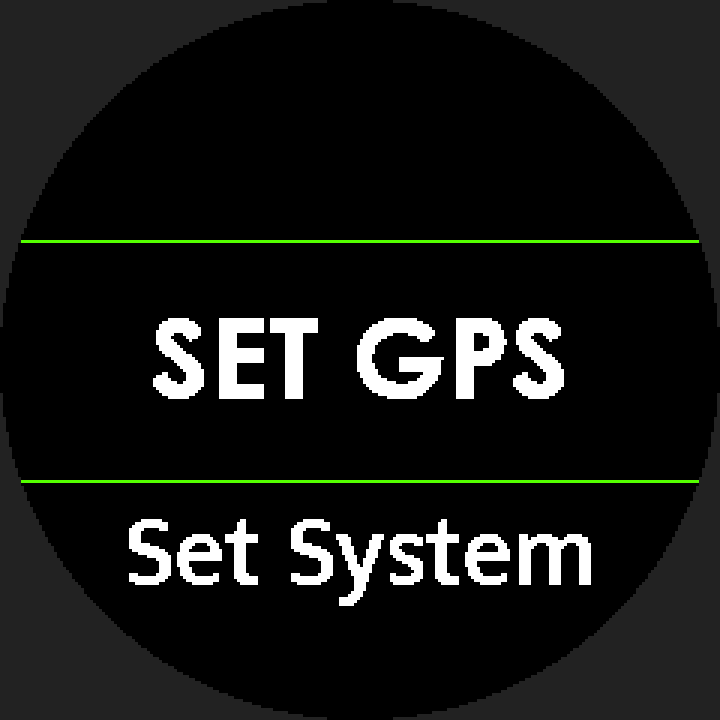
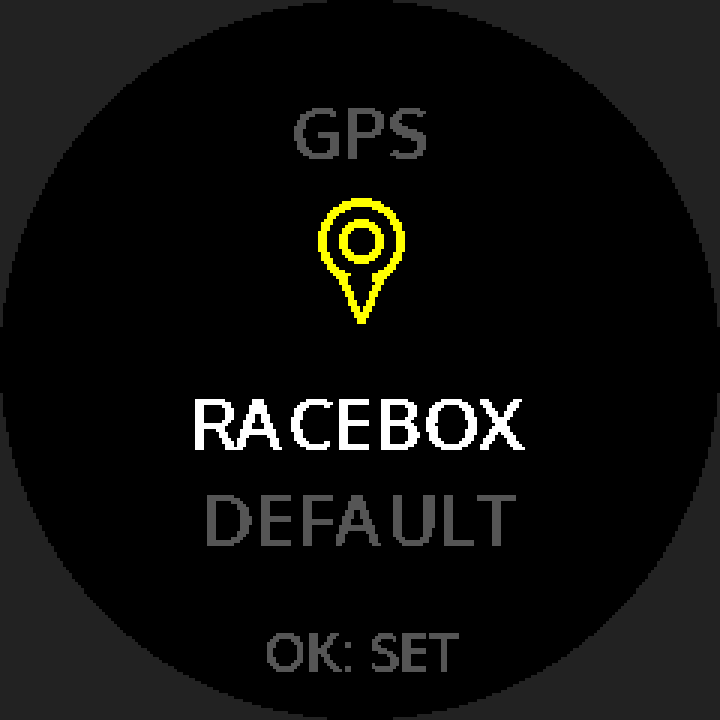
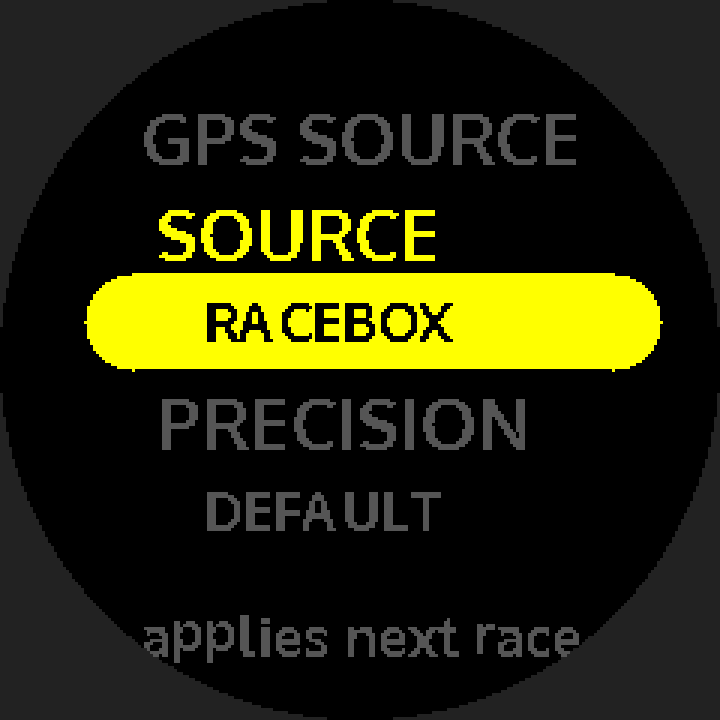
Three screens: status page → settings page → selection list.
- Status page: shows current source and precision; press OK for settings.
- Settings page: SOURCE (RACEBOX / INTERNAL GPS / QSTARZ); PRECISION (MAX highest update rate / ECO power-saving lower rate). PRECISION only applies to the built-in GPS; with RaceBox or Qstarz it is fixed at DEFAULT.
- Selection list: the current value has a filled dot and the focused row is yellow; OK saves.
- When it applies: settings save immediately, but the actual source/rate takes effect only the next time you enter Racing.
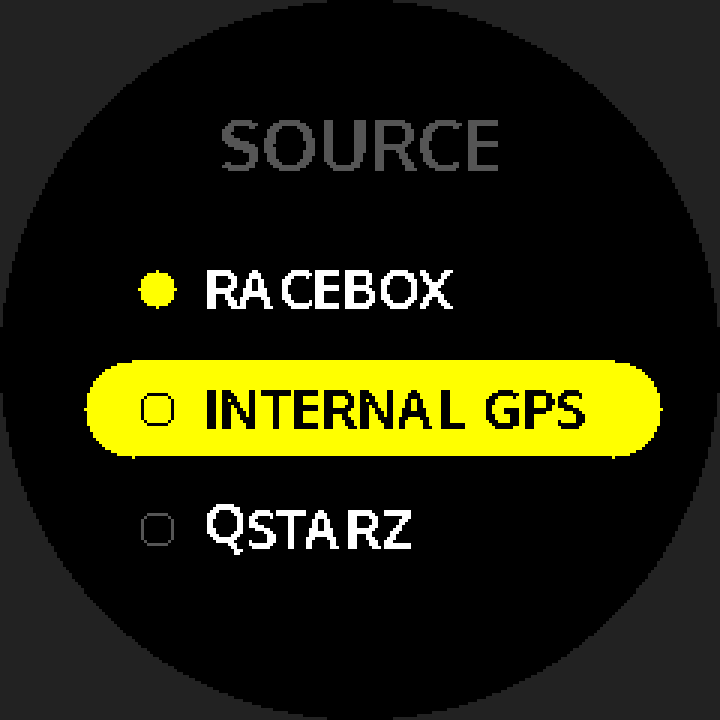
One item per page, set in turn:
| Item | Description |
|---|---|
| Satellite positioning (GNSS) | Enable/disable multi-GNSS |
Backlight (BACKLIGHT) | Four items: BRIGHTNESS 1–5 (default 2), AUTO OFF 5/10/20/30/60 s (default 5 s), RAISE TO WAKE ON/OFF (default OFF), and LONG PRESS — how long a long press of the backlight button keeps it on: 3/10/30 min (default 3 min). UP/DOWN picks an item, OK opens it; on the edit page UP/DOWN changes the value, OK saves, BACK cancels (brightness previews live and is restored on cancel). Item names are always in English |
| Key sound | On/off |
| Key vibration | On/off |
| Time | Time zone, date format, DST, Set Time (GPS sync / manual set / auto-sync switch, see below), 24-hour |
| Alarm | 5 independent alarms (10.4) |
| Language | English / Traditional Chinese / Simplified Chinese |
| Units | Metric / imperial (everyday display) |
| Heart rate | Heart-rate settings (10.5) |
| Compass calibration | Rotate the watch as prompted to calibrate |
| Watch face | Preview and switch between 8 faces: UP/DOWN preview, OK save, BACK cancel (the list does not wrap, see 4.4) |
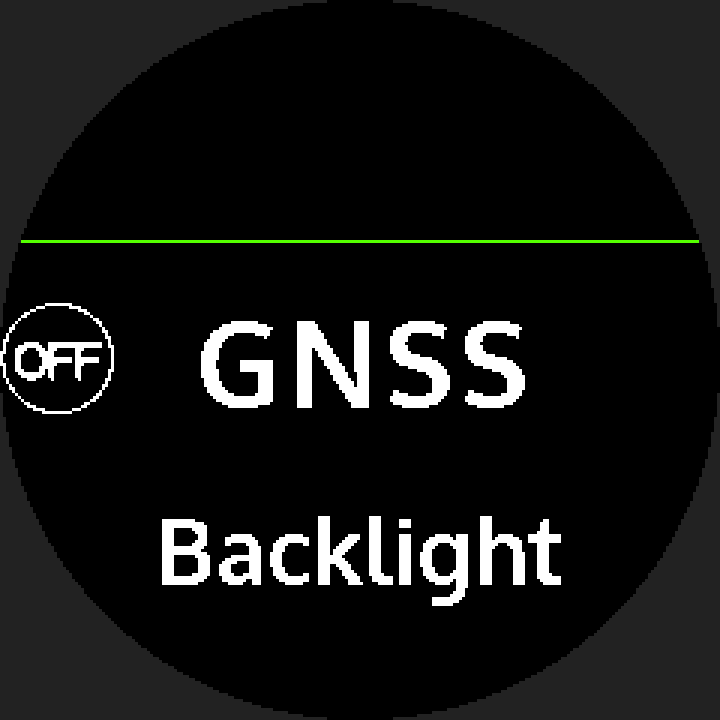
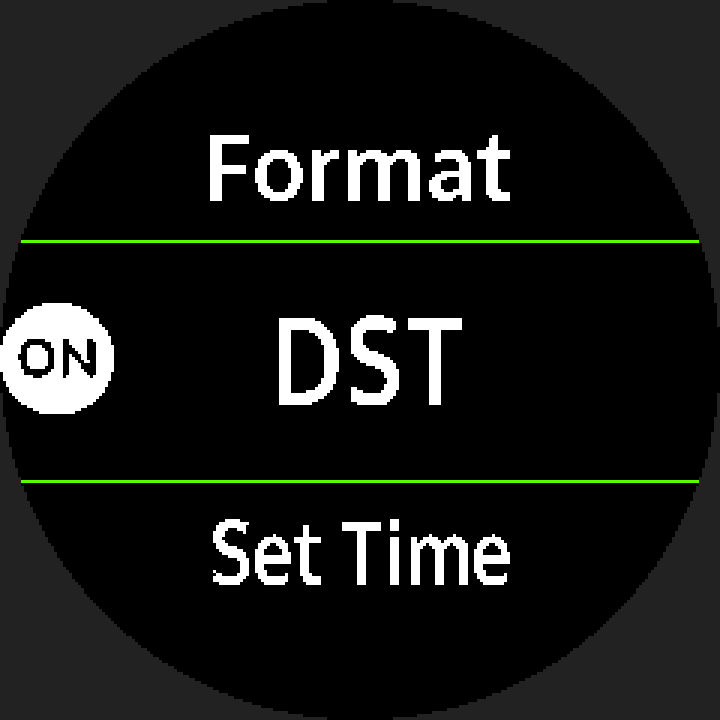

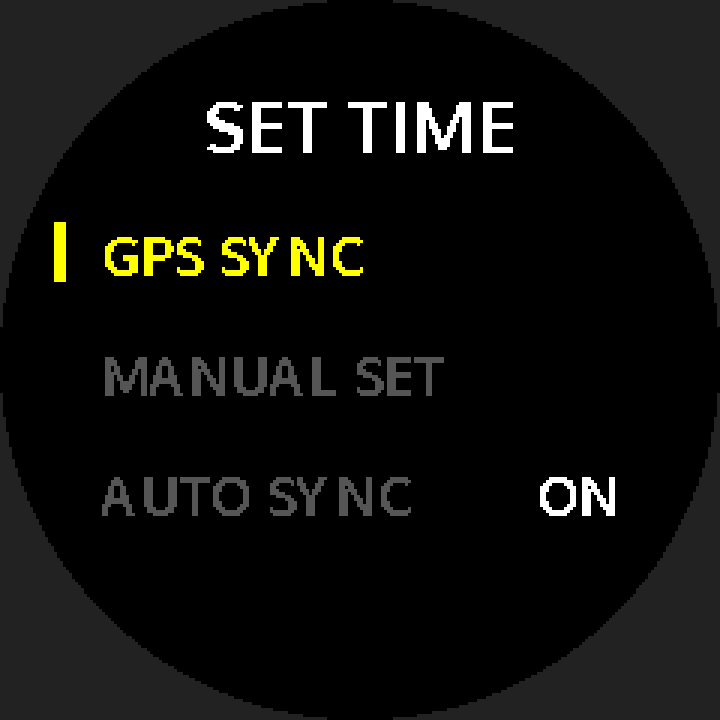
Time → Set Time opens a text submenu with three items:
- GPS SYNC: sync the time from GPS right away (go to an open outdoor area and wait for a fix). It is unaffected by the auto-sync switch and always available. If there is still no fix after 10 minutes it shows
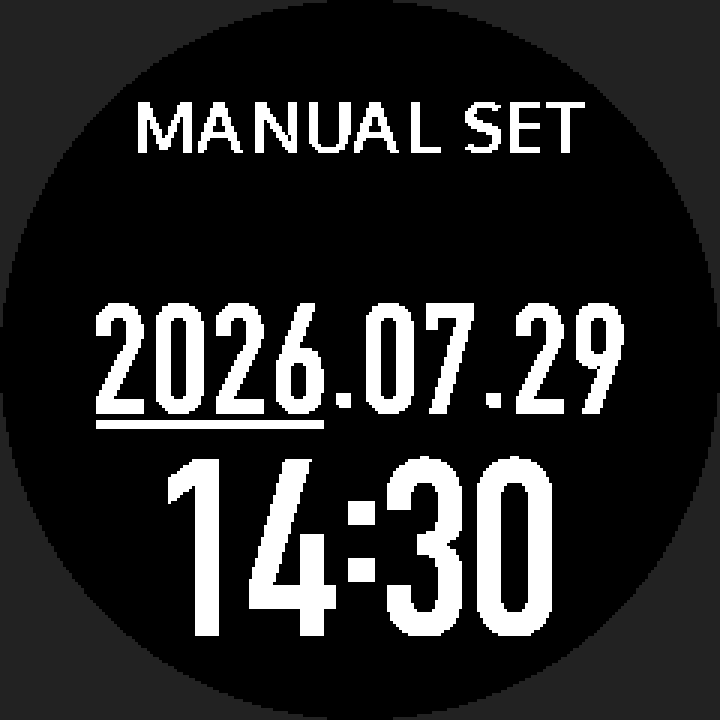
TIME OUTand returns to the face after about 2 seconds. - MANUAL SET: set date and time by hand — edit year → month → day → hour → minute field by field (the field being edited has a flashing underline), UP/DOWN change the value (hold for fast change), OK moves to the next field, and OK on the last field writes it (seconds reset to zero); BACK cancels. The year range is 2025–2037; your input is treated as local time in the current time zone, so check the time zone first.
- AUTO SYNC: the auto-sync switch (ON by default). When off, the watch will not overwrite your manually set time from GPS; running GPS SYNC yourself still syncs it.
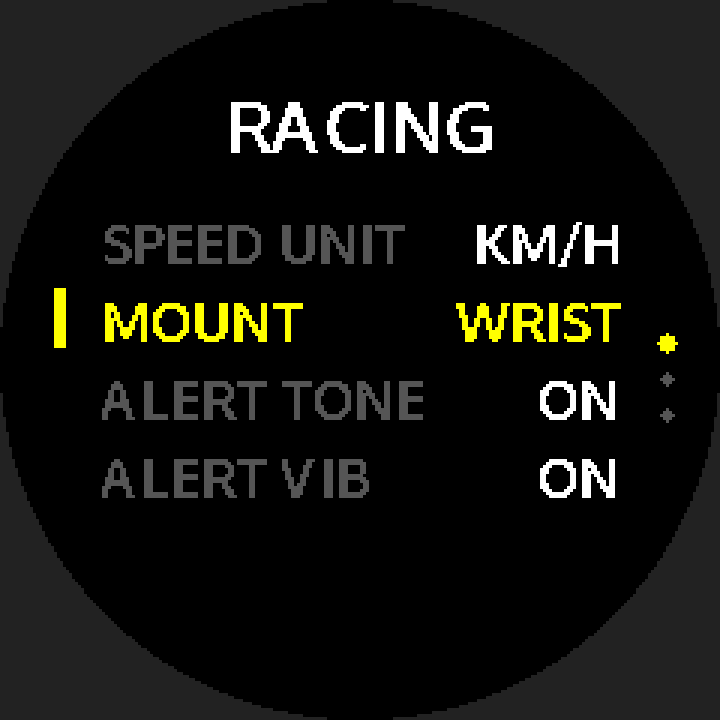
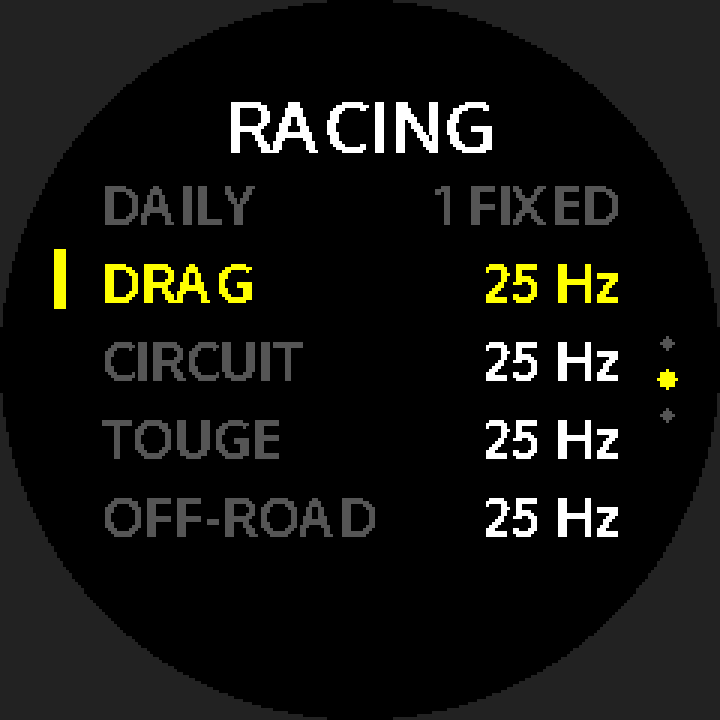
RACING settings span 3 pages. UP/DOWN move within a page and turn to the next page at either end (the dots along the right edge show the current page).
| Page | Item | Options | Takes effect |
|---|---|---|---|
| P1 | SPEED UNIT | KM/H ↔ MPH | Immediate (session screens and detail convert; exceptions: LAP TIMER detail speed stays in km/h, distances in the RECORDS list and in LAP TIMER / OFF-ROAD detail stay in KM, and STANDING records keep the unit they were recorded in) |
| MOUNT | WRIST (worn, default) ↔ VEHICLE (mounted) | Takes effect next session (see 6.4 / 6.6) | |
| ALERT TONE | ON ↔ OFF (default ON) | Immediate (governs all session alerts, see 6.8) | |
| ALERT VIB | ON ↔ OFF (default ON) | Immediate (as above) | |
| P2 | DAILY sample rate | Fixed at 1 Hz (not adjustable) | — |
| DRAG / CIRCUIT / TOUGE / OFF-ROAD sample rate | Adjustable | Takes effect next session | |
| P3 | MAX REC (longest single recording) | OK cycles 30 MIN / 1 H (default) / 2 H / 4 H; there is no “off” | Takes effect next session (see 6.4) |
| SCREEN LAYOUT | A/B/C per mode | Takes effect next session (see 6.5) |
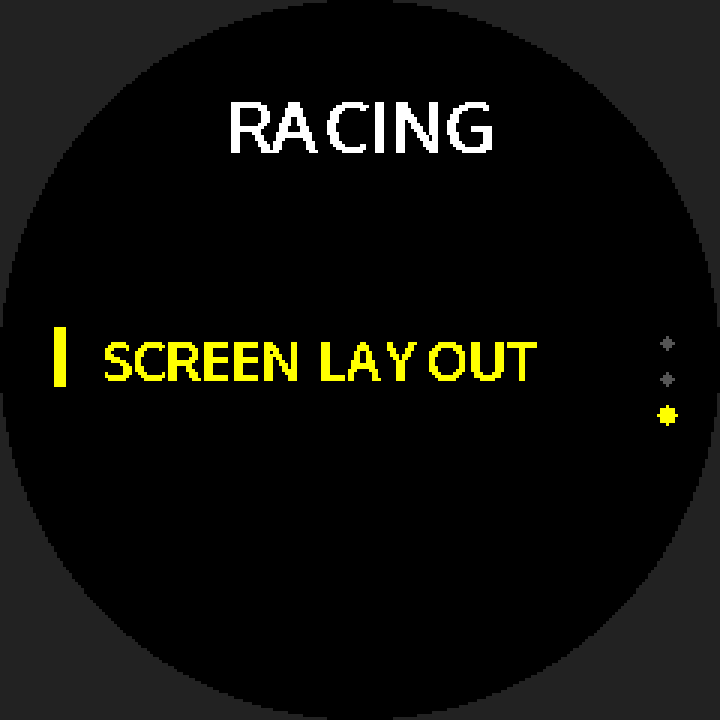
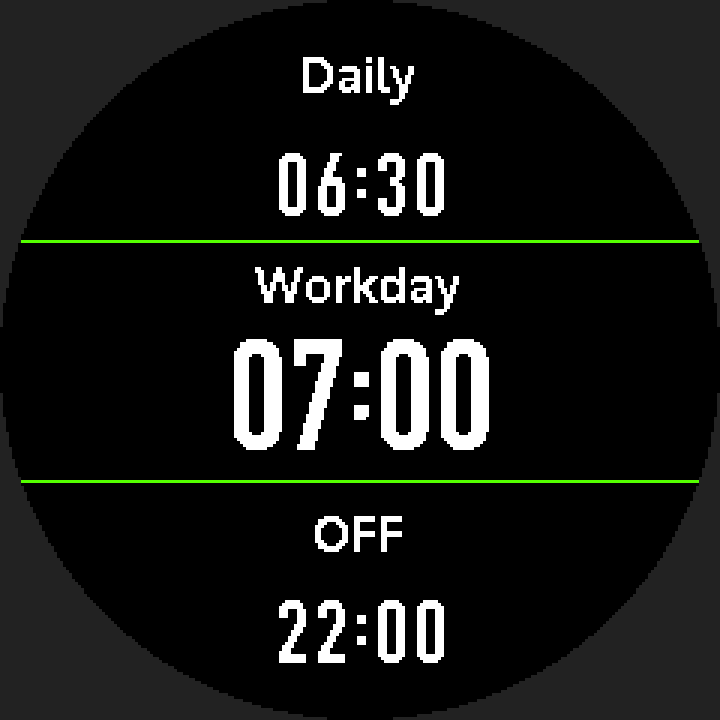
SCREEN LAYOUT row; the current P3 also has MAX REC above it. New screenshot to come.- How to enter: System Settings → Alarm. There are 5, each independent.
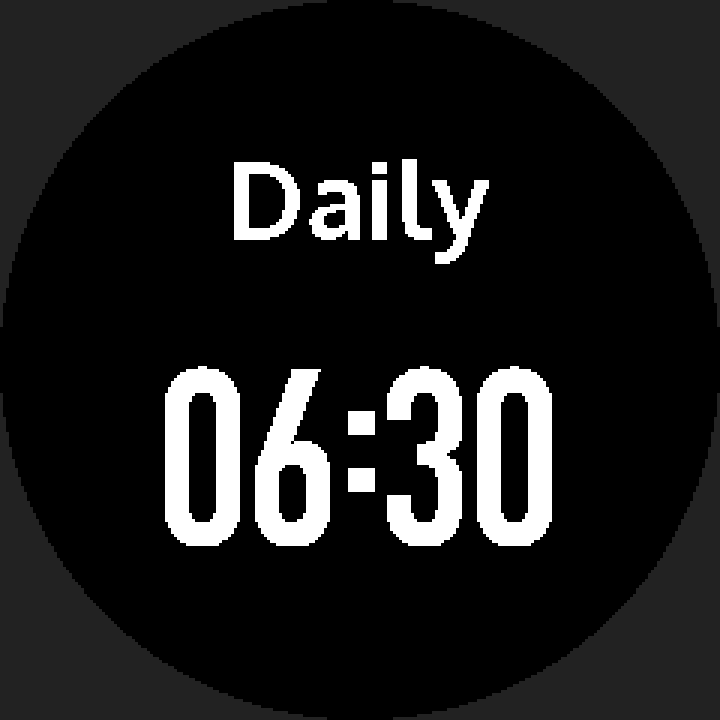
- Set each one: type (Off / Daily / Once / Weekdays) → hour → minute, advancing with OK; the editing field blinks, adjust with UP/DOWN (hold to change fast).
- Ringing: at the set time an alarm icon shows, beeping and vibrating every 3 s, stopping automatically after up to 60 s; any key dismisses it.
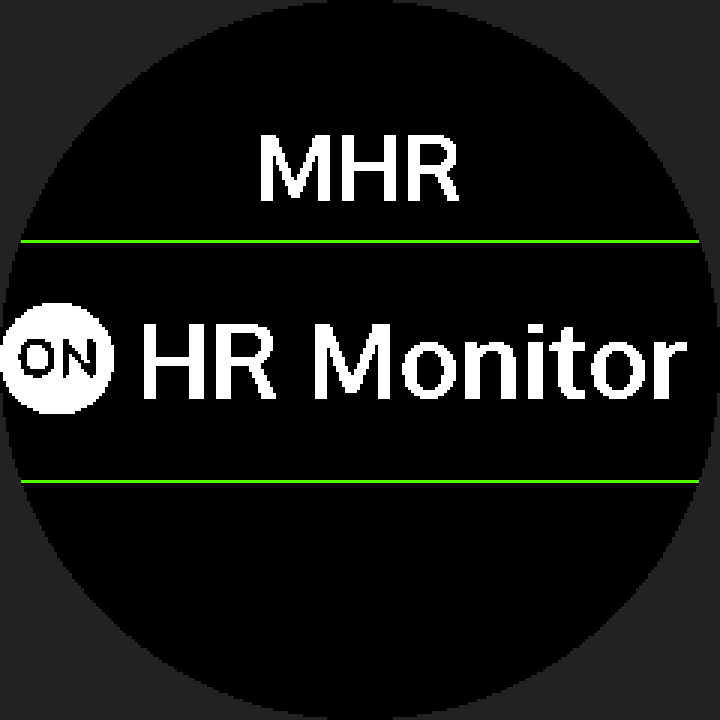
- Where to set: System Settings → Heart Rate. You can set: HR source (wrist optical toggle / external strap Bluetooth pairing), resting HR (scheduled resting-rate measurement with history), max HR (auto 220 − age, or custom) and the HR monitoring switch.
- See live HR: first turn on the HR monitoring switch above (off by default), then from the face UP → TILT (FreeTilt) → UP → Compass → UP to the HR monitor page (4-hour bar chart + live HR, returning to the face after ~60 s idle). With HR monitoring off, UP on the Compass goes straight to the Barometer (see 4.3).
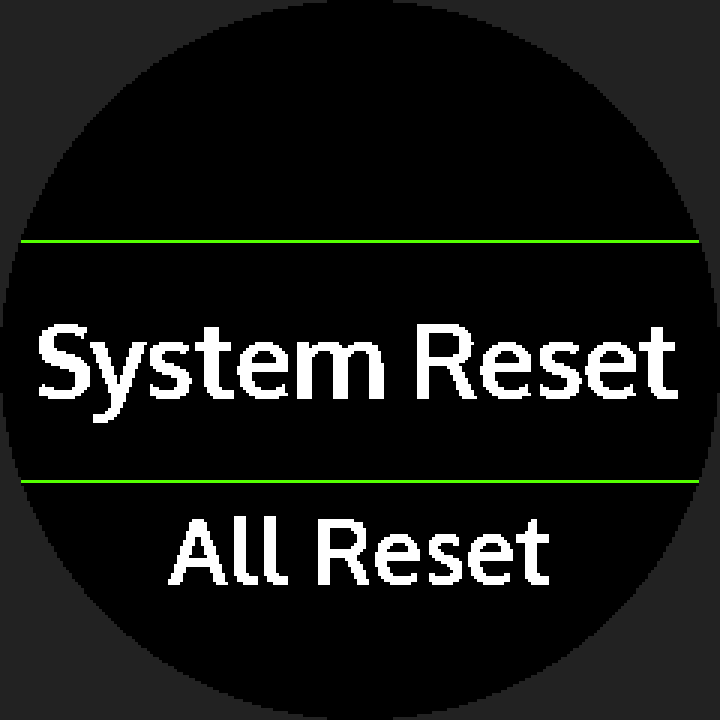
- Reset: system reset — every setting goes back to default (language English, time zone UTC+8, GPS source RACEBOX with the RaceBox pairing cleared, Set Time AUTO SYNC ON), achievement data is reset to zero and the watch face returns to the default Triple Stack (preview name
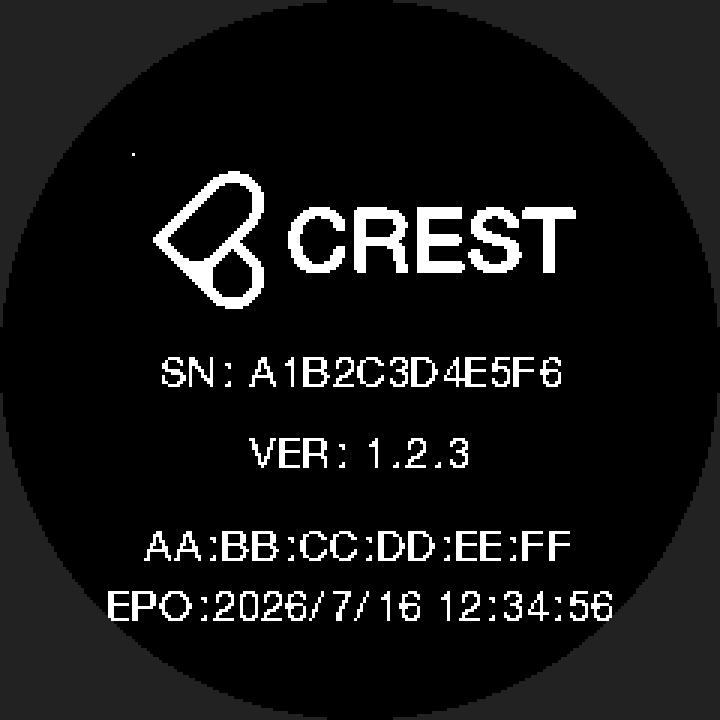
OVERVIEW); the clock itself is not reset, but the displayed time may change once the time zone is back at UTC+8. all reset — same as system reset, then an automatic reboot. Both prompt for confirmation first, and neither deletes Racing records; to delete records, useDELETE ALLin RECORDS (see 9.3). - About: shows the product logo, serial number (SN), firmware version (VER), Bluetooth address and the last almanac update time.
Achievement data (lifetime distance / drives / today’s top speed, see 4.6) is stored separately from the record files: deleting records in RECORDS does not affect your totals, while SETUP → Delete and both resets zero the achievements but do not delete session records:
| Operation | Session records | Achievement data | Watch face choice |
|---|---|---|---|
| Delete one record | That record is deleted | Kept | Kept |
DELETE ALL in RECORDS | All deleted | Kept | Kept |
SETUP → Delete | Kept (not deleted) | Reset to zero | Current choice kept |
| Reset → system reset | Kept (not deleted) | Reset to zero | Back to the default “Triple Stack” |
| Reset → all reset | Kept (not deleted) | Reset to zero | Back to the default “Triple Stack” |
App & Device Connection
The [Companion App] is the STINT watch’s track companion app. Use it to connect to the watch, sync track logs, review post-session data and manage device status. All screens in this chapter are actual app screens.
 123
123Before you start, check these:
- Phone Bluetooth is on.
- The STINT watch is powered on and near the phone.
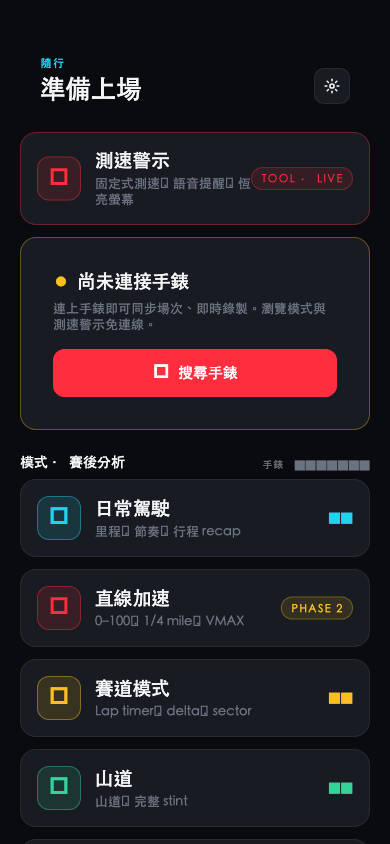
- The [Companion App] is open. On first launch a welcome screen (cloud backup sign-in) appears first; tap Browse first to skip it — you can sign in later under Settings → STINT ID. Then start from “Search for watch” on the home screen.
- The status row at the top of the home screen reads Watch · not connected, and the “Next step” card below it says Connect your watch.
- Tap Search for watch to begin pairing.
- While disconnected you can still browse synced sessions and use speed alerts (the home screen notes that neither needs a connection).
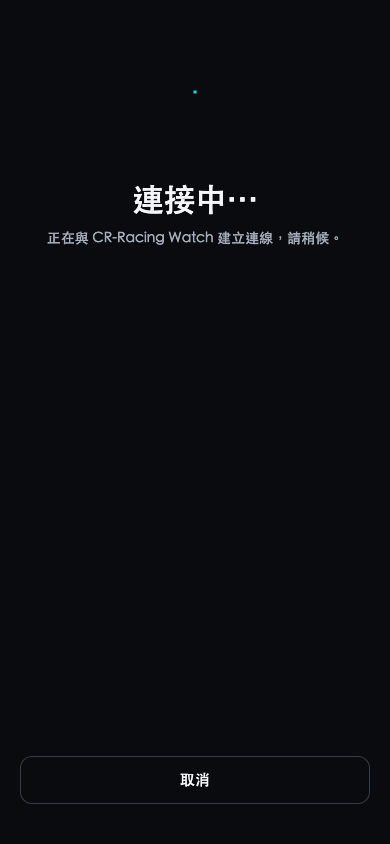
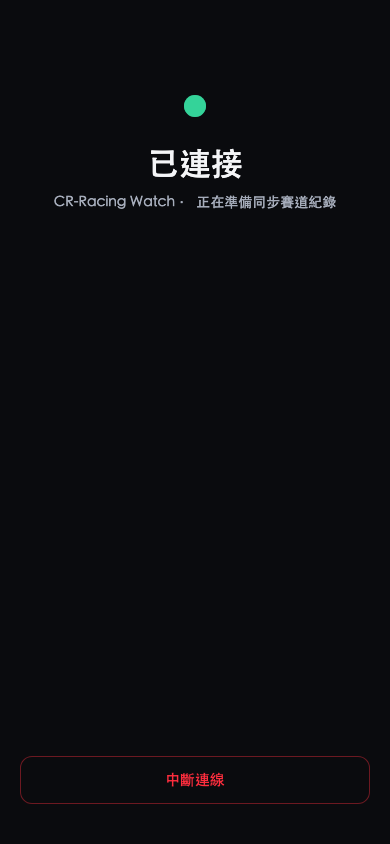 12
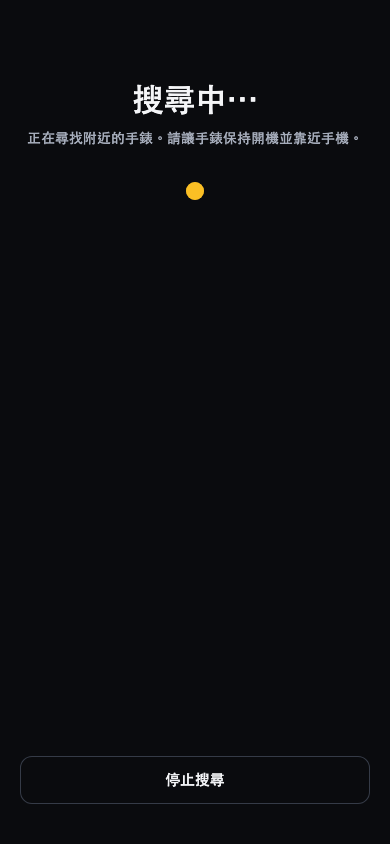
12- Tap Search for watch on the home screen.
- The app begins searching for nearby watches (about 8 seconds); keep the watch on and near the phone.
- When the search ends, a Select your watch list appears (names are STINT GTM plus four characters; see 11.3). Even if only one watch is found, tap your watch.
- The app establishes a link with the watch — just a moment.
- Once linked, the app briefly shows Connected and returns to the previous screen by itself; the home status row then shows a green dot and the watch name.
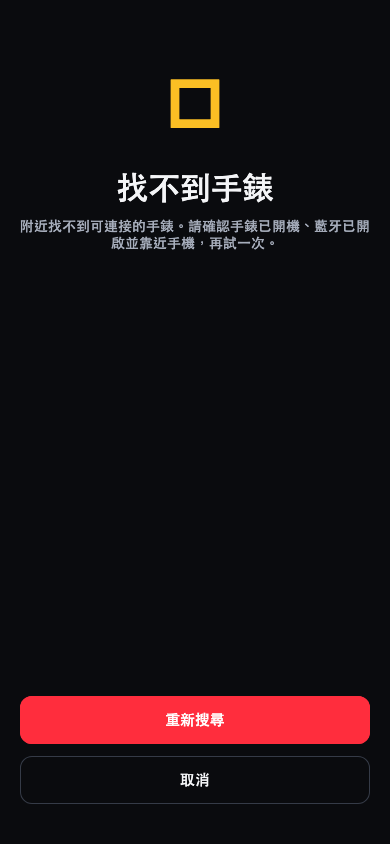
Don’t worry when you see Watch not found — it usually doesn’t mean a fault. Check in order:
- Is the watch powered on.
- Is the watch near the phone.
- Is the phone’s Bluetooth on.
- Is the watch connected to another device (one phone at a time).
- Tap Search again.
STINT GTM CA01). Those four characters are the last four characters of the Bluetooth address shown under Settings → About on the watch (an address ending in CA:01 gives STINT GTM CA01) — use them to tell watches apart when several are nearby. This name is used from firmware GTM003 onward; earlier firmware shows CREST-CR5L.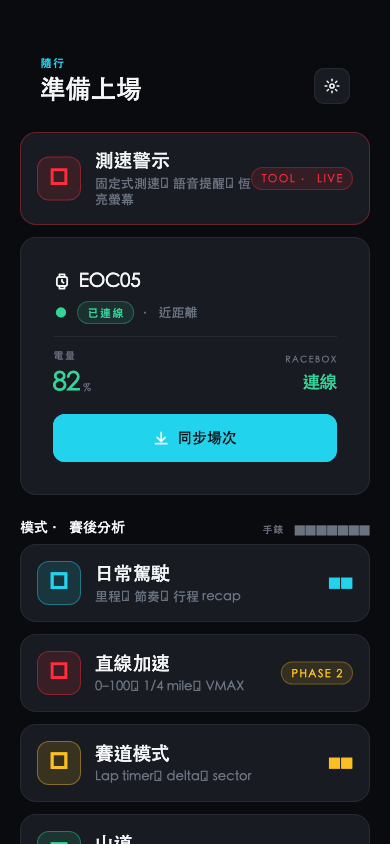 1234
1234Once connected, the status row at the top of the home screen changes:
- The connected watch name, in the form STINT GTM plus four characters (e.g.
STINT GTM CA01; see 11.3). - A green dot before the name means connected; after you have synced, the last sync time follows the name (e.g. “synced 5 min ago”).
- Tap the status row (Device › on the right) to open the “My Devices” page with the firmware version and RaceBox (see 11.5).
- The “Next step” card below becomes Sync to phone; tap Sync sessions to read the watch’s records.
 123
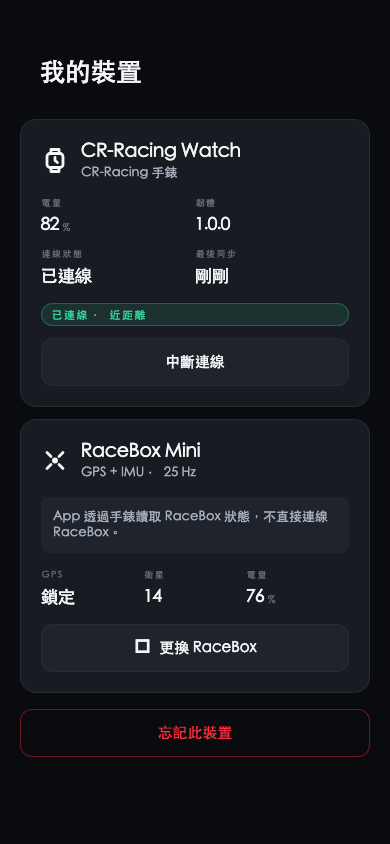
123The My Devices page (the Device tab at the bottom) shows the watch’s firmware version, connection state and last sync time, plus the RaceBox currently assigned to the watch.
- Watch info: firmware, connection state, last sync. Battery currently shows “—” (the app cannot read the watch battery yet).
- RaceBox card: shows “Not paired” or “Paired · address”, with a note that the app reads RaceBox status through the watch.
- Pair RaceBox / Change RaceBox button: assigns a RaceBox in the app (currently this does not affect which unit the watch actually connects to — see the note below).
 123
123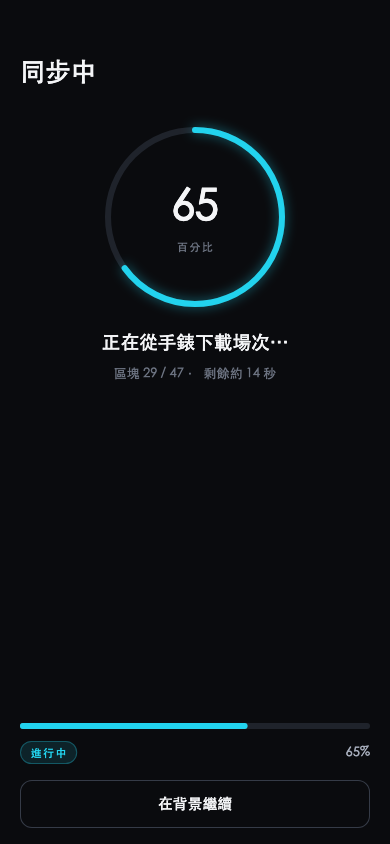
- Make sure the watch is connected.
- Tap Sync sessions on the home screen.
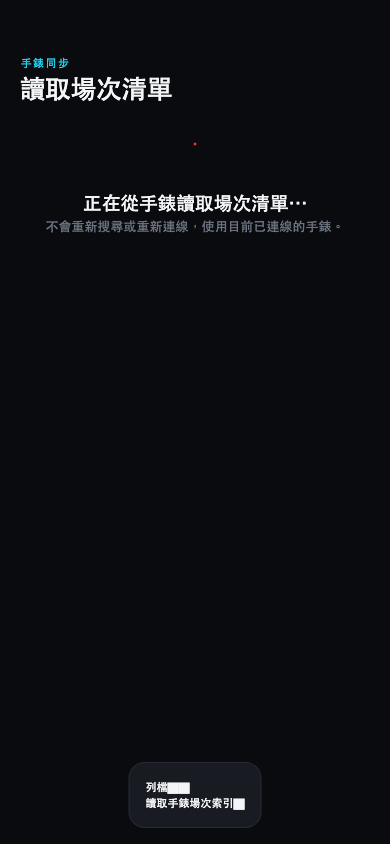
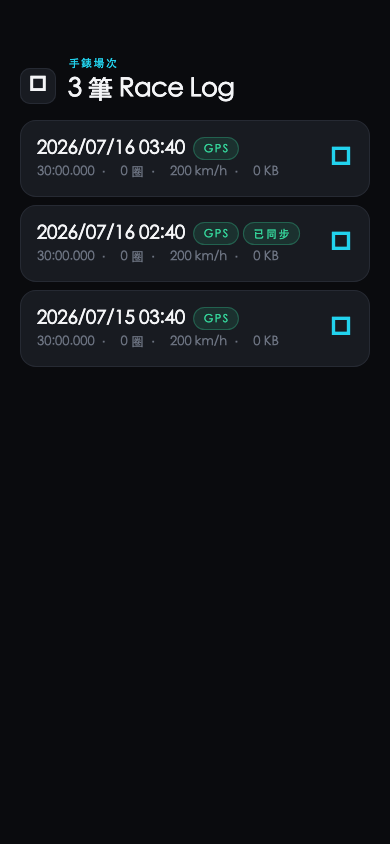
- The app reads the session list from the watch (no re-search or reconnect).
- Choose the Race Log to sync.
- The app downloads the track log, showing a progress percentage.
- When done, view the post-session data in the app.
Labels in the session list mean:
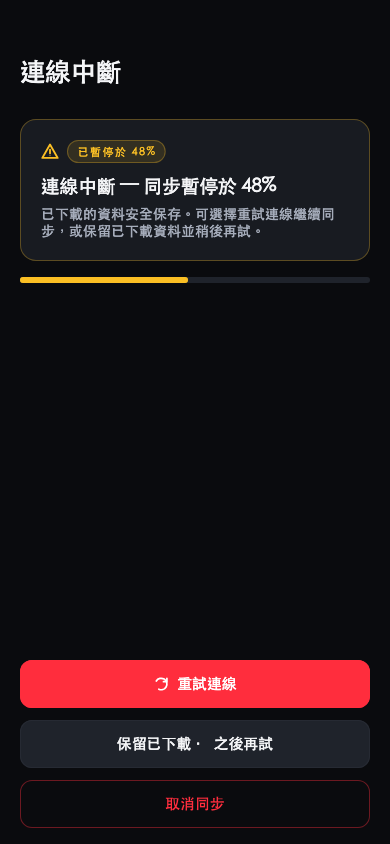
If the signal is only briefly unstable during a download, the app retries a few times by itself. If the connection really drops, the session’s row shows a red error (e.g. “Download failed: …”) and the app also says “Watch disconnected, please reconnect”. Then:
- Bring the phone near the watch.
- In the Device tab tap Reconnect (or tap Search for watch on the home screen) to connect again.
- Tap Sync sessions on the home screen, then tap that session again to download it again.
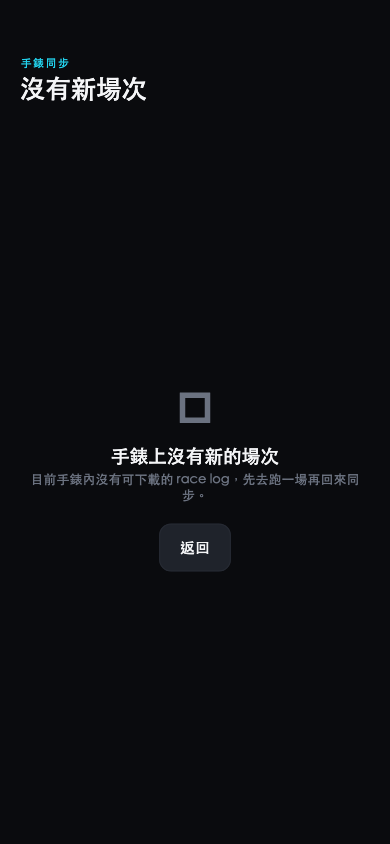
No new sessions (“no new sessions on the watch”) isn’t an error — it means the watch currently holds no records at all to download.
The watch doesn’t delete records by itself, so as long as old sessions remain on it, the app lists them as usual and marks the imported ones “Synced” (see 11.6) instead of showing this screen. After recording a new session (see Chapter 6), come back and tap Sync sessions.
| Q: The app can’t find my watch? | Make sure the watch is on and near the phone with Bluetooth enabled, then tap Search again. The watch connects to one phone at a time — disconnect any other phone first. |
| Q: If the connection drops, will data be lost? | No. The original records on the watch are unaffected, and sessions that finished syncing are kept. For the interrupted session, reconnect and tap it again to download it again (it starts from the beginning; see 11.7). |
| Q: Does the app connect to the RaceBox Mini directly? | No. The app reads RaceBox status through the watch, not directly; during sessions the watch connects to the RaceBox. |
| Q: Why are there no new sessions? | This screen means the watch holds no Race Log at all right now (for example, right after clearing its records). If old sessions remain, the app lists them and marks the imported ones “Synced”. Record a new session, then come back and sync. |
| Q: What does “Synced” mean? | It means the session is already imported. To update it, re-sync/overwrite. |
Besides the app, you can connect the watch to a computer: it appears as a flash drive, with sessions stored in the RACELOG folder (each filename is the recording start time encoded as an 8-digit hexadecimal number, e.g. 6AB4C368.BIN). The desktop parser (double-click parse.bat) produces track maps, spreadsheets and speed charts (see the Chapter 9 walkthrough).
The watch’s GPS source and built-in precision can be changed from the app as well as on the watch (see 10.1), in the Watch section of the Settings tab at the bottom (the watch must be connected; when it isn’t, the options are greyed out with the hint that they can be set after connecting the watch):
- GPS source: Built-in or RaceBox.
- Built-in output rate: appears only when “Built-in” is selected; choose Highest or Power saving — these correspond to MAX / ECO on the watch (see 10.1).
- After changing it the app notes that “the change applies the next time you enter Race” — the same rule as on the watch; the session in progress is unaffected.
SETUP → SET GPS). Note: when the watch is set to Qstarz, the app shows the source as “RaceBox”; choosing a source in the app at that point overwrites the watch’s Qstarz setting.Every session can be exported as a KML track file (openable in Google Earth and similar map software), or turned into an achievement image to share. All five modes are supported. The session page also has Export CSV / GPX: CSV has one sample per row and opens in Excel or any spreadsheet; GPX is the standard GPS track format for map and analysis software. Both contain coordinates, and the start/end handling follows the same per-mode defaults as KML (see below).
- Choose Export KML on the session page and pick how much of the route to include:
- Full track — includes the exact start and end points.
- Protect start/end — automatically removes the track within a 300 m radius of the start and end points (any part of the route that passes near those points mid-way is removed too).
- The default depends on the mode: circuit and DRAG default to the full track (there is no privacy concern on a circuit); daily, touge and off-road default to protecting the start and end. You can switch at any time.
- Share achievement produces a result card (1080×1080) that you can post to social media or send to friends with the system share sheet.
- The card itself is safe: the route keeps only an anonymized shape and contains no place names, coordinates, start/end points or any GPS positioning data.
Tilt recordings made with FreeTilt (see 4.5) can be synced to the app, which can overlay the attitude onto your driving video and export a new file. Race sessions can be overlaid too: tap Overlay video on the session summary, or start from the home-screen tool Video OSD (pick the videos first, then the record), to burn speed, distance, G-force and similar data into the video; alignment and export work as described below.
- Sync: pick a tilt recording in the watch record browser and download it over Bluetooth. Once downloaded it appears in the session list alongside your sessions, marked as a tilt recording.
- Pick a video: choose driving footage from the same period. The app aligns them automatically using the watch recording’s timestamps and the video’s capture time; you can fine-tune by hand if they drift.
- Export: the artificial horizon and R/P values are overlaid onto the video and exported as a new file. One tilt recording can be applied to several videos at once for batch export.
FAQ & Tips
| Q: Can’t find GPS / slow to fix? | Go outdoors with open sky, away from tall buildings, tree cover, garages and tunnels. The first fix, or one after a long gap, takes longer — that’s normal. |
| Q: No G-force shown? | It depends on the source: RaceBox is measured; built-in GPS derives it from GPS only at MAX precision (ECO power-saving mode does not provide it); Qstarz shows no G-force on the watch, and none in the app either after syncing (the app says there is no measured G-force). See 1.2. |
| Q: Off-road attitude shows NO TILT / NEEDS VEHICLE MOUNT? | Check the source first: built-in GPS uses the watch’s own IMU and a RaceBox uses its own, so both can produce tilt; Qstarz sessions provide no tilt at all. With built-in GPS, go to SETUP → RACING, set MOUNT to VEHICLE, fix the watch to the vehicle, and wait for the pre-start confirmation screen to read READY (or keep the vehicle briefly stationary after starting) so the watch can take an attitude reference. MOUNT only affects built-in GPS; RaceBox sessions ignore it and need a moment somewhere in the recording where the vehicle is briefly stationary for the detail page to calculate tilt. |
| Q: Watch can’t find the RaceBox? | The RaceBox does not need pairing — check that it is on, charged and near the watch. The watch searches automatically after entering Racing and only gives up after about 5 minutes. |
| Q: A recording split into two sessions? | For very long sessions the watch splits and saves automatically to protect data — this is normal. |
| Q: Max sample rate but no finer data? | Actual detail is limited by the source’s update rate. Built-in GPS is lower, so setting above it adds no density; use RaceBox for the highest density. |
| Q: How long until it returns to the face? | Normal screens return to the face after about 11 minutes of inactivity; the Racing mode list and the DRAG method picker after about 5 minutes, standby after 20 minutes (about 5 minutes if the GPS source drops out and is not ready), and a built-in GPS search that finds nothing after 20 minutes. A recording never returns to the face for inactivity, but it does end automatically under the conditions in 6.4. And on any screen, 24 hours without a button press while not charging powers the watch off. |
| Q: Buttons seem unresponsive at low battery? | When the low-battery warning shows, the first key press only clears the warning; press again to perform the key’s normal function. |
| Q: How do I power off? | At the watch face, hold BACK. |
Q: It shows STORAGE FULL, or nothing saves? | The watch does not delete old records automatically, so storage does fill up. When there are 300 records, the records total about 16 MB, or the watch runs short of free space, it shows STORAGE FULL with DELETE OLD LOGS before a recording starts (or when an automatic split tries to continue into the next segment) — delete a few sessions by hand in RECORDS (see 9.3), or sync with the app first and then clear them. If it shows STORAGE ERROR instead, the storage had a read/write error that deleting records won’t fix; back up your records with the app or over USB first. |
Q: I get SAVE FAILED? | A failed save is announced with two long beeps and a long buzz (see 6.8). It means a read/write error occurred while writing the recording — not that storage is full (a lack of space is caught before recording starts, with STORAGE FULL). When a session was split automatically, the segments already saved are not lost. Try again; if it keeps happening, back up your records with the app or over USB first. |
Q: LOW BATTERY or CHARGE TO REC — it won’t start a new recording? | Below about 3.5 V the watch refuses to start a new recording, so it can’t die mid-session and leave a broken file. Charge it first. If the battery drops below 3.5 V during a recording, the watch stops and saves automatically (the screen shows SAVED / LOW BATT, see 6.4). |
| Q: Several RaceBoxes nearby — the watch connected to someone else’s? | The watch doesn’t match a specific RaceBox: on entering Racing it connects to the first one it finds, and the watch doesn’t show which unit it connected to (see 6.2, 11.5). Switch on only your own, or turn the others off and re-enter Racing. |
Q: The detail page shows NO DATA / NO LAPS / NO RUNS / NO ELEVATION? | It means the session has no data of that kind — not a fault. NO LAPS = no lap was completed; NO RUNS = no DRAG run was completed; NO ELEVATION = no usable altitude change; NO GPS DATA = there was no GPS fix for the whole recording, so no route can be drawn (see 1.2). Separately, NO IMU on a screen during recording means no valid attitude data has arrived for about 3 seconds in a row. READING LOG or CALC simply means it is still loading — wait a moment. |
Appendix
| Processor | MediaTek MT2523 (ARM Cortex-M4 + FPU), 104 MHz |
| Memory / storage | 4 MB RAM + 128 KB TCM; 4 MB flash |
| Display | 240 × 240 full-color TFT |
| Buttons | Four physical buttons (UP/DOWN/OK/BACK) + backlight button (doubles as LAP during a session) |
| Built-in GNSS | Sony CXD5605GF, supporting GPS / GLONASS / BeiDou / Galileo / QZSS / SBAS |
| Positioning accuracy | 2DRMS 1.0 m (at a signal strength of −130 dBm) |
| Time to first fix | About 35 s cold start; about 2 s hot start (real-world times depend on how much sky is obstructed, see 6.7) |
| Receiver sensitivity | −161 dBm tracking; −147 dBm cold start |
| GPS source | External RaceBox Mini (Bluetooth, with G-force) / built-in GPS / external Qstarz logger (Bluetooth, BL-1000GT · 818GT) |
| Data update rate | RaceBox Mini up to 25 Hz; built-in GPS up to 5 Hz (1 Hz in power-saving mode); Qstarz about 5.6 Hz (limited by the Bluetooth connection interval). Actual recording density is also bounded by each mode’s sample-rate ceiling (see 6.0) |
| Motion sensing | 3-axis accelerometer + 3-axis magnetometer (used for the compass and for vehicle roll and pitch) |
| Heart rate | Optical heart-rate sensor (PPG) |
| Barometer | Barometric sensor (altitude and pressure trend graph) |
| Connectivity | Bluetooth (to the [Companion App], RaceBox and Qstarz); USB (charging / reading records on a computer) |
| Record retention | RECORDS browses up to 300 records (sessions and tilt combined), 10 per page; old records are never deleted automatically — clear them yourself when full. The HOME overview always summarizes only the newest 10 records (tilt recordings take slots but don’t count as sessions; see 9.1 / 9.3; achievement data is unaffected, see 4.6) |
| Laps per session | Up to 200 laps per session (GPS auto lap adds one warm-up lap); at the limit it shows LAP FULL while distance and track keep recording (see 7.8) |
| Watch faces | 8 (2 classic / 4 achievement / 2 minimal, see 4.4) |
| Other features | Time, alarm, compass, barometer, heart rate |
| Battery | Rechargeable lithium battery (4.2 V standard, also supports 4.3 V high-capacity cells). [TBD: capacity in mAh] |
| Battery life | About 3 months on standby (not recording); about 1–2 weeks with daily wear and ordinary logging; about 8–12 hours with GPS and sensors running continuously. High sample rates and a long-lit screen draw the most power. |
| Charging | Clip the supplied charging clip onto the watch body and charge over USB; below about 3.0 V it first pre-charges at 70 mA (the screen stays dark meanwhile), then charges at 300 mA. About 1 hour to 80%. While charging the watch switches to charging mode: you can only view the battery (see 3.3); no other functions are available. |
| Charging protection | Charging stops at a battery temperature of 50 °C or more, or below 0 °C; a single charge runs for at most 24 hours |
| Low-battery behavior | When not charging, the watch shuts down automatically once the battery drops below about 3.4 V; at that level it also switches off again right after power-on, so charge it first. Below about 3.5 V a recording stops and saves automatically, and a new one cannot start (see 4.5 / 6.4) |
| Water resistance | 50 m (5 ATM). Fine for swimming, rain and washing your hands; not for diving, jumping into water or high-speed water sports, and keep it away from steam rooms, saunas, hot springs and hot showers. This is the rating as shipped; it degrades as seals age and with impacts or contact with soap, sunscreen and other chemicals, and is not a permanent property. |
| Size / weight | [TBD] |
| Operating temperature | [TBD] |
| Situation | Action |
|---|---|
| Open main menu | Face OK |
| Quick session overview | Face DOWN |
| TILT / compass / info pages | Face UP (TILT comes first, see 4.3) |
| Power off | Face hold BACK ~5 s |
| Start a session | Main menu → RACING |
| Mark a lap in session | LAP TIMER (BUTTON): Live screen OK or LAP; GPS AUTO: LAP sets the line / adds a manual lap, OK has no effect (see 7.5). DAILY DRIVE and TOUGE don’t record laps |
| End & save session | Live screen hold BACK 2 s |
| Refresh Bluetooth | Face short-press BACK |
| G-force | The force felt when accelerating, braking or cornering; lateral G reflects cornering, longitudinal G reflects accel/brake. RaceBox measures it with a sensor; built-in GPS (MAX) derives it from changes in speed and heading (see 1.2). |
| GPS-derived G | G-force worked back from changes in GPS speed and heading when there is no accelerometer. Good for trends, less accurate than a measurement, and with no vertical component. |
| trap (speed) | Instantaneous speed at the end of a distance (e.g. 1/4 mile). |
| STANDING | Acceleration measured from a standstill. |
| ROLLING | Acceleration measured while already moving, started on cue. |
| Sample rate (Hz) | Data points recorded per second; higher means a finer track. |
| RaceBox Mini | External high-precision GPS accessory with G-force sensing. |
| Qstarz logger | An external GPS logger (BL-1000GT / 818GT); no G-force is shown on the watch (the mobile app derives it itself). |
| FreeTilt (TILT) | A GPS-free quick tilt tool: mount it at any angle, zero it, and see the vehicle’s roll and pitch live (see 4.5). |
| Lifetime distance (TOTAL KM / MI) | The sum of the distance of all session records; not limited to the last 10 sessions and not reset by deleting records (see 4.6). |
| Drives (DRIVES) | How many drives you have completed after pressing OK: START; a drive split automatically into several records still counts as 1. |
| Today’s top speed (TODAY MAX) | The highest speed reached today, based on the watch’s local date and reset at midnight. |
| Milestone (MILESTONE) | Staged targets for lifetime distance (100 / 250 / 500 / 1,000 / 2,500 / 5,000 / 10,000, then every 5,000); the face congratulates you once when you cross one. |
| MOUNT | The mounting setting: WRIST (worn) or VEHICLE (fixed to the vehicle); affects the OFF-ROAD horizon and the start confirmation page. |
- The watch never deletes old records automatically; RECORDS browses up to 300 records, and you must clear space yourself when it fills. Back up important records early.
- With 300 records stored in total, or not enough space, neither sessions nor FreeTilt can start a new recording (it shows
STORAGE FULL/DELETE OLD LOGS) — the watch never deletes old records to make room. Delete a few old records to continue. - G-force from the built-in GPS (MAX) is derived, has no vertical component, and is skipped at low speed (below 2 km/h neither axis, 2–10 km/h longitudinal only); it is less accurate than a RaceBox measurement. ECO mode samples too sparsely to provide G-force at all.
- Qstarz sessions show no G-force on the watch (the device’s mounting orientation is unverified); once synced, the mobile app derives it itself.
- Off-road attitude / tilt requires MOUNT=VEHICLE and a brief stationary moment during the session for the watch to take its reference (on the pre-start confirmation screen, or by stopping for a few seconds after starting); otherwise it shows
NO TILT / NEEDS VEHICLE MOUNT. Wrist-worn (WRIST) sessions provide no attitude data, and Qstarz sessions carry no tilt data at all (see 6.3). - Qstarz’s real update rate is limited by the Bluetooth connection interval to about 5.6 Hz — lower than a RaceBox (25 Hz) and close to built-in GPS at MAX (5 Hz).
- Normal screens return to the face after about 11 minutes idle; a session in progress (Live) does not return to the face for inactivity, but it ends automatically when MAX REC is reached, after a long stop, or on low battery (see 6.4).
- Overly long sessions split into multiple sessions automatically (see 6.0), resetting timer and distance.
- The LAP TIMER detail page shows speed fixed in km/h, not converted by the speed-unit setting.
Taiwan NCC statement (certification no.: [TBD]) — reproduced in the original Chinese as required by law
取得審驗證明之低功率射頻器材,非經核准,公司、商號或使用者均不得擅自變更頻率、加大功率或變更原設計之特性及功能。低功率射頻器材之使用不得影響飛航安全及干擾合法通信;經發現有干擾現象時,應立即停用,並改善至無干擾時方得繼續使用。前述合法通信,指依電信管理法規定作業之無線電通信。低功率射頻器材須忍受合法通信或工業、科學及醫療用電波輻射性電機設備之干擾。
United States FCC statement (FCC ID: [TBD])
This device complies with Part 15 of the FCC Rules. Operation is subject to the following two conditions: (1) this device may not cause harmful interference, and (2) this device must accept any interference received, including interference that may cause undesired operation.
EU CE / RED: This product complies with the essential requirements of the EU Radio Equipment Directive (RED 2014/53/EU). For the full Declaration of Conformity (DoC), contact the manufacturer. (CE marking and EU representative details: [TBD])
Warranty: one-year limited warranty — 12 months from the date of purchase; where no proof of purchase can be provided, 15 months from the date of manufacture. Service is provided within Taiwan (R.O.C.) only; customers outside Taiwan bear the round-trip shipping, duties and customs charges. To request service, provide the product serial number and proof of purchase; we also recommend including the diagnostic code produced by the app’s “Device Check”, which resolves most cases without shipping the unit. The battery is an exception: if its capacity falls below 80% within 300 charge cycles and this is confirmed by inspection, it is treated as a defect and remains covered. The warranty card supplied with the product governs in full. (Support contact: [TBD]). Damage caused by improper use, use contrary to this manual, unauthorized disassembly or the use of non-original accessories is not covered (see “Safety and Disclaimer”, item 7).
| Version | Date | Notes |
|---|---|---|
| v1.0 | 2026-07-15 | First release. End-user oriented, page-by-page operation plus walkthroughs. Brand name shown as placeholders, to be replaced before publishing. |
| v1.17 | 2026-09-24 | Aligned with develop @ 106a2c77 (firmware GTM003): features merged after 9/2 added, low-battery figures corrected. ① §13.1 correction: when not charging, the watch shuts down below about 3.4 V (Mis1.cpp:248). The 2.9 V previously written is the fuel gauge’s system floor SHUTDOWN_SYSTEM_VOLTAGE, not the shutdown point a user meets. The firmware has no threshold matching “won’t power on below about 3.5 V” (3500 only sets the fuel-gauge wake-up period while suspended), so that sentence was rewritten too. The old figures in the v1.12 row are a historical record and stay as they were. ② §9.2 INFO page added (PR #194 / #117): second-to-last page in every mode — SRC / RATE / DRAG / BATT / END / FIX / PTS / FW. #117, listed as “not yet merged” in v1.16, was merged on 9/14. ③ Automatic session end and MAX REC (important) (PR #208): TIME LIMIT (default 1 hour; 30 min / 2 h / 4 h on page 3 of SETUP → RACING; no off), NO MOVEMENT (20 min), LOW BATT (about 3.5 V); below 3.5 V at start it shows LOW BATTERY / CHARGE TO REC; built-in GPS search timeout 60 → 20 min; standby returns to the face after 20 min; any screen powers off after 24 h without a button press while not charging (§6.4 / 6.7 / 10.3 / 12 / 13.1 / 13.4). ④ Storage pre-check (PR #232 / #233): sessions and FreeTilt share the 300-record and space check (STORAGE FULL / DELETE OLD LOGS / STORAGE ERROR); v1.16’s “FreeTilt can’t start with 10 session records” no longer applies; auto-split shows Saving...; FreeTilt’s 2-hour auto-stop is now documented (§4.5 / 6.4 / 13.4). ⑤ STANDING (PR #230 / #231): splits are now 0-100 / 100-200 / 200-MAX (each its own segment time; 200-MAX runs to the run’s top speed and is not used for the best run); a short BACK mid-sprint keeps the run as INCOMPLETE; built-in GPS false-zero guard; detail page 1 is titled BEST 0-100 (§6.6 / 8.1 / 8.3 / 8.5 / 8.6). The STANDING screenshots in 8.3 / 8.6 (live and detail) are still the old ones, marked “new screenshots to come”. ⑥ Bluetooth name (PR #251 / #252): from GTM003 it is STINT GTM plus four characters (the last four of the Bluetooth address on the About page), §11.3 / 11.4. ⑦ Backlight (PR #207): four BACKLIGHT items (BRIGHTNESS / AUTO OFF / RAISE TO WAKE / LONG PRESS); “Clock power saving” removed (§1.1 / 10.2). ⑧ PR #240 switched the boot screen and About page to the STINT GTM wordmark: text unchanged, the §3.1 boot screenshot still shows the old logo and is marked “new screenshot to come”. ⑨ No user-visible change: #241 (update file found via a candidate list; every released STINT build already has it), #181 / #174 (docs), #234 / #238 (performance), #253 (old model targets removed). ⑩ Japanese edition: leftover Chinese translated in the §9.2 DRAG row and captions/alt text, six rows of the §10.2 table, the §10.4 / 10.5 headings and the §10.4 captions. ⑪ Whole-manual check against the product (2026-09-24): about 440 statements were checked one by one against GTM003 firmware (develop 0d7a880a; the firmware code is identical to the GTM003 build c55838df) and App main 43a27a1, and about 100 mismatches were corrected. Highlights: there are 8 watch faces (Today’s Hero and Race Card were removed; the default is the three-stat face); powering off takes holding BACK for about 5 s; charging stops when the battery is at or above 50 °C or at or below 0 °C, and below about 3.0 V it first pre-charges at 70 mA; SETUP → Delete and all reset do not delete Racing records (use RECORDS → DELETE ALL), while SETUP → Delete resets achievements; LAP TIMER asks for a LAP MODE (BUTTON / GPS AUTO) after the mode; auto-split keeps the lap count and shows Saving...; RaceBox battery shows only on the standby screen; the orange/cyan G is lateral G; the OFF-ROAD live horizon always uses the watch IMU; GPS auto lap drops ALREADY COUNTED / GPS LOW / ≈ BEST, which the firmware does not have, and now warns not to press LAP after an auto lap; STANDING sprint screen, closing the result, disarming, 2 s of continuous GPS loss and how GPS LOST is shown; chapter 11 rewritten to match the current app (an interrupted sync re-downloads from the start, home and device screen contents, the watch list on first connection); chapter 12 drops WRONG DEVICE and “the app estimates G for Qstarz”, which are not true. Screenshots that no longer match are marked “New screenshot to come.” Firmware and app issues found along the way are listed separately for Brad and are not written into the manual. Not verified on hardware: MAX REC / no-movement / low-battery auto end, live 200-MAX display, backlight settings on STINT GTM (written from the code and test plans). Still TBD: battery capacity, size/weight, operating temperature, NCC/FCC/CE numbers, support contact, the [Companion App] name; screenshots of the INFO page, the STANDING per-run page and the boot screen. |
| v1.16 | 2026-09-02 | Retail product name STINT GTM filled in, and aligned with develop @ 4b69101a. ① Product name: brand STINT, model GTM, full name STINT GTM (signed off 2026-09-02). Six placeholders replaced per language — footer, cover model line, chapter 1 in the contents, the chapter 1 heading and opening sentence, and the “For editors” box (only [Companion App] is left). The wording inside the v1.14 changelog row is a historical record and was deliberately left alone. ② Retention policy changed (important): the firmware has disabled automatic deletion of old records (`race_tilt_log.c`: “boot/commit automatic retention is disabled”), and RECORDS now browses up to 300 records (sessions and tilt combined, 10 per page — PR #185 / #186). Every “keeps the 10 most recent, oldest deleted automatically” statement has been rewritten (§9.1 / 9.3 / 12 / 13.1 / 13.4). The HOME overview and the classic face’s signature line still summarize only the newest 10 sessions — that has not changed. The limitation that FreeTilt cannot start once 10 session records are stored has been added. ③ §4.5 FreeTilt sampling rate corrected from 2 Hz to 25 Hz (PR #189 / #190). ④ §7.8 documents the PARTIAL record: the half lap you were on when you stopped is kept separately but never counts as a formal lap and is never best or worst (PR #202). ⑤ The Japanese edition’s §11.10 heading, still in Chinese, was translated. ⑥ Merge status corrected: of the five items v1.15 listed as unmerged, #121 the 10 watch faces (#183), #175 half laps (#202), #184 FreeTilt 25 Hz (#189 / #190) and #138 record capacity (#185 / #186) all merged between 8/19 and 8/20; only #117, the record-detail INFO page, remains. The watch-side protocol for app-driven firmware updates (#209 / #210, PR #213) is merged, but §11.11 stays a placeholder because the app-side screens are not final. Still TBD: battery capacity, size/weight, operating temperature, NCC/FCC/CE numbers, support contact, and the [Companion App] name. |
| v1.15 | 2026-08-19 | Aligned with develop @ bdcec103 and inventoried every branch. ① String correction: the §8.3 caption read HOLD… READY, but the watch shows HOLD... READY with three plain periods; the Japanese edition’s leftover Chinese word in the same caption was corrected too. ② §8.4 gained the standing-mode on-screen state table (UNARMED / ARMED / READY / RUNNING / DECEL / RESULT), the standby prompts OK: ARM NEXT RUN / OK: NEXT RUN, the RUN LIMIT shown after 200 runs, and the two reasons OK may refuse to arm (GPS NOT READY / STOP TO ARM). ③ §8.6 now names the best-result page BEST RUN and explains that a cancelled or cut-short INCOMPLETE run is never chosen as the best. ④ Merge status corrected: #144 standing multi-run (8/12), #176 Auto Lap live UX (8/13) and #180 the boot-recovery fix that was deleting FreeTilt records (8/13) are all merged, so the earlier “#144 not merged” note is void. Still on branches, not yet merged (deliberately not written into the body of this version): #121 the 10 watch faces (wf/face-onto-develop, which also adds face names to the settings preview), #117 the record-detail INFO page, #138 raising record capacity from 10 to 300 (once merged, every “10 most recent sessions” in §13.1 and §9 must be rewritten), #175 half-lap PARTIAL records, and #184 FreeTilt’s logging rate going from 2 Hz to 25 Hz (once merged, the §4.5 sample rate must change). |
| v1.14 | 2026-08-14 | Specifications and warranty signed off by A. ① The charging accessory is now correctly called a charging clip (previously “cable”; the accessory actually supplied is a clip-on charger); §1.5 Safety and §2 Quick Start updated, and it is now stated explicitly that the watch switches to charging mode while charging — the buttons do nothing and it cannot be used. ② Three blank rows in §13.1 filled in: battery life (about 3 months standby / 1–2 weeks daily wear with ordinary logging / 8–12 hours with GPS and sensors running), the Charging row now names the charging clip and “about 1 hour to 80%”, and water resistance is set to 50 m (5 ATM) with the permitted and prohibited water activities and the seal-ageing disclaimer. ③ §13.5 warranty filled in with the final terms: one-year limited warranty (15 months from manufacture without proof of purchase), service within Taiwan only, serial number and proof of purchase required, battery below 80% within 300 cycles covered as a defect; the note in that section now says the certification numbers and the support contact are pending, not the warranty terms. Still TBD: battery capacity, size/weight, operating temperature, NCC/FCC/CE certification numbers, support contact, [Product Name] placeholder (the model is GTM; the retail product name is not settled). |
| v1.13 | 2026-08-12 | Aligned with develop @ b6ce9f5a after a full audit (method: extract the firmware’s 367 on-screen strings and mechanically diff them against the manual text). Two substantive errors corrected: ① off-road tilt is not “independent of the GPS source” — `race_tilt2_g_is_true_3axis_imu()` uses the watch’s IMU for built-in GPS, the RaceBox’s own IMU for RaceBox, and excludes Qstarz entirely; §6.3 / 6.5 / 9.3 / 12 now state the two conditions (MOUNT=VEHICLE and a source with true three-axis data). ② the off-road detail page is not an artificial horizon — P1 is a single maximum-tilt figure and P2 a total-tilt gauge (left and right carry no direction; R-P reads -- because the split is unimplemented); §6.5 / 9.2 updated, and the Japanese edition’s untranslated Chinese row was translated at the same time. Three shipped but undocumented features added: §6.5 RaceBox battery (RB 51% / RB CHG while charging, four color bands — PR #163 / issue #116); §6.4 pre-start readiness (GPS NOT READY / HOLD STILL... / READY, only built-in GPS with VEHICLE has to wait — PR #164); §7.8 the 200-lap-per-session limit and LAP FULL (recording continues past the limit — PR #173 / issue #127). Five edge-state entries added to §12 (STORAGE FULL / SAVE FAILED / LOW BATT / WRONG DEVICE / the various NO ... empty states). The §13.1 lap row is corrected from the mistaken “64 laps on the detail page” to the 200-lap recording limit. Merge status corrected: #136 FreeTilt (8/11), #137 OFF-ROAD horizon (8/10) and #140 GPS auto lap (8/10) are all merged into develop, so the earlier “not yet merged” notes are void; only #121, the 10 watch faces, is still unmerged. |
| v1.12 | 2026-08-08 | §13.1 specification summary substantially filled in. It previously had only 8 rows with battery, water resistance and dimensions left blank; it is now reorganized into six groups — platform / positioning / sensors / connectivity and records / power / physical — totalling 24 rows. Every newly added figure is sourced: MT2523 processor at 104 MHz, 4 MB RAM + 128 KB TCM, 4 MB flash and the 240×240 display (docs/01_overview.md, Display.h); the built-in GNSS is confirmed as the Sony CXD5605GF, supporting six constellations, with 2DRMS 1.0 m accuracy, 35 s cold / 2 s hot TTFF and −161 / −147 dBm sensitivity (docs/datasheet/CXD5605GF_datasheet_notes.md); charging at 70 mA pre-charge / 300 mA fast charge, the 60 °C and 24-hour charging protections, and the 3.5 V no-boot / 2.9 V auto-shutdown thresholds (cust_battery_meter.h, docs/05_peripherals.md); 10-session retention and the 64-lap-per-session ceiling (RACE_STORAGE_MAX_FILES / RACE_VIEW_MAX_LAPS in race_storage.h). Battery life, capacity in mAh, time to full charge, water resistance, dimensions and operating temperature remain TBD — none of these exist in the firmware and they require hardware measurement and certification results; the power-consumption measurements in docs/test_plan/ are currently marked TBD. |
| v1.11 | 2026-08-06 | Added four already-shipped app-side features (previously only connection and syncing were covered; these four were merged from 2026-07-17 onward but the manual had not caught up): new §11.12 “Setting the GPS source in the app” (source / built-in output rate, applies next time you enter Race; noting that the app currently lists only built-in and RaceBox, so Qstarz must be switched on the watch), §11.13 “Exporting tracks and sharing achievements” (full-track vs. protect-start/end KML modes and the per-mode defaults, the GPS-sensitive-data warning, and the fact that achievement cards contain no positioning data), §11.14 “Tilt recordings and video OSD” (Bluetooth sync, merging into the session list, automatic video alignment and batch export). Cross-reference added to §4.5; §11.5 notes that since pairing was removed, selecting a device in the app does not change which unit the watch connects to. App screenshots for these three sections are pending the app home-screen redesign (IA restructure). |
| v1.10 | 2026-08-06 | RaceBox no longer requires pairing (firmware PR #169, merged and shipped). The shipping default bind policy is “connect to the first one found”, so the NOT PAIRED screen never appears in the production build. Changes: §6.1 now marks all three sources as pairing-free; §6.2 rewritten from “Pairing RaceBox” to “Using the RaceBox Mini” (app pairing steps and the NOT PAIRED tip removed, warning added about connecting to the first of several nearby units); §6.7 rewritten around searching for nearby devices, with the heading covering Qstarz; §12 FAQ and §13.3 updated to match.The concurrent firmware PR #167 (QSTARZ Phase B + unified packaging chain, 40 commits) is entirely bootloader / OTA / Release Center infrastructure with no user-visible change, so the manual is unaffected. |
| v1.9.2 | 2026-08-03 | Converged after a two-way check against the CD edition: adopted CD’s corrected §10.3 table structure (the engineering-side v1.8 edit left an unclosed <table>, duplicating the header and wrapping later content into the table) and aligned the cover and footer version marks (which had been stuck at v1.0). A section-by-section comparison confirmed the CD edition and this one are now identical in body content, with no differences across 65 sections and 101 image references. |
| v1.9.1 | 2026-08-03 | Adopted CD’s typographic work from this round into the current edition: added .tbd (TBD placeholders in gray, easy to scan before publication) and .legalhd / .legaltext (smaller size, looser leading, justified text and orphan/widow control for the §13.5 regulatory block). The CD edition was not imported wholesale — CD’s master had merged only up to v1.7 and lacks v1.8’s five firmware-alignment corrections and v1.9’s watch faces / achievement system, so a full import would have reintroduced four already-corrected errors. |
| v1.9 | 2026-08-03 | Added the 10 watch faces and the achievement system (PR #121, not yet merged into develop; written up on Brad’s instruction): §4.4 expanded from 2 faces to 10 (2 classic / 6 achievement / 2 minimal) with the non-wrapping list and app-side selection; new §4.6 “Achievement data” (lifetime distance / drives / today’s top speed, unit rules, large-number abbreviation, empty-state copy, when it counts, milestone steps and the congratulation message, and the fact that upgraded watches do not import old records); §9.3 and §10.6 gained tables of how each clearing operation affects achievement data; §10.2 / §13.1 / §13.3 updated to match. Face screenshots pending the final designs. |
| v1.8 | 2026-08-03 | Aligned with the shipping firmware (develop as of 2026-08-02). Five statements that did not match the actual device were corrected: ① ODO removed from the main menu, leaving 3 items — RACING / RECORDS / SETUP (§5); ② G-force now described per source — RaceBox measured / built-in MAX GPS-derived (a new feature; the previous “no G-force” was wrong) / built-in ECO none / Qstarz none on the watch (§1.2 / 6.5 / 12 / 13.3 / 13.4); ③ off-road tilt now depends on MOUNT, not the GPS source, with the on-screen text NO TILT / NEEDS VEHICLE MOUNT (§6.3 / 6.6 / 12 / 13.4); ④ added the SCREEN LAYOUT system (5 modes × A/B/C, §6.5 / 10.3); ⑤ RACING settings reorganized into 3 pages with MOUNT / SCREEN LAYOUT added (§10.3). §6.7 gained the 5-minute built-in GPS warm-hold. Screens: 14 RECORDS and detail pages redrawn per #135 “larger log text and graphics”, plus 3 main-menu and 4 settings screens. |
| v1.7 | 2026-07-29 | Included three in-development features (on Brad’s instruction). Status correction (v1.8): of these, race-alert session alerts (PR #128) and MOUNT / tilt self-calibration (PR #134) have been merged into develop, contrary to the original note; FreeTilt (#136) and the OFF-ROAD horizon (#137) remain unmerged on their branches. Content: new §4.5 FreeTilt (with the 4.1 / 4.3 carousel updated); the OFF-ROAD horizon layout and the MOUNT setting / VEHICLE start confirmation page (§6.4 / 6.6 / 10.3 / 13.3); new §6.8 session alerts with the ALERT TONE / VIB switches and the app connection icon on the face (§4.1 / 10.3 / 11.4). Four new rendered screens. |
| v1.6 | 2026-07-29 | Aligned with the latest merges on firmware develop: added Qstarz as a third GPS source (PR #123 — §1.2 rewritten for three sources, connection and setup notes in §6.1/6.2/6.4/10.1, §13.1/13.3/13.4 and the FAQ updated, plus a new source-selection screen); added manual time setting and the auto-sync switch (PR #120 — the §10.2 Set Time submenu (GPS SYNC / MANUAL SET / AUTO SYNC) and the field-by-field editing screen, with the quick-start steps updated to match). |
| v1.5 | 2026-07-25 | Backfilled the changelog entry for Chapter 11 “App and device connection” (originally missing; the chapter and §11.1–11.10 were added on 2026-07-16); §4.4 gained the watch-face and switching description; §13.1 gained data-update-rate and watch-face rows, with battery, water resistance and dimensions marked TBD; new §13.5 “Regulatory statements and warranty” (NCC / FCC / CE numbers TBD); new §11.11 placeholder for firmware update (app side). |
| v1.4 | 2026-07-16 | Added §6.7 “GPS Fix & Wait Times” to the Racing chapter (search-screen annotations, wait timeline, environment comparison, no-GPS screen). |
| v1.3 | 2026-07-16 | Added Chapter 8 “Standing-Start Drag” (with the ARM→save flow and three-layer GPS protection); former chapters 8–12 shifted to 9–13, with TOC and cross-references updated. |
| v1.2 | 2026-07-16 | Added Chapter 7 “GPS Auto Lap” (with the line-setting flow, track overhead and record-structure diagrams); former chapters 7–11 shifted to 8–12, with TOC and cross-references updated. |
| v1.1 | 2026-07-16 | Added the “Safety & Legal Notice” chapter, Racing “Key Concepts (6.0)” and the appendix “Known Limitations (13.4)”; expanded the logic for lap counting, DRAG methods and the sample-rate ceiling. |